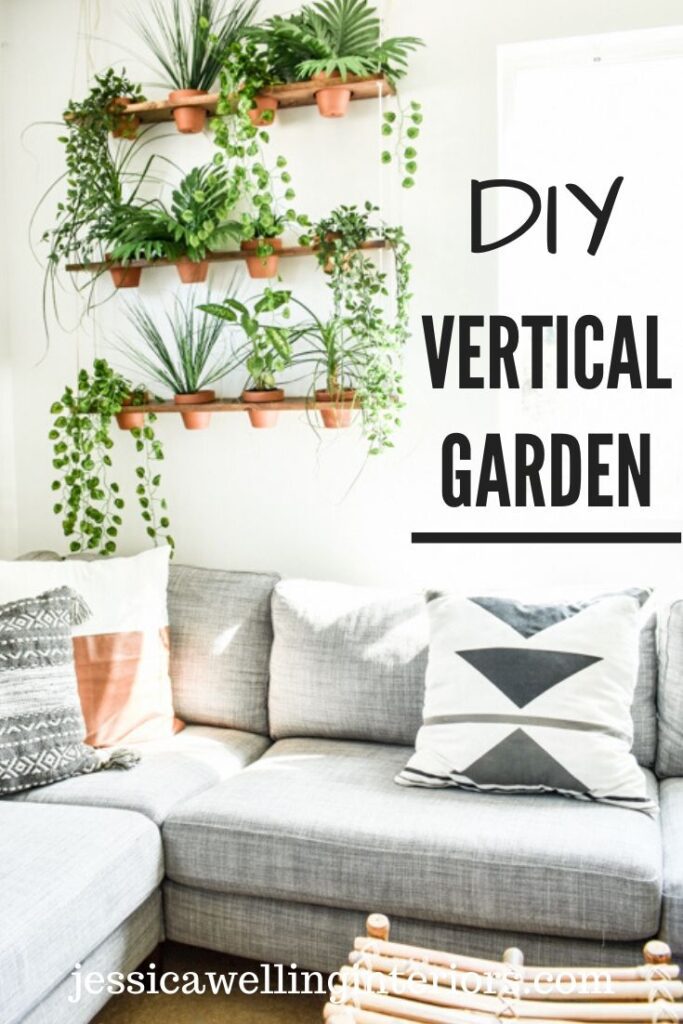
Build a DIY indoor vertical garden for indoor hanging plants with this detailed tutorial. This living wall planter is a showstopper!

My first big social distancing project is a makeover of our TV room/ Peter’s office. I painted the walls the first week we were home. Then we changed out the legs on the Ikea sectional to give it a classier look.
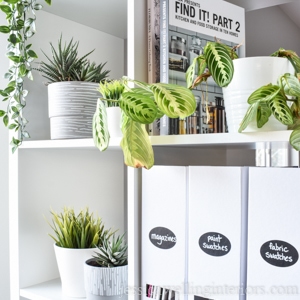
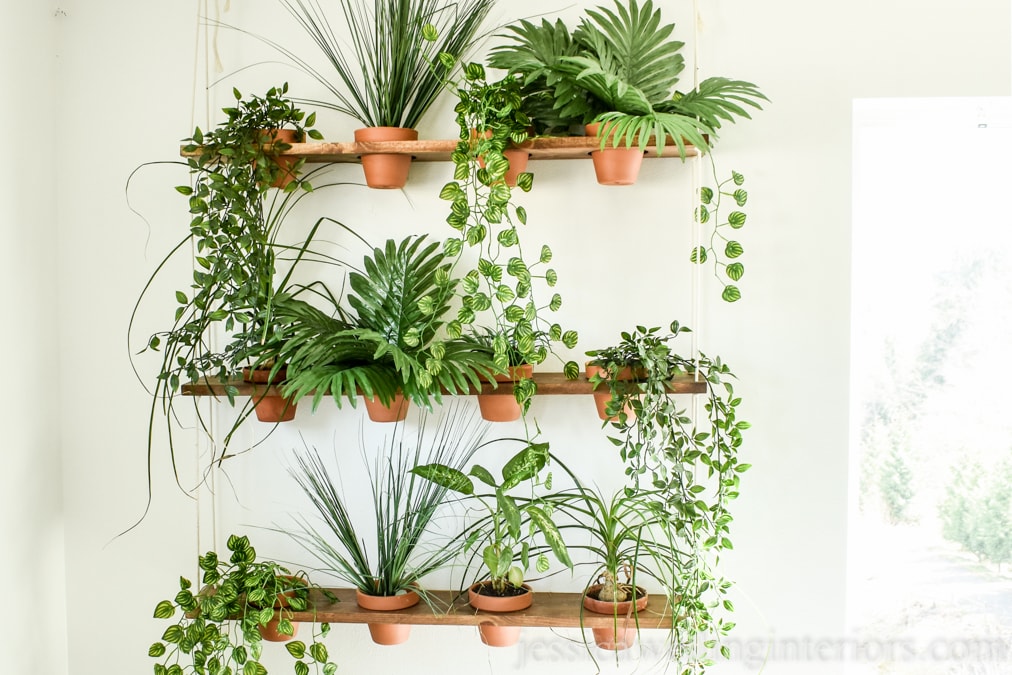
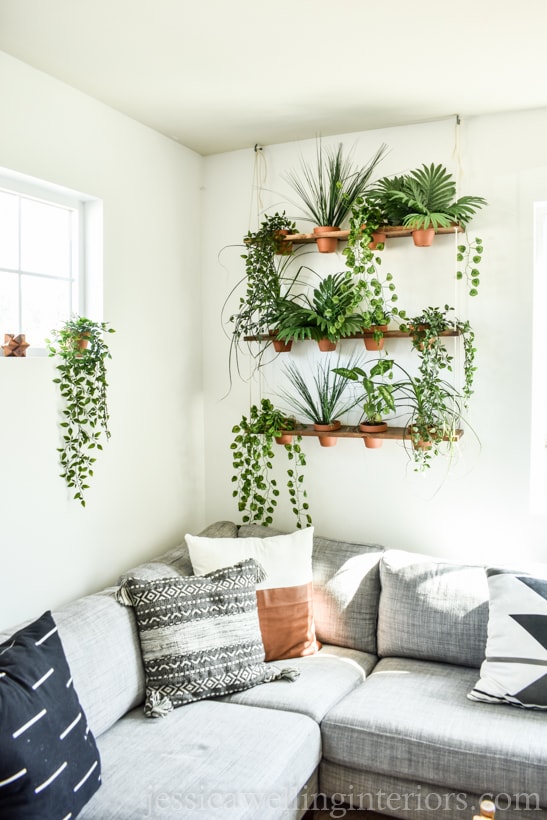
And last week, I built this fun vertical garden. Quick note: these are all fake plants. I’m trying to keep the real plants limited to the main floor of our house, where they’re more likely to get watered. Also, I don’t want to have water dripping down onto the couch.
Aren’t Faux Plants from the 90’s?
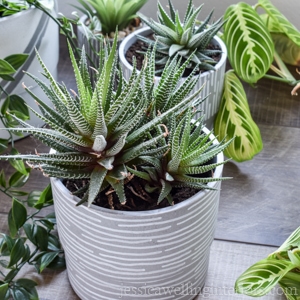
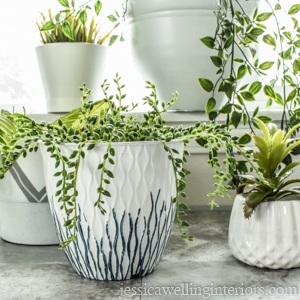
It’s okay to have faux plants again. I know they’ve been out of vogue for at least 20 years. But they’re making a HUGE comeback- especially at my house. The key is getting nice quality ones that look real. Here are my very favorite artificial plants that I use in my own home and for clients.
One of the big challenges with faux plants from the ’80s and ’90s was that they faded easily, so a lot of them ended up looking more teal than green. No Bueno. But they’re making much nicer and more realistic-looking ones now. Click here for my best tips for decorating with plants!
Alright, enough about that. Let me show you how to make a hanging garden.
How to Build an Indoor Vertical Garden
Materials
- 2 6′ 1×6 boards (I used pine)
- 3/16″ cotton rope
- hooks
- 12 4.5″ diameter terra cotta pots
- 12 faux indoor plants
- floral foam (optional)
- wood conditioner
- wood stain
- polyurethane clear coat
Tools
- tape measure
- pencil
- speed square
- drill & bit
- drill press
- hole saw
- chop saw or reciprocating saw
- paintbrush
- rag
- orbital sander & 120 grit sanding disk
- clamps
- stud-finder
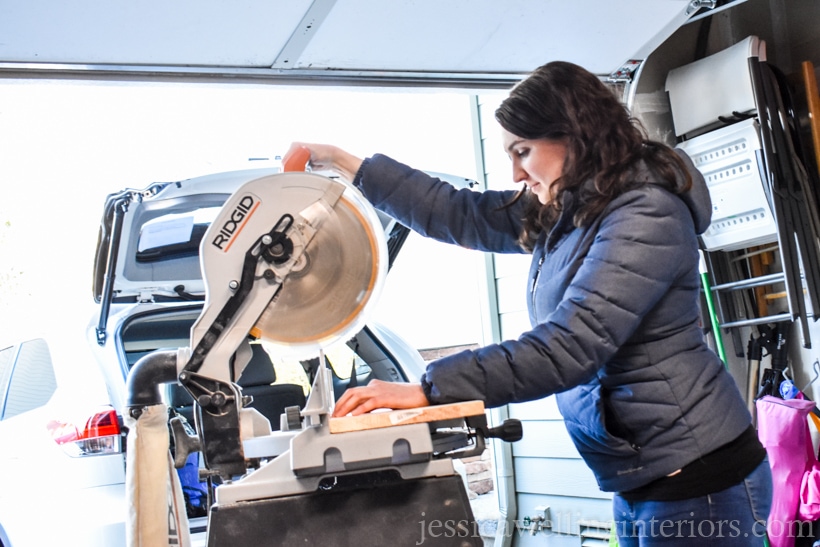
1. cut boards in half
My garden is 3′ wide, so I cut each of my 6′ boards in half, to give me 4 3′ pieces. I only used 3 of them, but the fourth was nice to have as a test piece for drilling holes and testing stain.

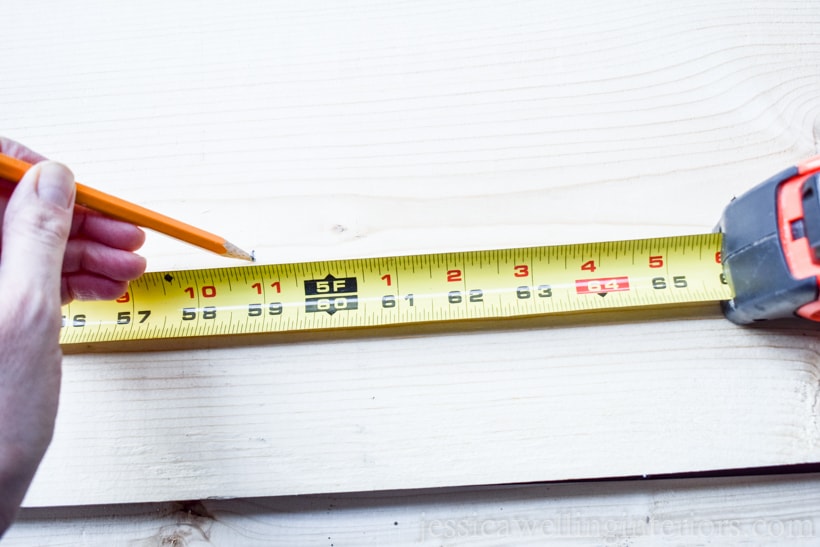
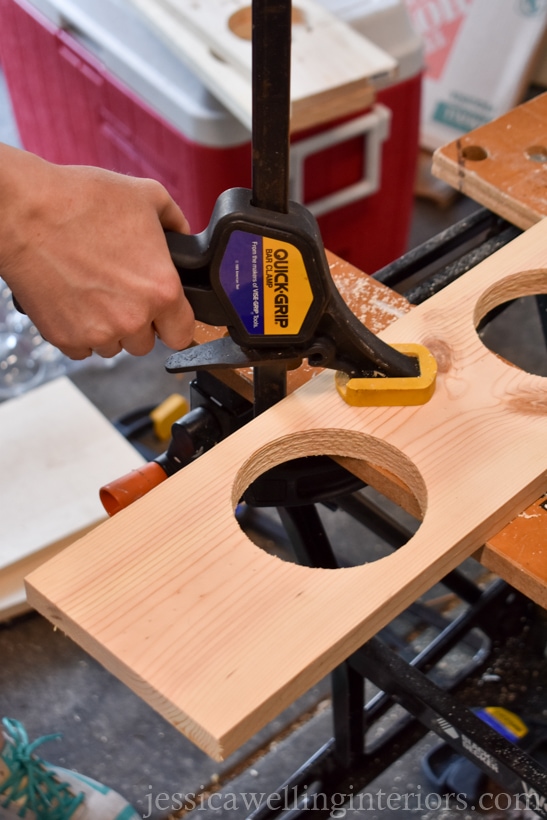
2. Measure & Mark Hole Locations
I wanted four evenly-spaced holes to hold four pots on each shelf.
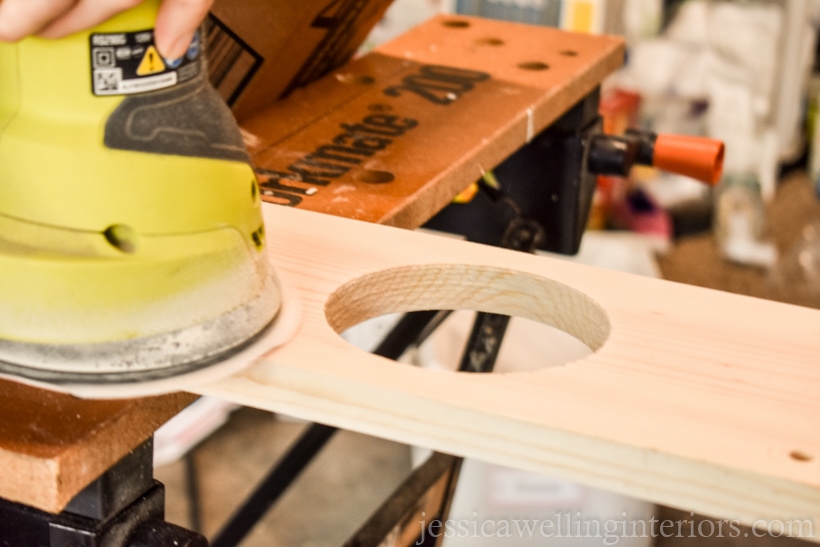
3. Cut holes
My neighbor was kind enough to help me use his drill press to cut the holes. I was hoping there would be a quick and easy way to cut them, but in the end, the drill press was by far the best choice. Not gonna lie, this was probably the most intimidating tool I’ve ever used. But totally doable. If you don’t have a neighbor with a drill press and hole saw, a jig saw could also work.
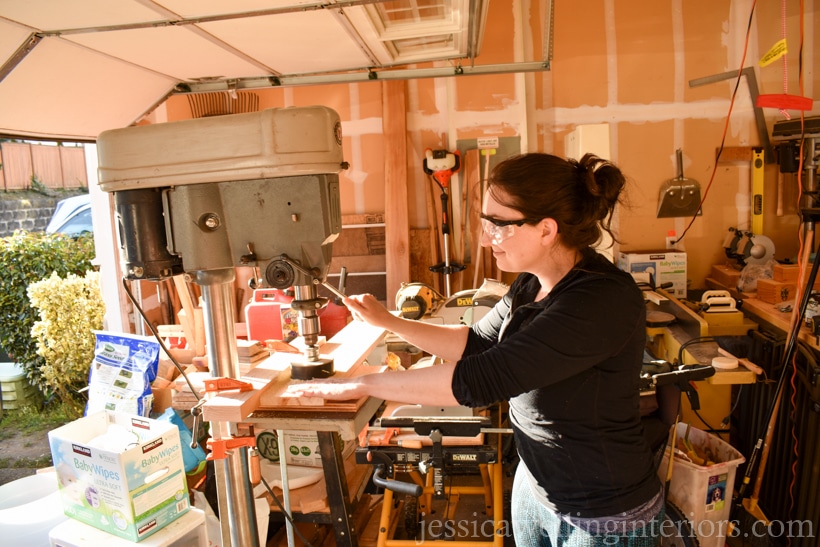
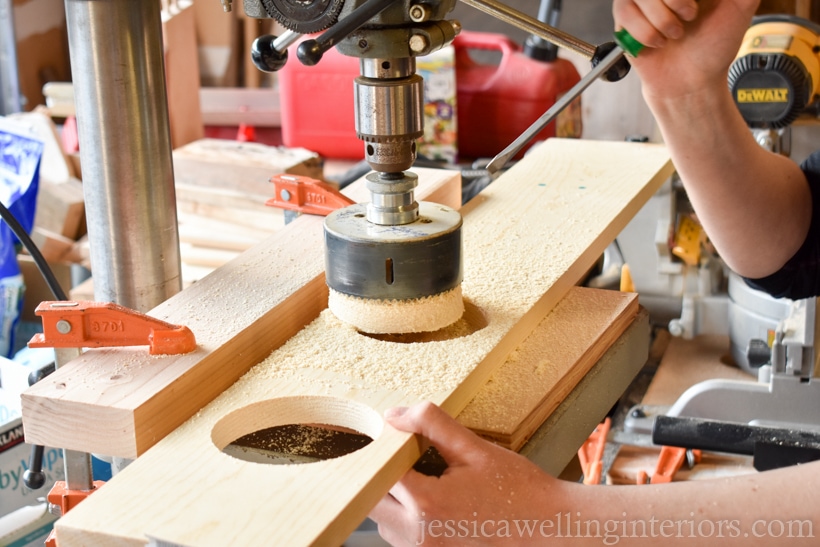
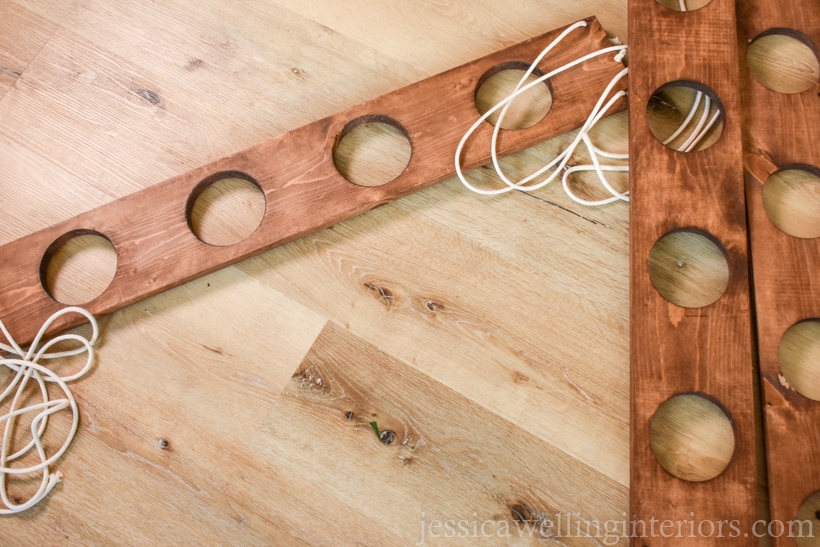
We cut 4 holes in each of the 3 boards.
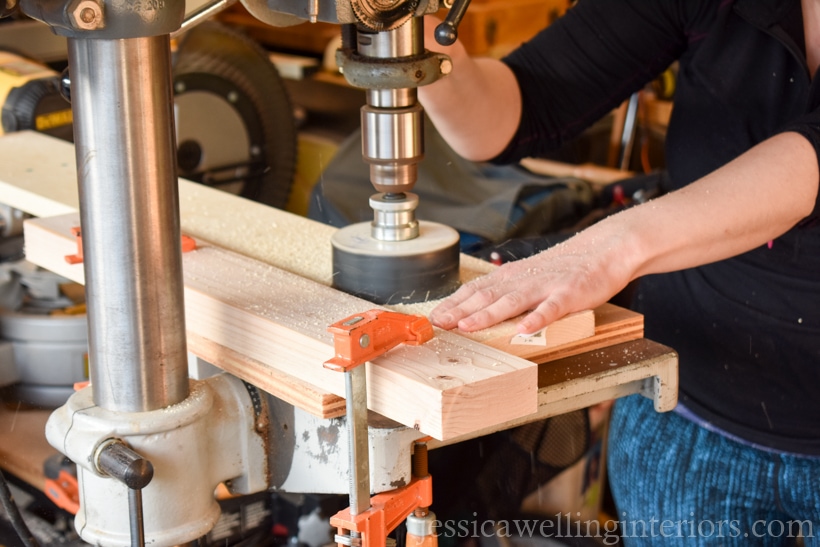
4. Drill Holes
I clamped each board down and used a 5/8″ drill bit to drill four holes in each shelf- one at each corner for the rope to go through.


5. Sand
Sand the boards with 120 grit (or finer- the numbers get bigger as the grits of sand get finer) sandpaper. I used my orbital sander, but you could do it by hand if you prefer. Wipe it down with a damp rag when you’re done to remove the sawdust.
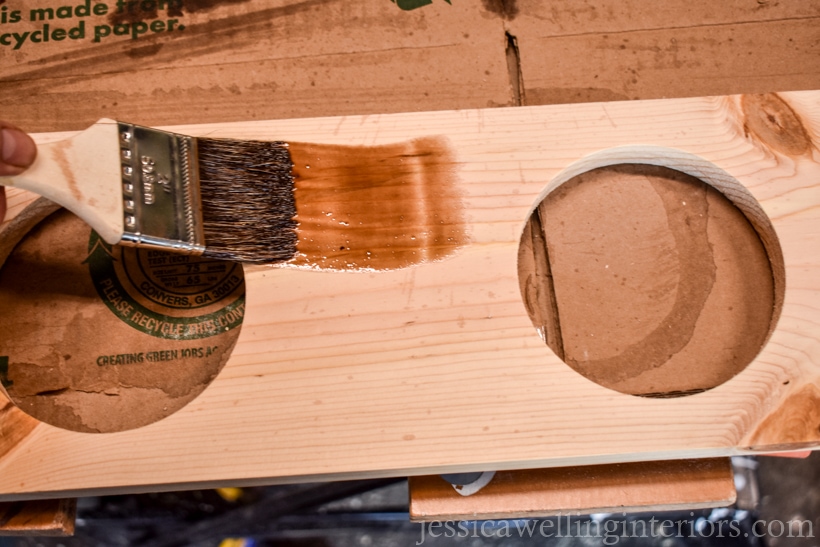
6. Apply Wood Conditioner
When I’m working with a softwood like pine, I always apply a pre-stain wood conditioner. It helps the wood absorb the stain more evenly. Otherwise, you’ll end up with blotchiness. And no one wants that! I used a disposable paintbrush and let the conditioner dry overnight.
7. Apply 1st Coat of Wood Stain
I brushed the stain on with a disposable brush, and let it sit for 15-20 minutes, before coming back and wiping it off with a clean rag.
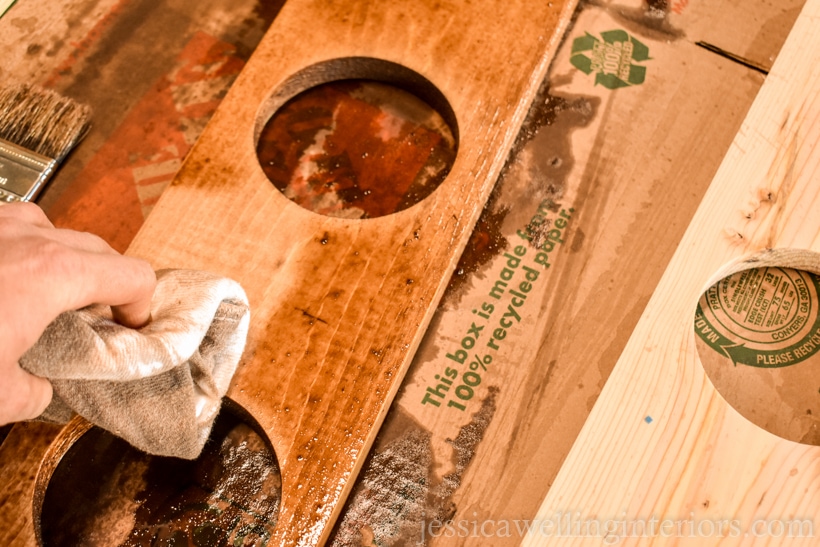
The cut ends of the wood always absorb more stain than the sides, so I usually wipe the ends off right away. Let that dry for at least two hours.
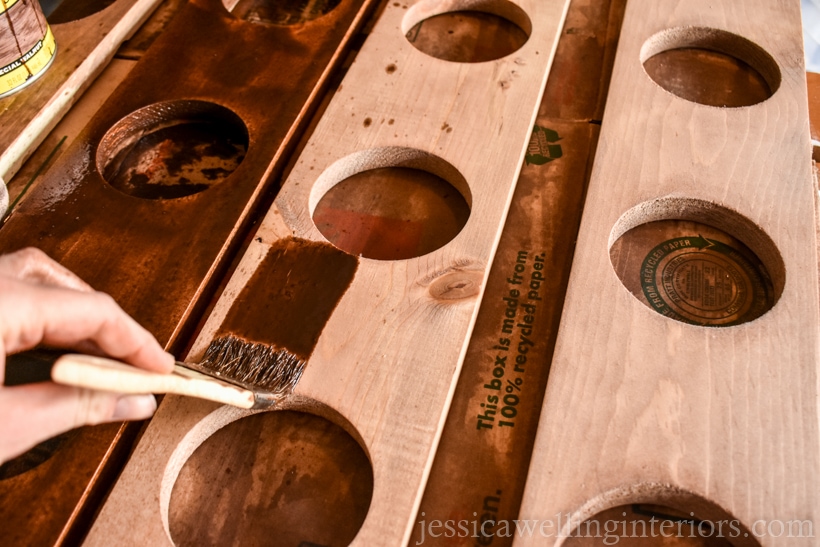
8. Apply 2nd Coat of Wood Stain
I wasn’t quite happy with the color after the first coat of stain, so I added a second coat, using the same method as before, and letting it dry for a few hours. As you can see, now it has a much darker “walnut” color, which is exactly what I was going for.
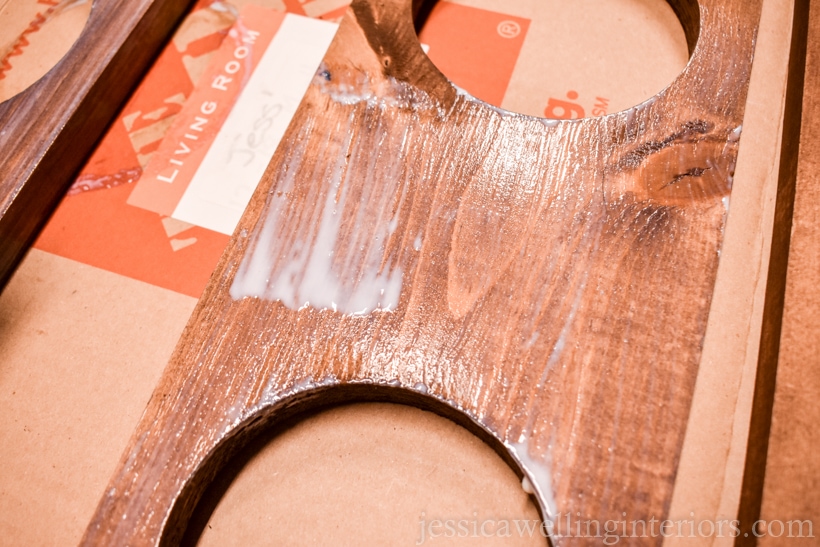
9. Apply Polyurethane
I used a disposable brush to brush on a thin coat of polyurethane to protect the wood.

It looks milky out of the can, but it dries clear. Again, let that dry for a few hours before moving on to the next step.
10. Cut Rope
Cut 4 equal lengths of rope.
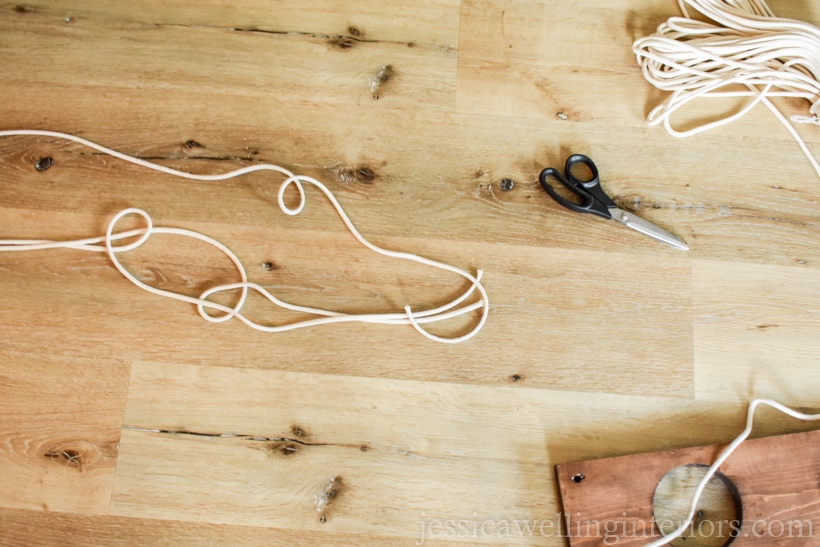
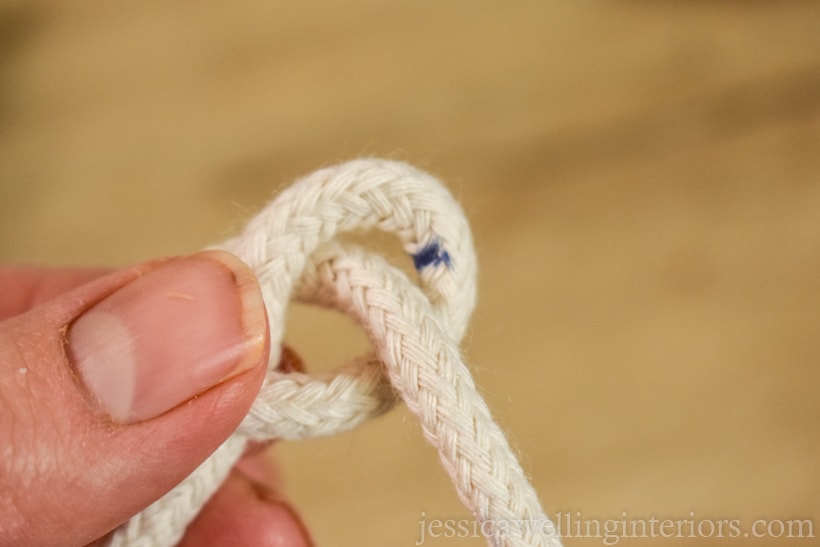
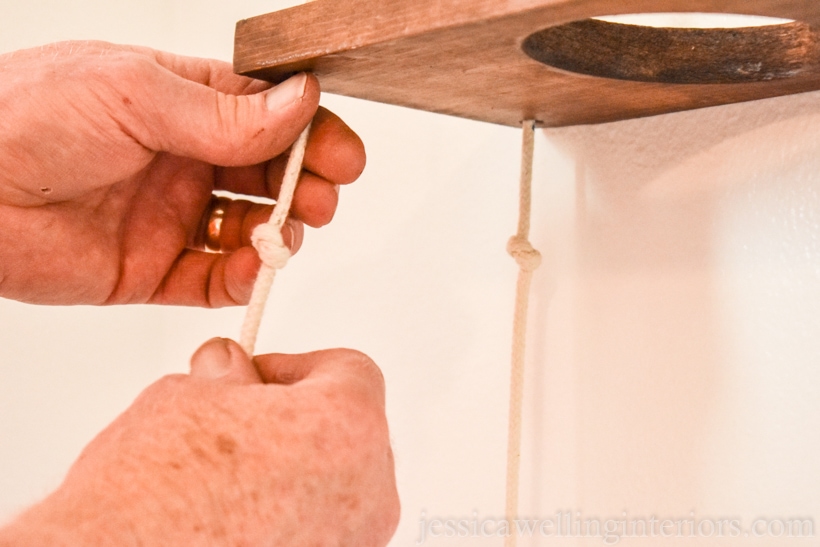
11. Tie Knots
Tie a knot at one end of each of the four lengths of rope. Don’t tighten them yet- there may be some adjusting to do later.

12. String Rope Through Holes
Use something sharp and skinny (I used a shish-kebab skewer) to poke the rope through the holes of the bottom shelf.
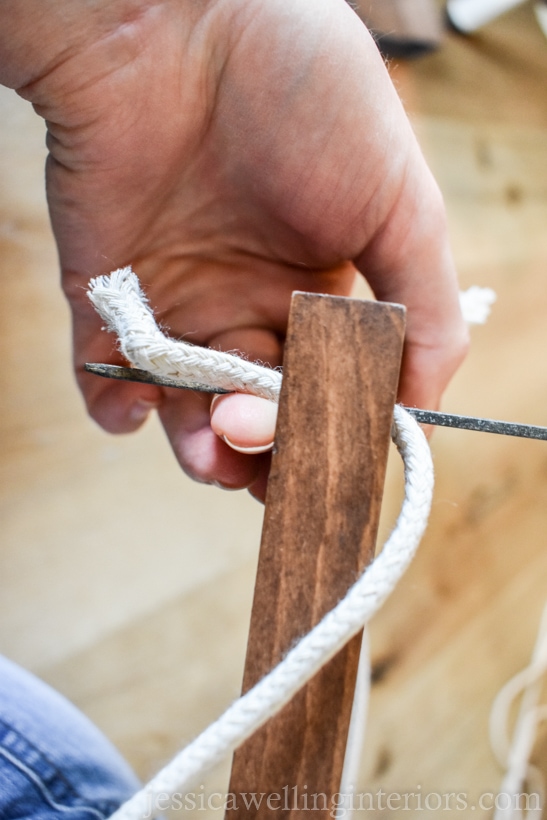
Put one of the lengths of rope through each of the 4 holes, and tie a knot underneath. Again, don’t tighten these knots yet.
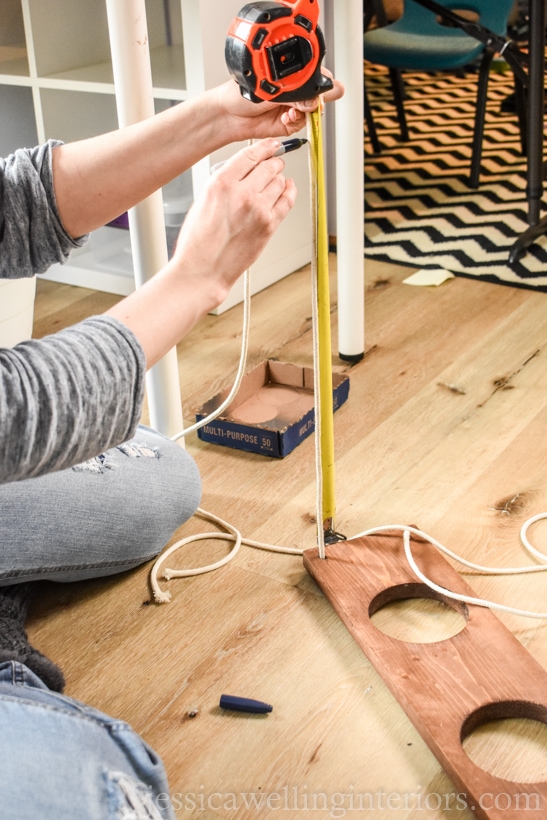
13. Measure & Mark
Lay the shelf on the floor and hold one of the ropes straight up. Use a tape measure to measure and mark a small dot on the rope where the next shelf will hang. Mine shelves are ___” apart.
14. Tie a Knot
Tie a knot right at the dot. Repeat this for all four ropes.
15. String Ropes Through 2nd Shelf
String all four ropes through the 2nd shelf, and repeat everything until you have all the ropes strung through all three of the shelves.
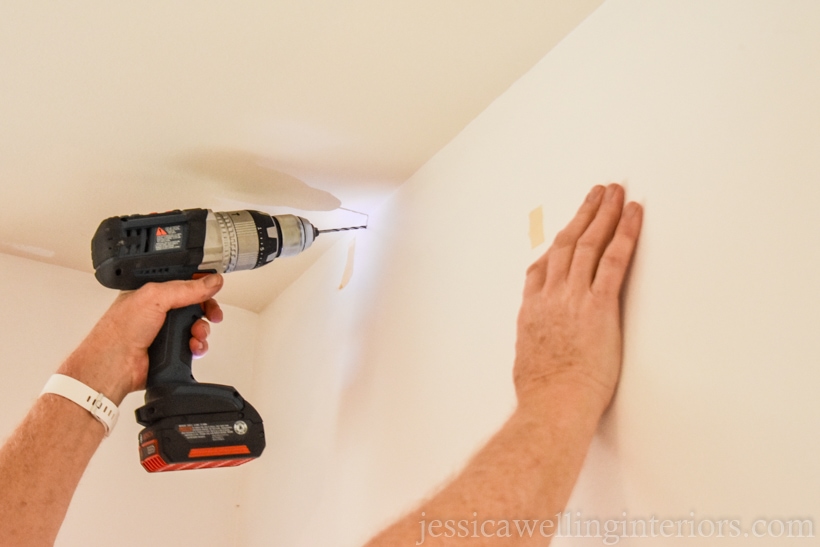
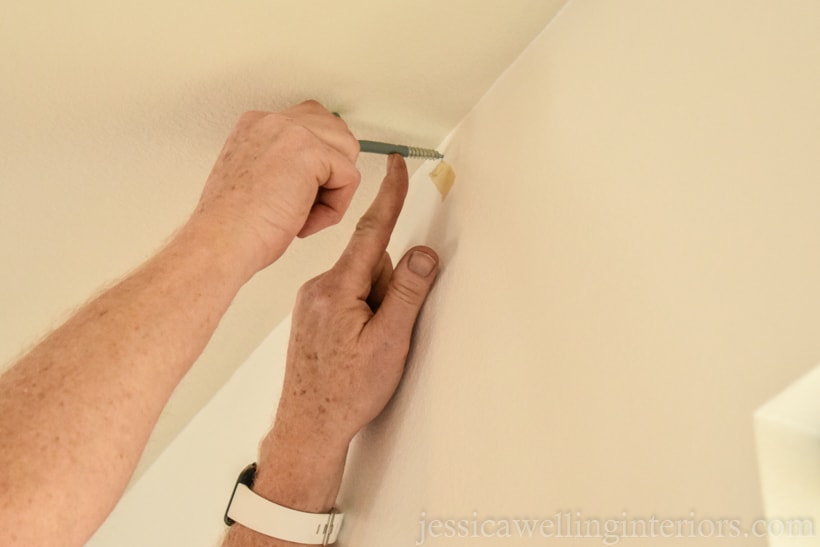
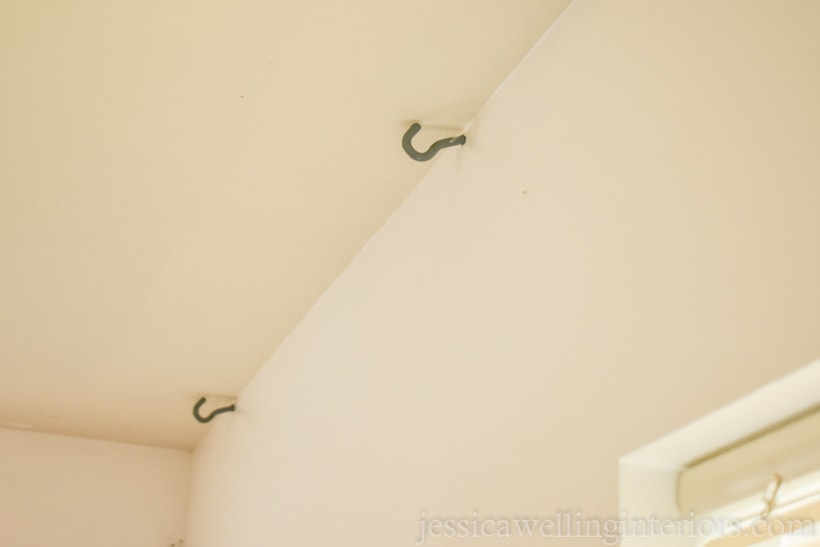
16. Install Hooks
The hooks need to go into something solid since this whole thing is going to be relatively heavy. My tall dad helped me get the hooks in place. He drilled a hole first, then screwed the hook into the hole.
17. Hang Vertical Garden
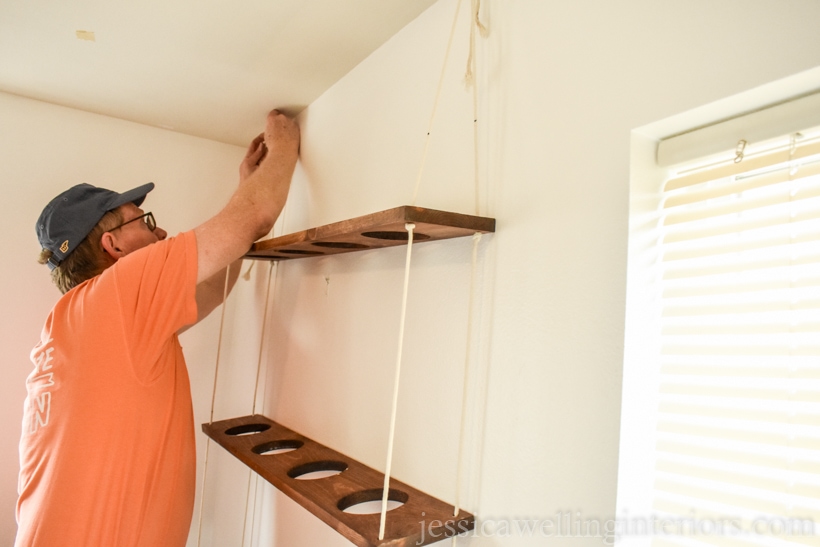
18. Adjust Planter Shelves
Now it’s time to futz with the shelves and get them level. Start with the top shelf. You can move the knots up and down to make adjustments. Hopefully your fingernails aren’t too short! This step turned out to be easier than I expected.
It may help to set a level on each of the shelves. I also found that adding some pots helped weigh the shelves settle.
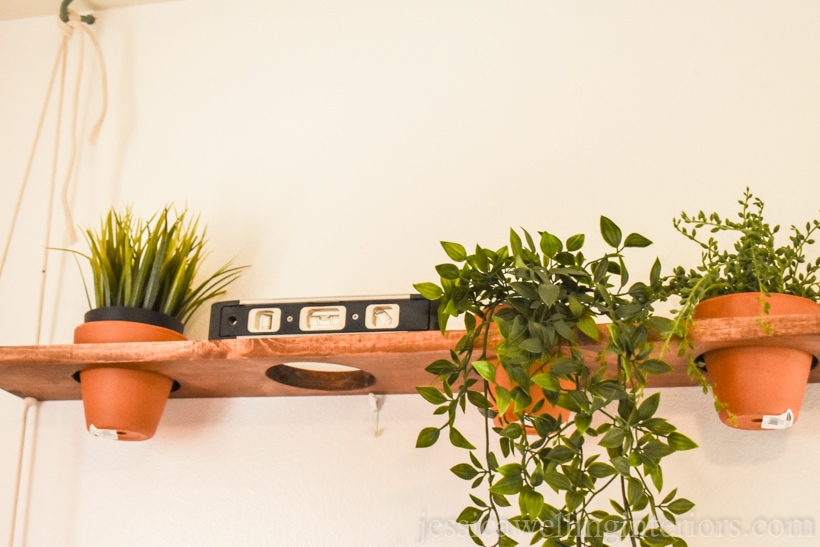
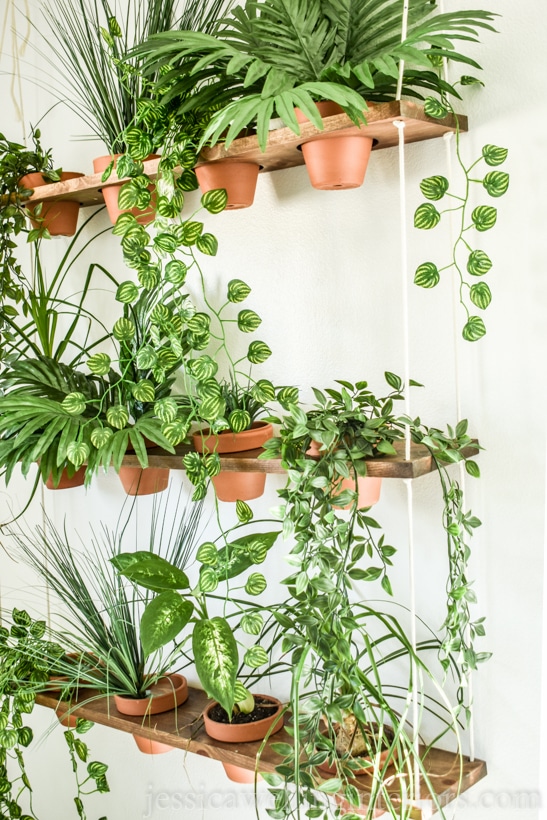
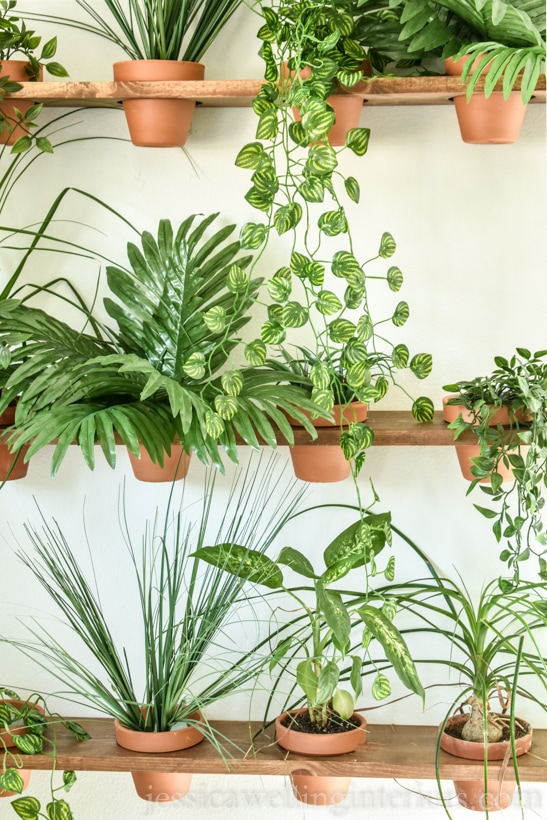
Add Pots and Indoor Plants
Some of my plants are just stems, so I cut cubes of floral foam and stuck the stems into that to keep the plants in place. Here are my favorite faux indoor plants… and you’ll recognize some of them in this project (the plant in the pic below did not make the list- too fake).

And It’s Done!
I’m pretty excited about how this one turned out! Peter even told me his coworkers have been noticing it behind him in his conference calls. Here’s the watermelon vine in the photo below.
More Plant-Lovin Ideas…

How to Style Indoor Plants: 6 Designer Tips