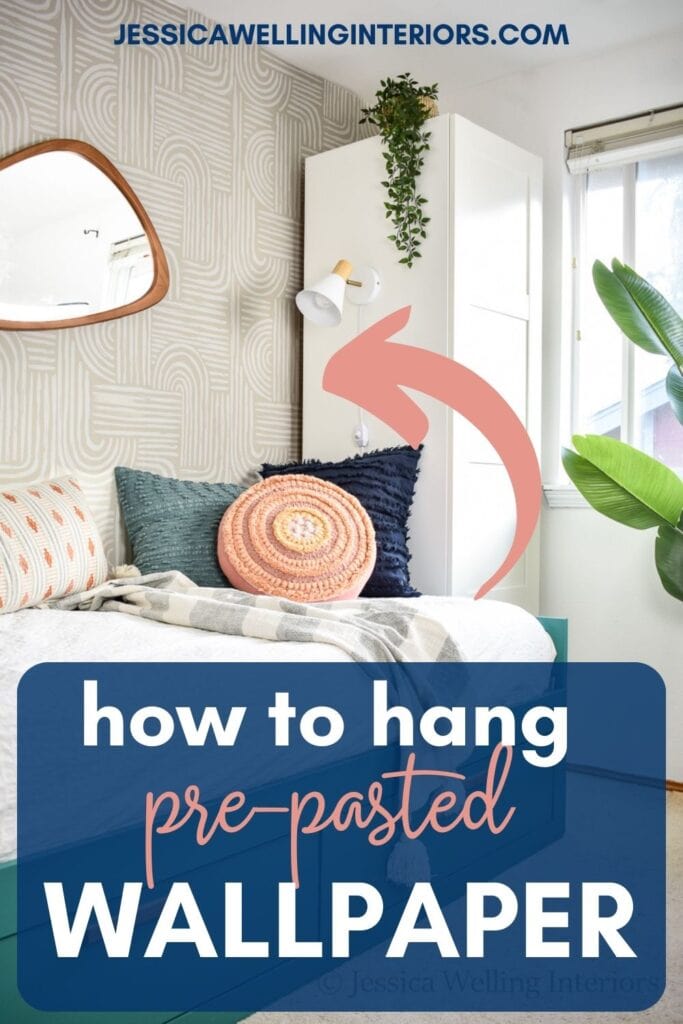
How to Apply Pre-Pasted Wallpaper
Learn how to apply pre-pasted wallpaper with this in-depth tutorial and transform you walls. It’s easier than peel and stick!
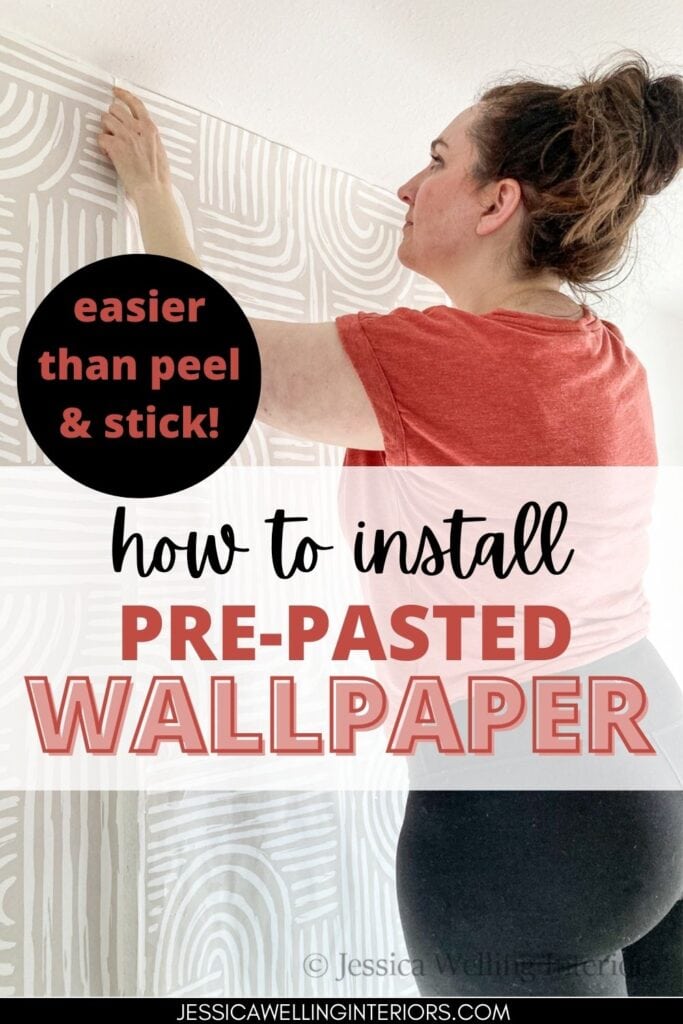
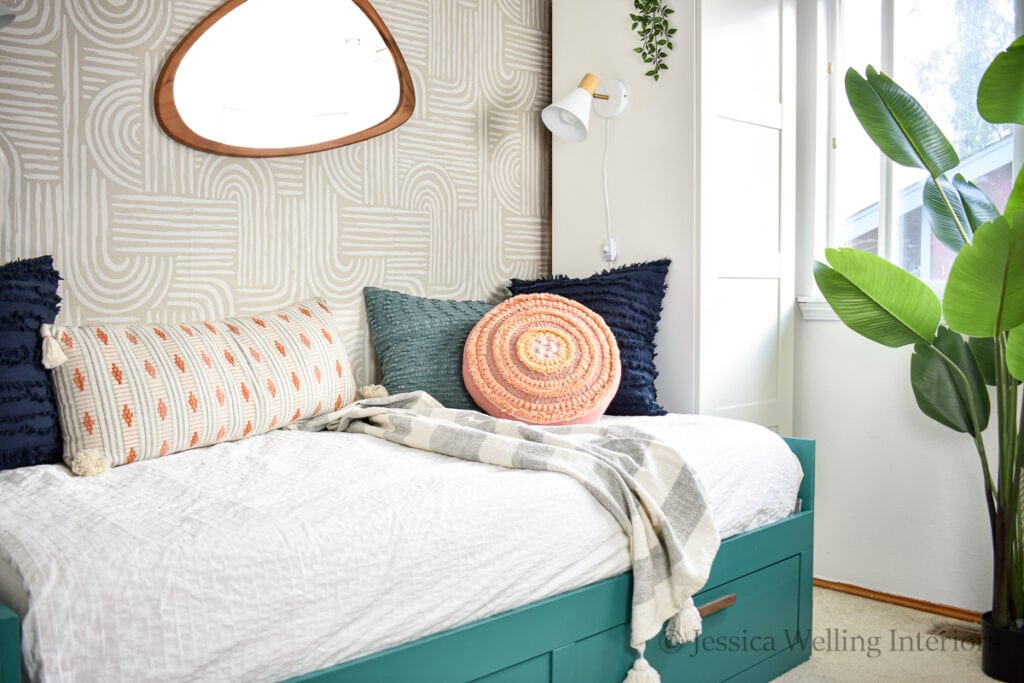
Today I’m hanging pre-pasted wallpaper on an accent wall as part of my guest room makeover. I actually prefer pre-pasted paper to peel-and-stick because in my experience it’s much easier to install.
What is pre-pasted wallpaper?
Pre-pasted wallpaper comes with the adhesive already applied to the back. Like an old-school postage stamp, you just have to get it wet to activate the glue (but preferably not with your tongue!). We’ll discuss the best method for this in the tutorial below.
Traditional wallpaper (you may also see it referred to as unpasted or non-woven) requires you to apply a separate adhesive, which can be messy and time-consuming. It’s also generally A LOT harder to remove from the walls later, as anyone who’s ever bought a fixer-upper house will tell you!
How to Apply Pre-pasted Wallpaper
Tools
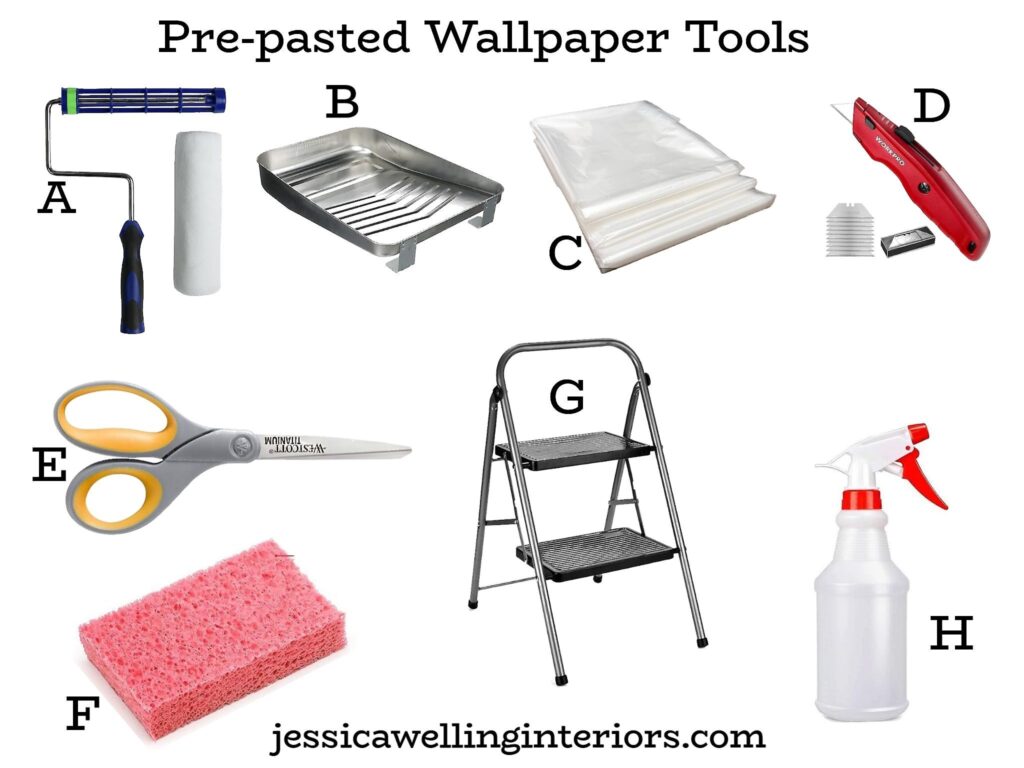
B. Paint Tray
C. Drop Cloth
E. Scissors
F. Sponge
G. Step Stool
H. Spray Bottle filled with water
Directions
I’m going to give the basic step-by-step instructions, then I’ll give troubleshooting tips and explain how to go around wall outlets, corners, etc. at the end.
1. Prep your walls.
All wallpaper needs clean walls that are as smooth as possible. Most homes in the US have textured drywall, which is what I’m working with.
Use sand paper to smooth out any lumps or old paint drips and wipe everything down with a damp rag when you’re finished to remove all the dust.
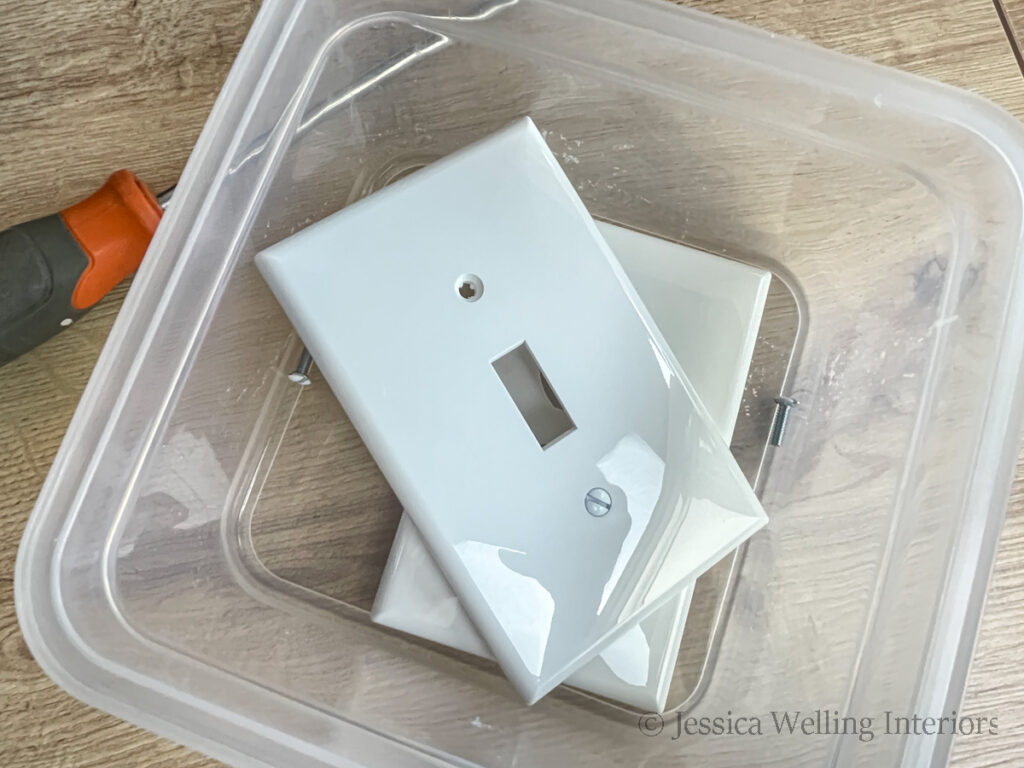
2. Remove Switch & Outlet Covers
Use a screwdriver to remove any switch plates and outlet covers.
I like to keep all my covers and their screws together in a container so nothing gets lost.
3. Remove baseboards.
Use a pry bar to carefully pull the baseboards off the wall. It is possible to apply wallpaper without removing them, but the process is more forgiving and you’ll have a cleaner finish if you take them off and then re-install them afterward. Note: I’m not re-installing mine because I have permanent furniture that will go right up against this entire wall.
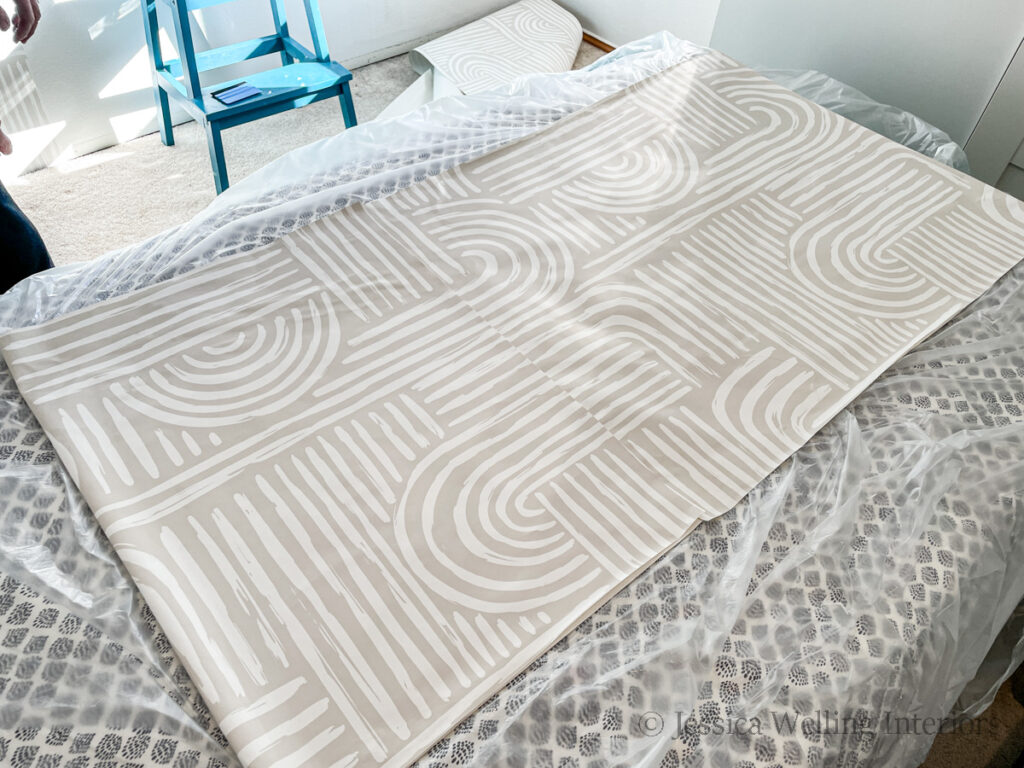
3. Lay out the first run.

Pre-pasted wallpaper should be installed from left to right, starting in the upper left corner. If you’re going around an entire room, you’ll want to start in the darkest or most inconspicuous corner possible, since it will likely be impossible to match the pattern perfectly at the end. Corners behind doors are great for this.
I’ve also found that my wallpaper-hanging skills improve as I go, so the last few runs are likely to look a lot better than the first!
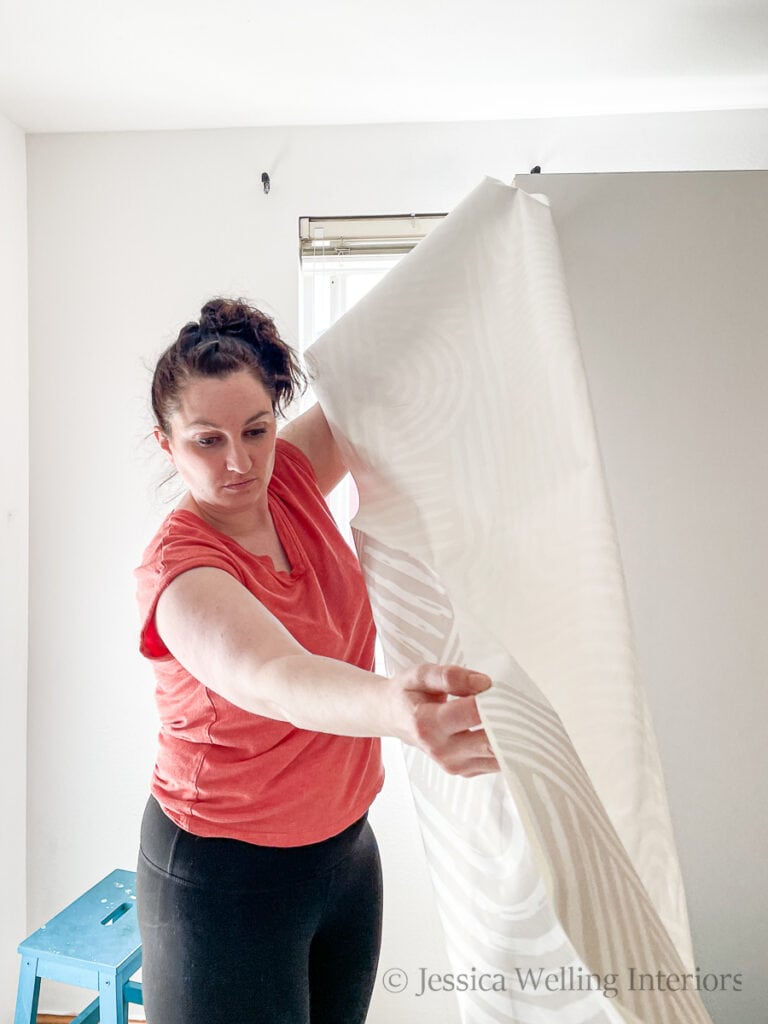
Lay the first run out on the floor or a table with the back facing up. I’m
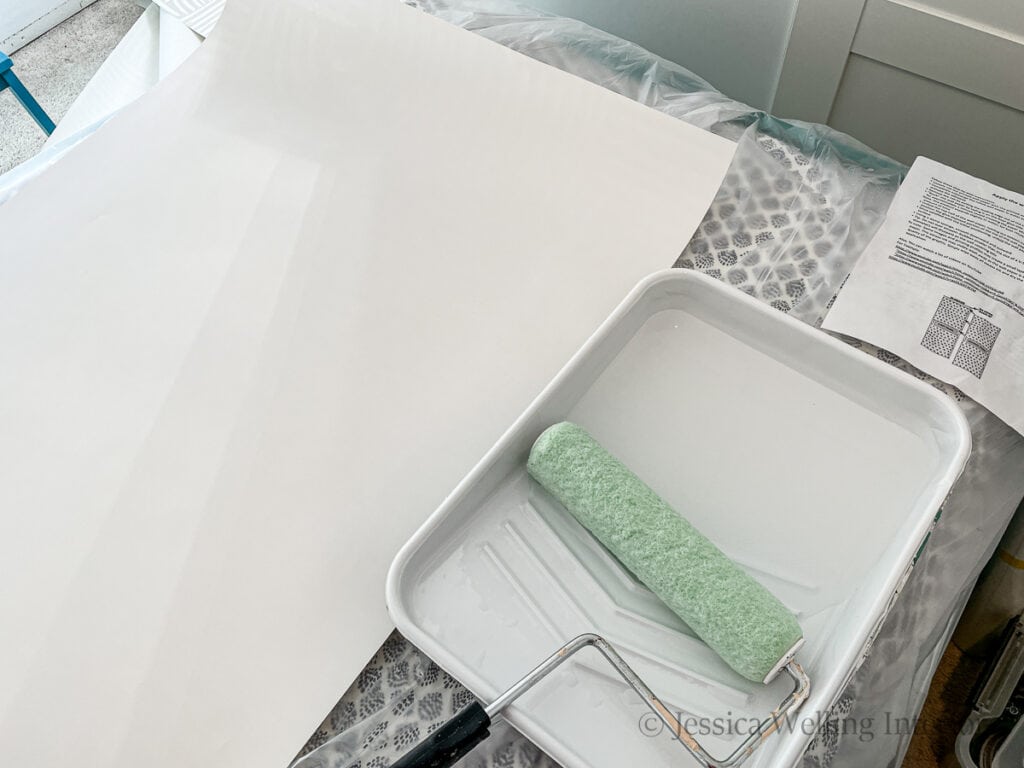
4. Wet the backing.
Use a paint roller and tray to apply water to the entire back of the wallpaper.
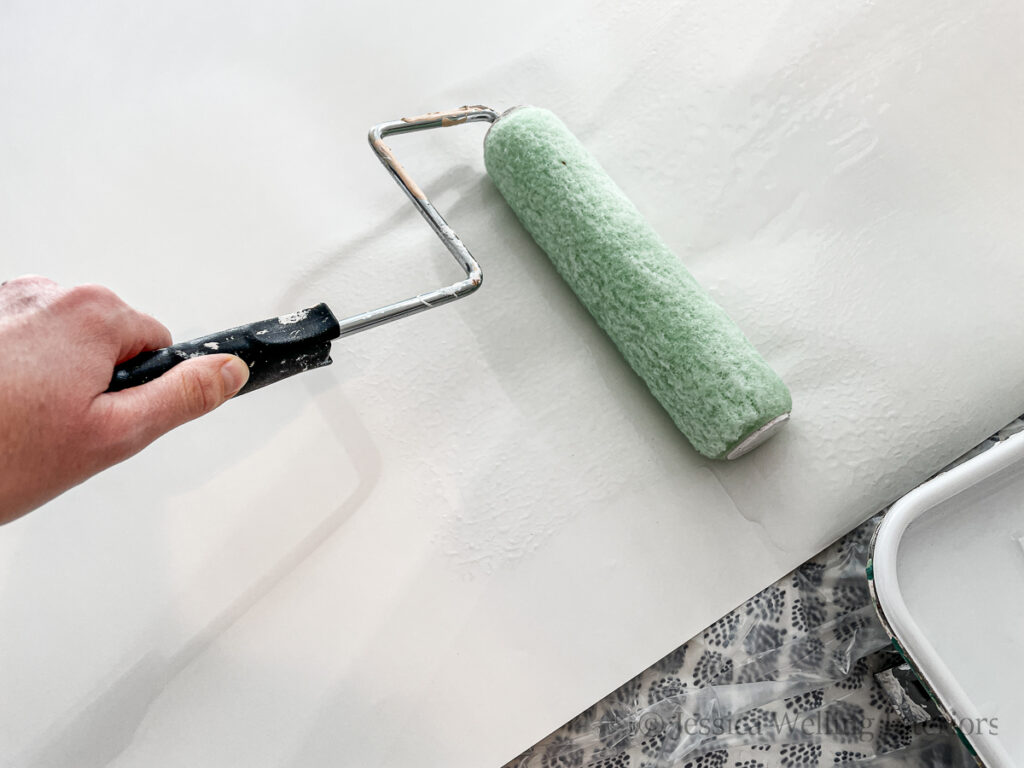
Note: Some instructions say to roll up the wallpaper and submerge it in a tray of water. We tried this, but found that the water wasn’t able to reach all of the surface, so some of the backing was wet while some was still dry. We found that the paint roller method worked MUCH better.
5. Block
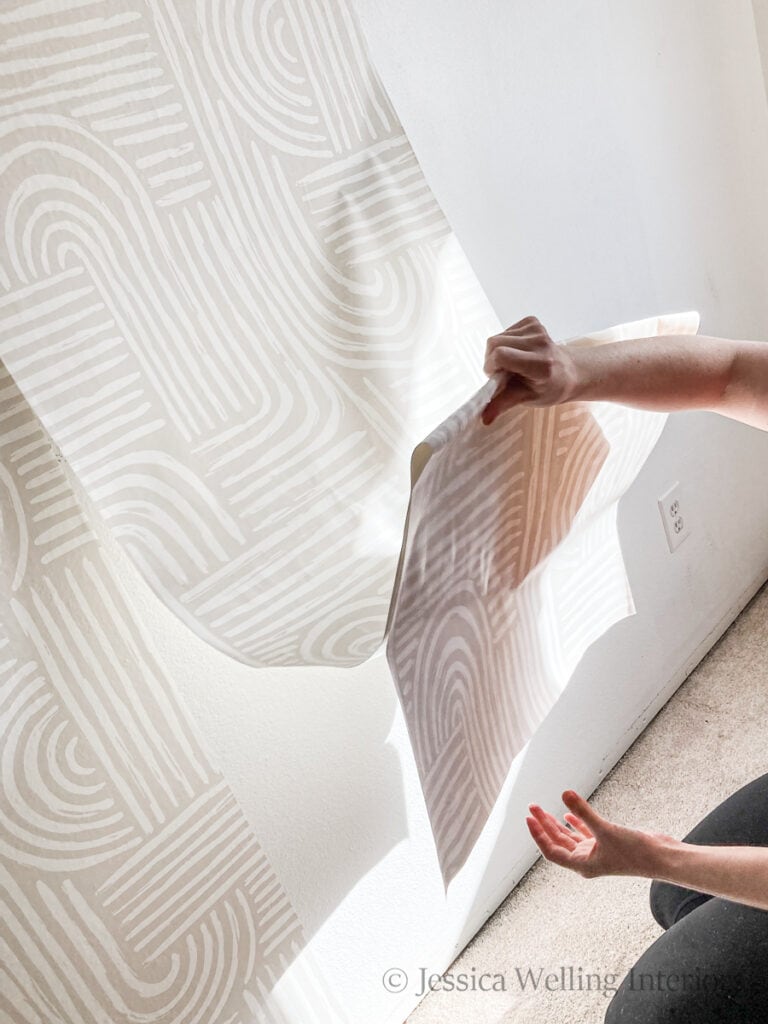
Carefully fold the top of the wallpaper down toward the center. Smooth it down with your hands, but be careful not to make a crease at the fold. This step is called “blocking” in the wallpaper world.

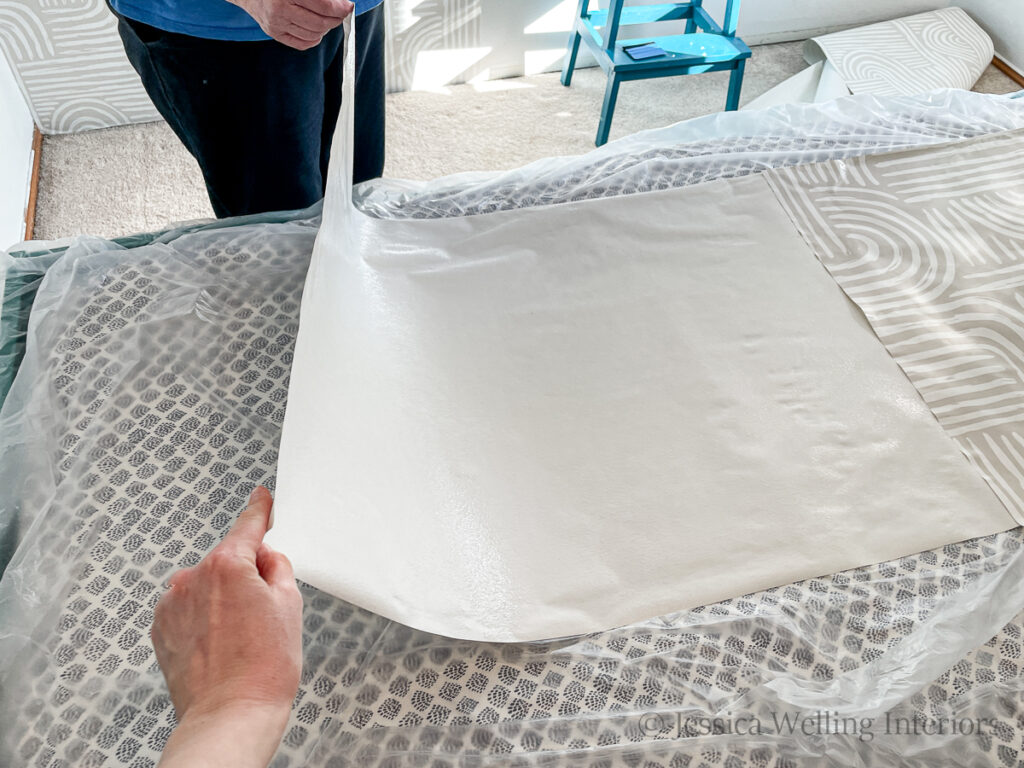
Then fold the bottom up toward the center as well, again smoothing it out but not creasing it. This is required to activate the glue on the wallpaper.
Blocking Times
The recommended blocking times will vary a bit from one manufacturer to another. This paper from Coloritto needed to sit for one minute. Others may need to sit for up to five minutes to fully activate the glue.
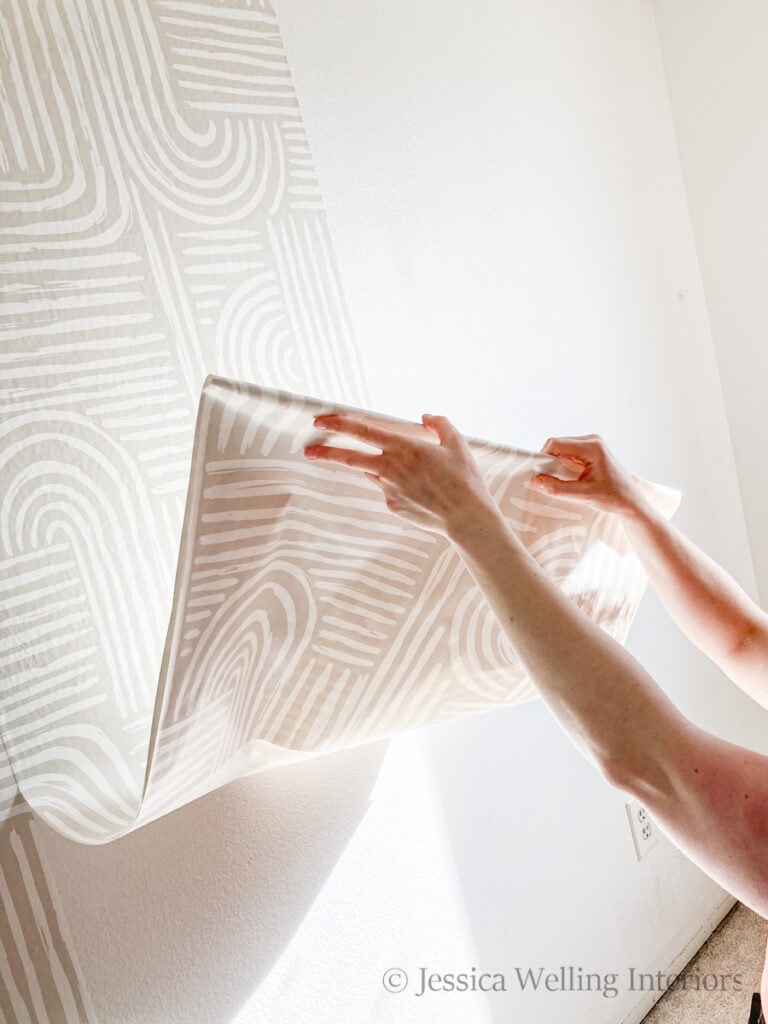
6. Unfold top.
Unfold the top half of the run, pick it up, and carry it to the wall where you’ll be starting.
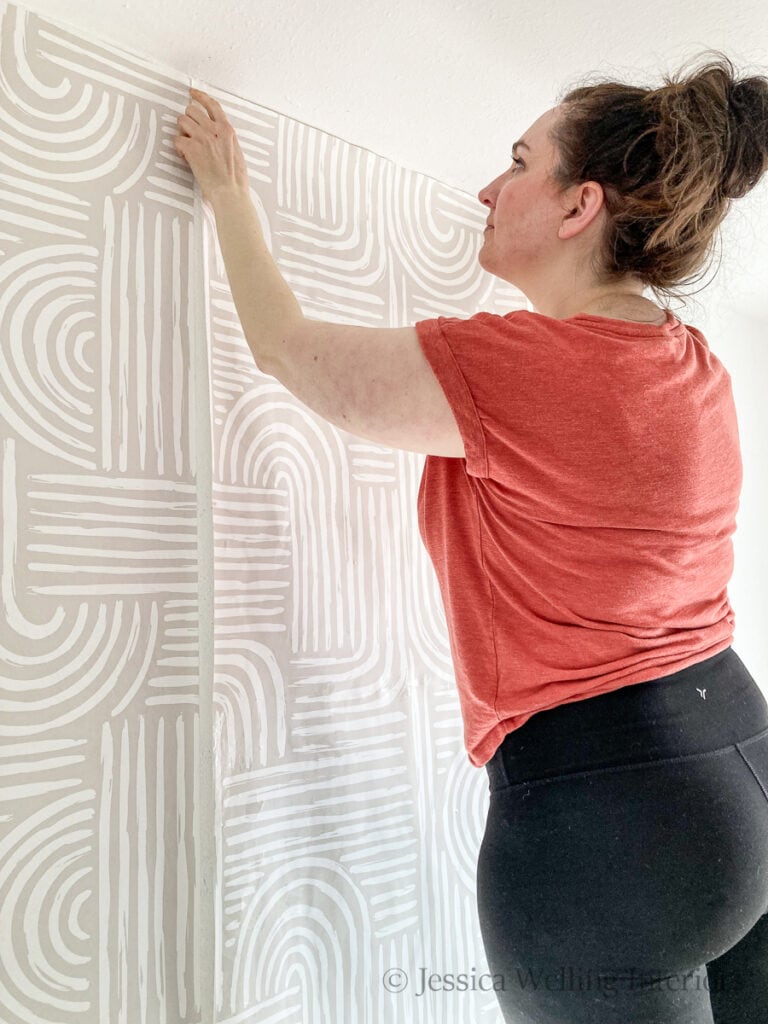
7. Apply to wall.
Line the top edge of the wallpaper up with the top left corner of your wall. I find this to be the most challenging part of the whole process, so don’t get discouraged if it takes several tries to get it right. The beauty of pre-pasted wallpaper is you can re-position it if needed (as long as it’s still wet).
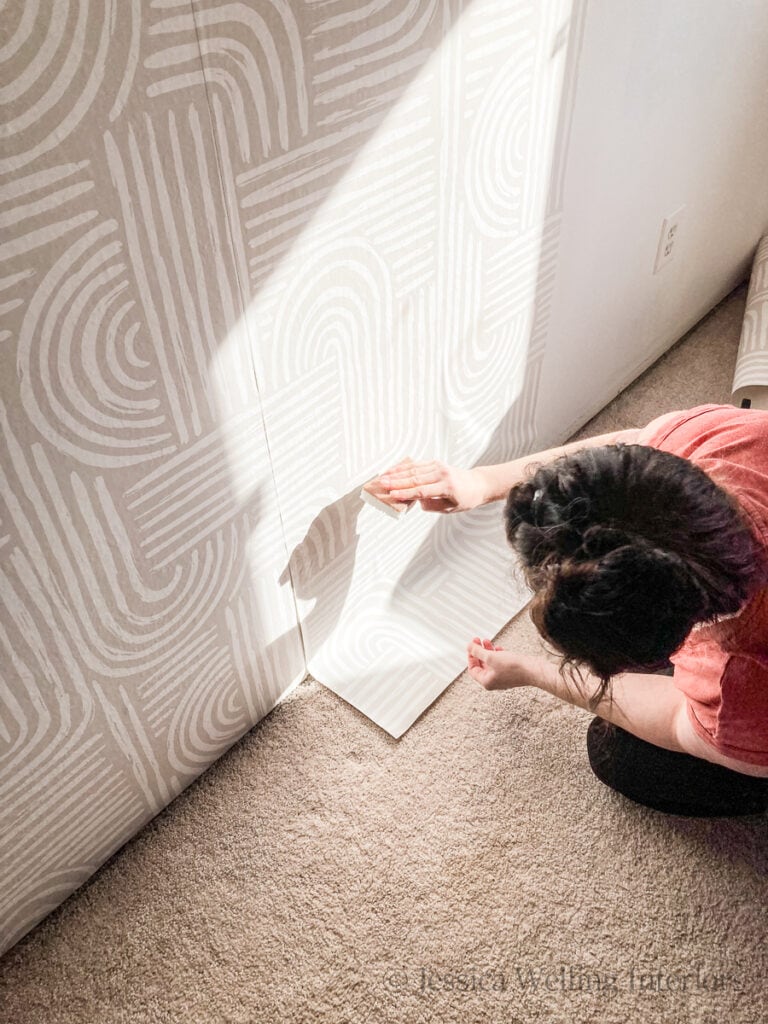
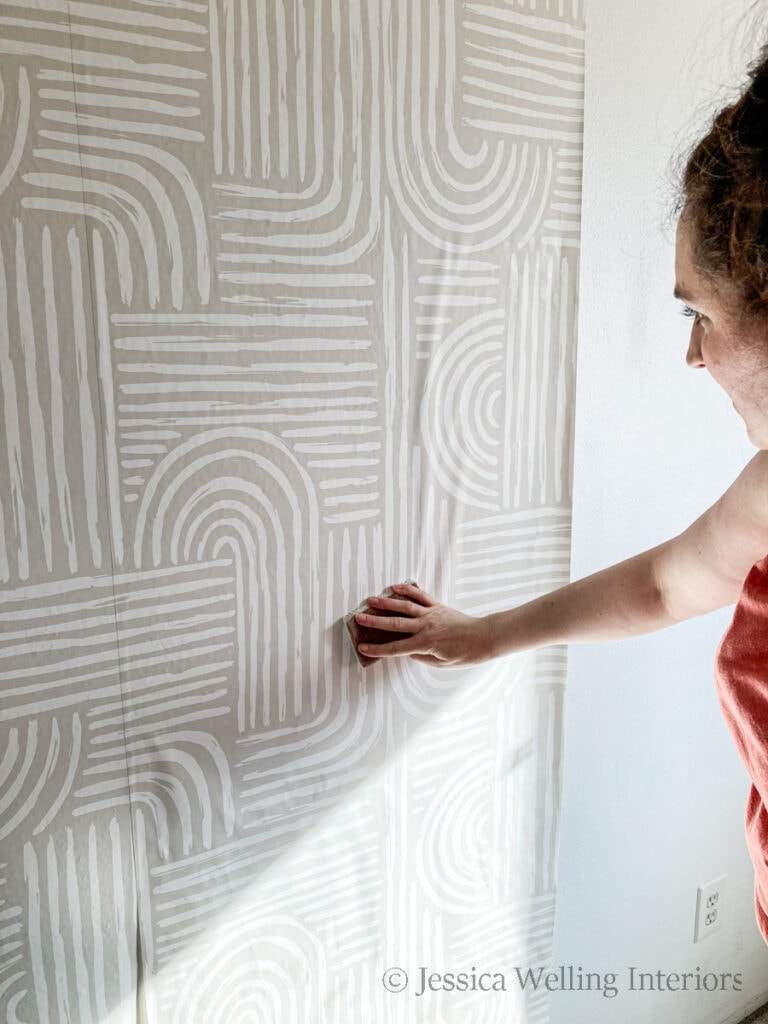
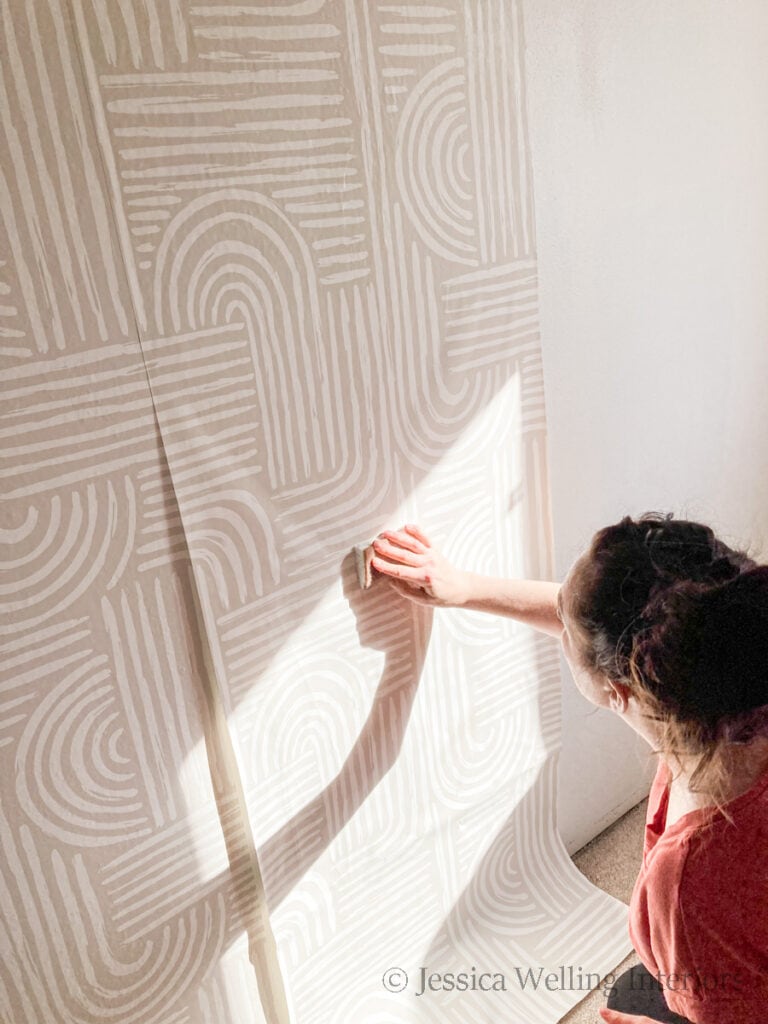
8. Smooth
Use a damp sponge to smooth out the wrinkles and air bubbles. This process takes some time and practice. Work your way down and move the sponge out toward the sides to smooth the paper against the wall and push out the air pockets. If it doesn’t go well, peel a section of the wallpaper away from the wall and re-smooth it.
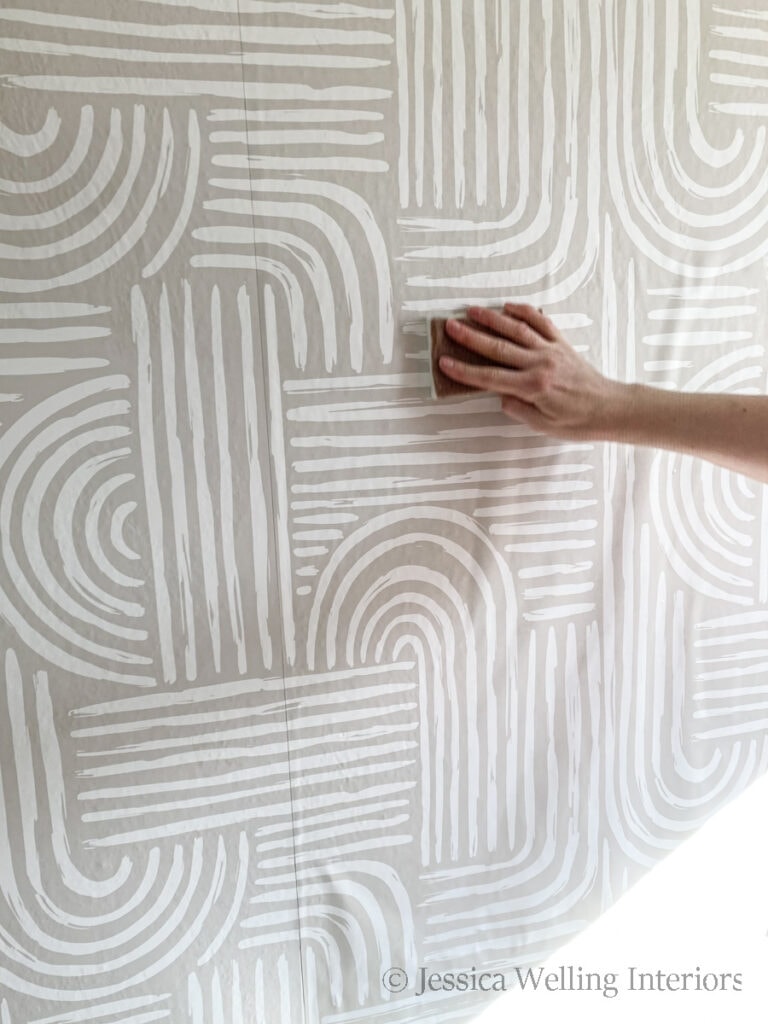
You’ll likely have some of the glue oozing out from under the paper at the edges. This is fine, but try not to smear the excess glue onto the front of your wallpaper. It’s also a good idea to keep your wet sponge clean by rinsing it out once in a while.
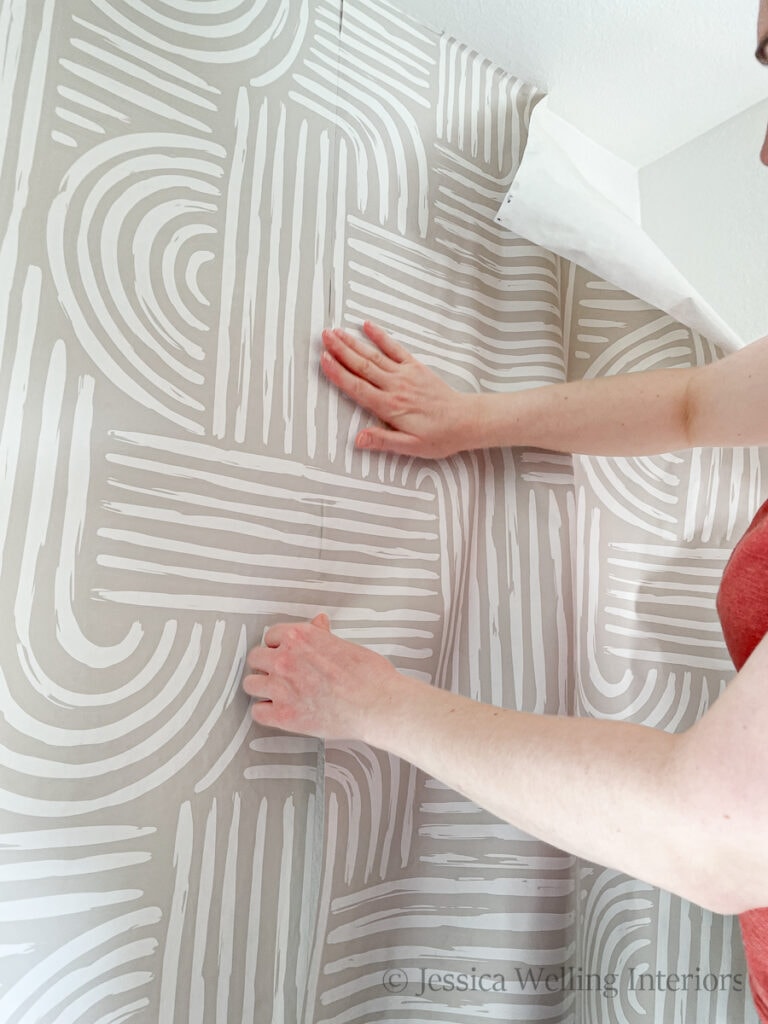
9. Unfold bottom & smooth.
Once the top half of the run is securely attached to the wall and smoothed down, unfold the bottom half and continue the smoothing process until you get to the floor.

9. Trim excess paper.
Leave a little excess paper at the bottom of the wall when you cut it off. The paper will shrink slightly as it dries, so it’s best to leave it for now and come back once everything is dry to do the final trimming.
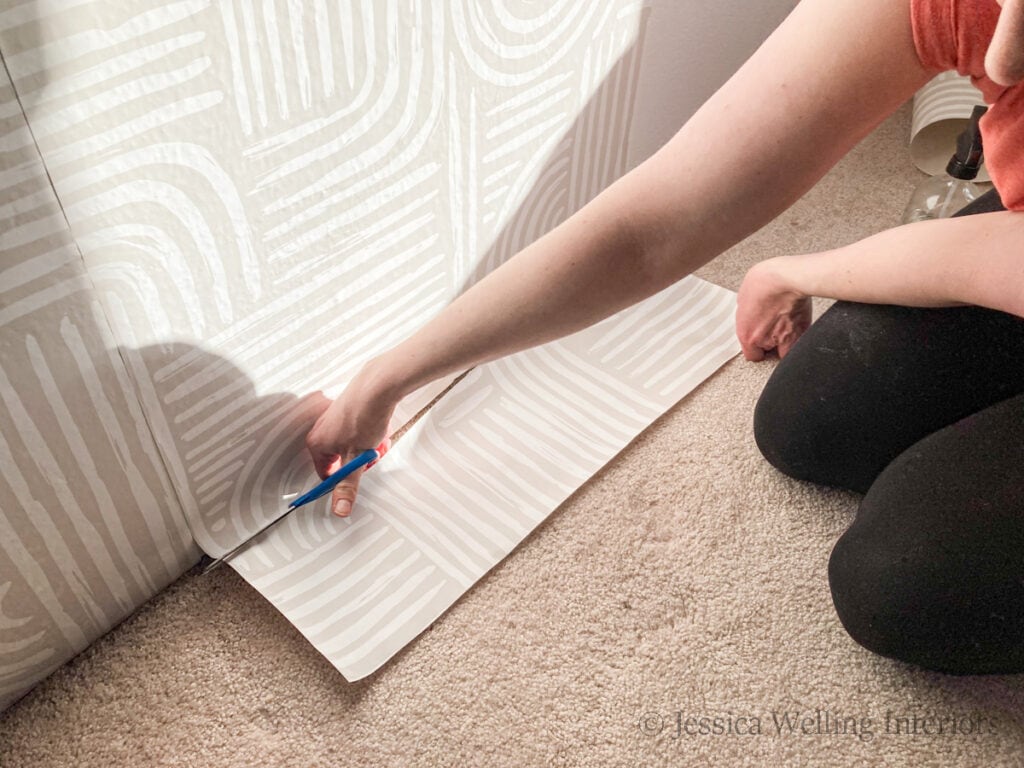
As you can see, I’ve removed the baseboard from this wall since I’m going to have furniture right up against it. But you can also leave your baseboard in place. Just leave a little extra paper and come back later with a razor blade to made a clean cut a couple of days later once everything is dry.
10. Line up the next run.
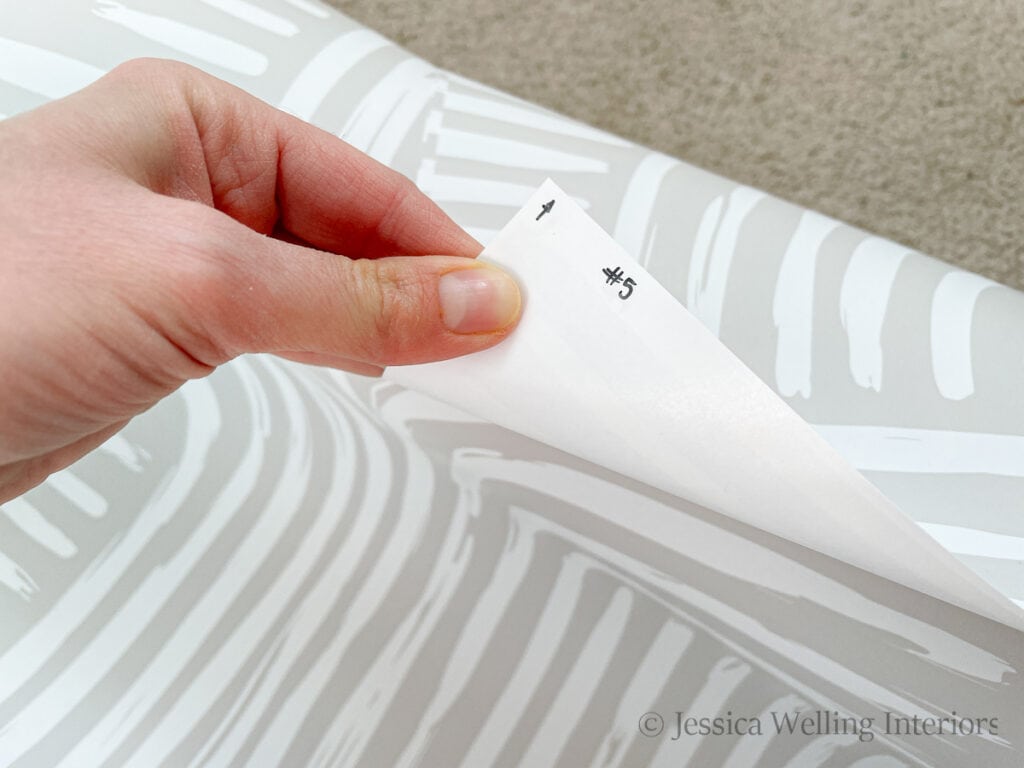
This next step will depend on your wallpaper manufacturer. Coloritto actually emailed me after I placed my order to double-check the dimensions of my wall. And since they print their wallpaper on demand, they sent me the wallpaper already cut to length. They also numbered the runs for me and marked the top of each one, which was hugely helpful!
If your wallpaper just comes on a standard roll, you’ll need to hold it up to the already-installed run next to it to line up the pattern. You may have to waste some paper, which is always sad, but necessary. Do this step before you apply any water!
11. Repeat
Repeat this pro
until you’ve covered your whole wall.
12. Trim the bottom.
It’s best to let everything dry completely before you do any precise cutting, since the paper can tear and it will shrink as it dries. After 24-48 hours, come back with a razor blade and cut the bottom of your paper.
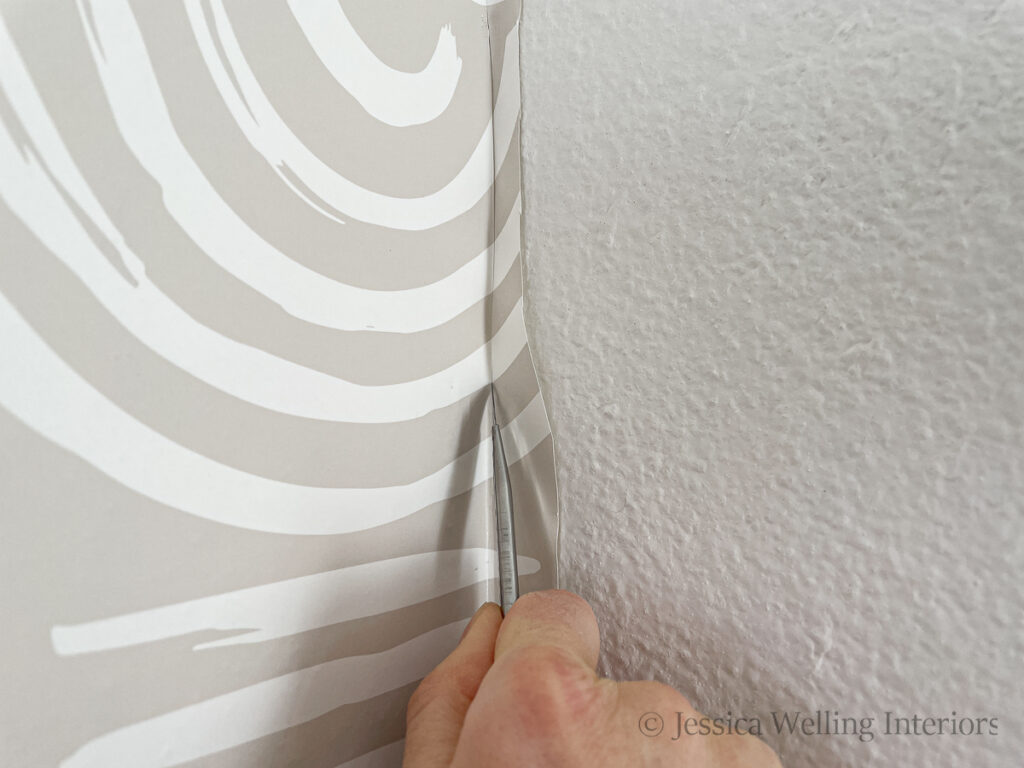
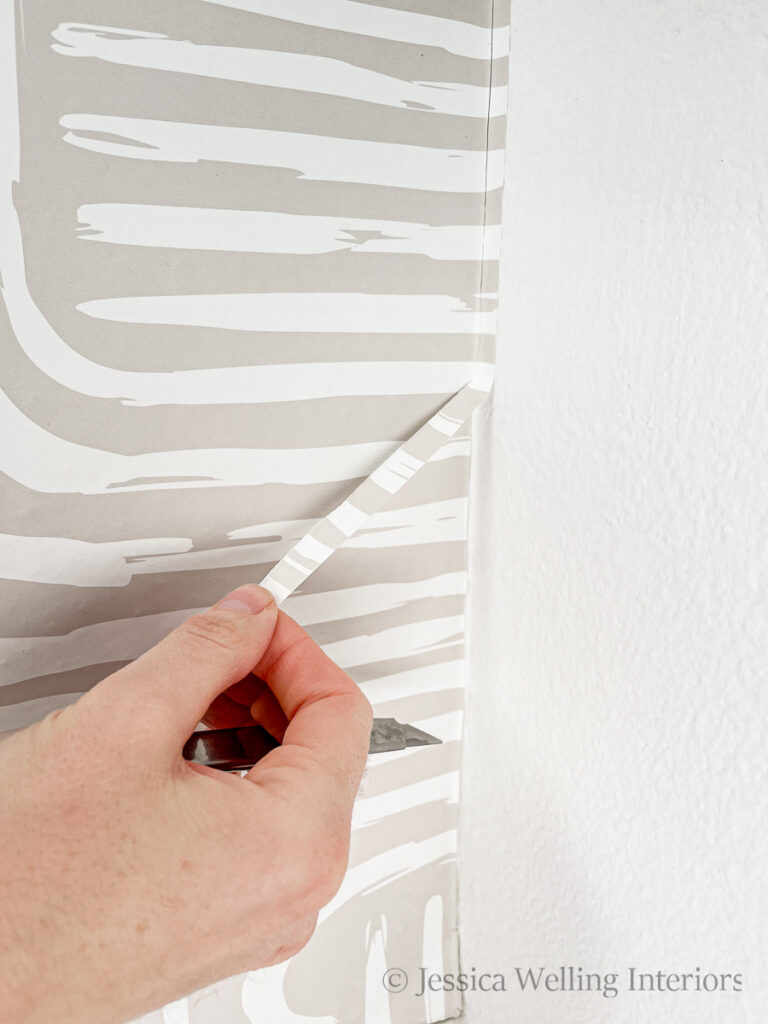
Corners
When you get to the corner, go ahead and continue all the way into the corner. I’m only papering this one wall, so I’ll trim off the excess later once it’s dry.
If you want your wallpaper to go onto the next wall then just continue it around the corner.


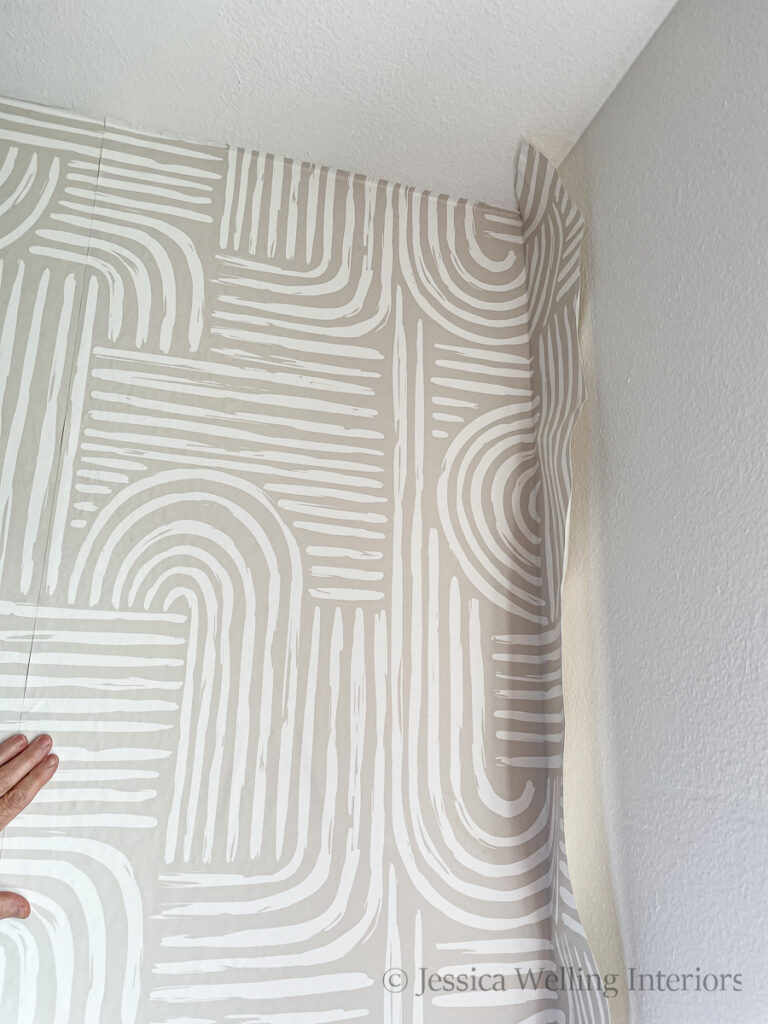
Once the paper is on the wall, trim off some of the excess so it won’t be weighed down as it dries, but leave an inch or two.
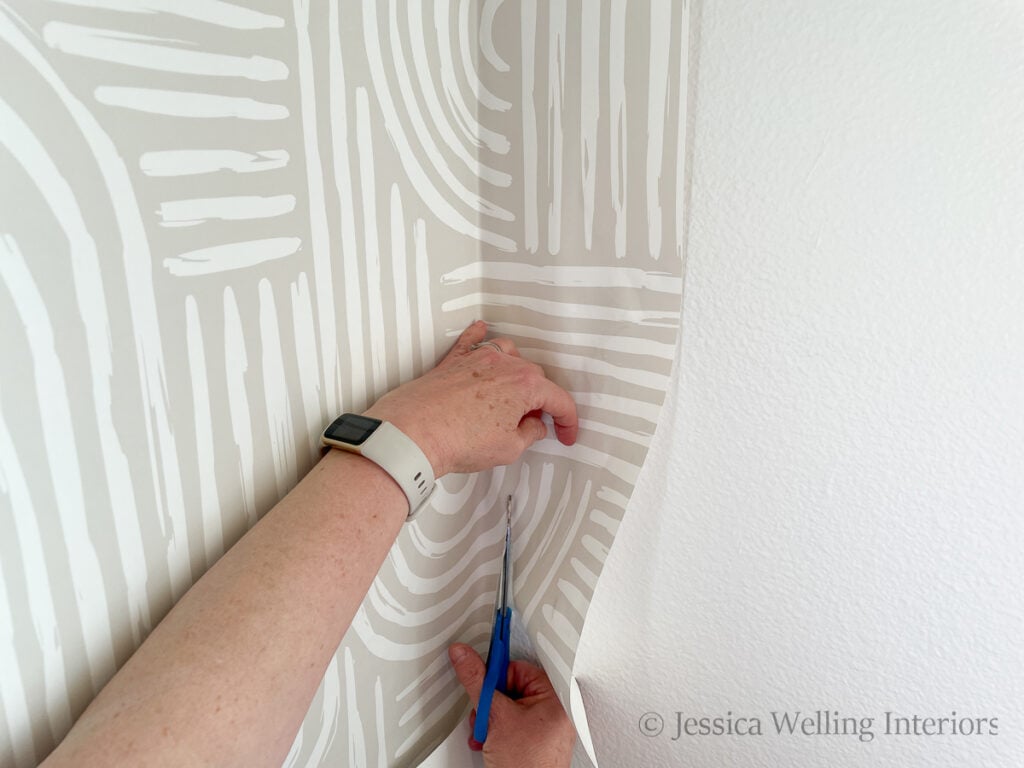
Then, once everything is good and dry (ideally 2 days later) come back and cut into the corner with a razor blade. Then peel the extra strip of paper away.
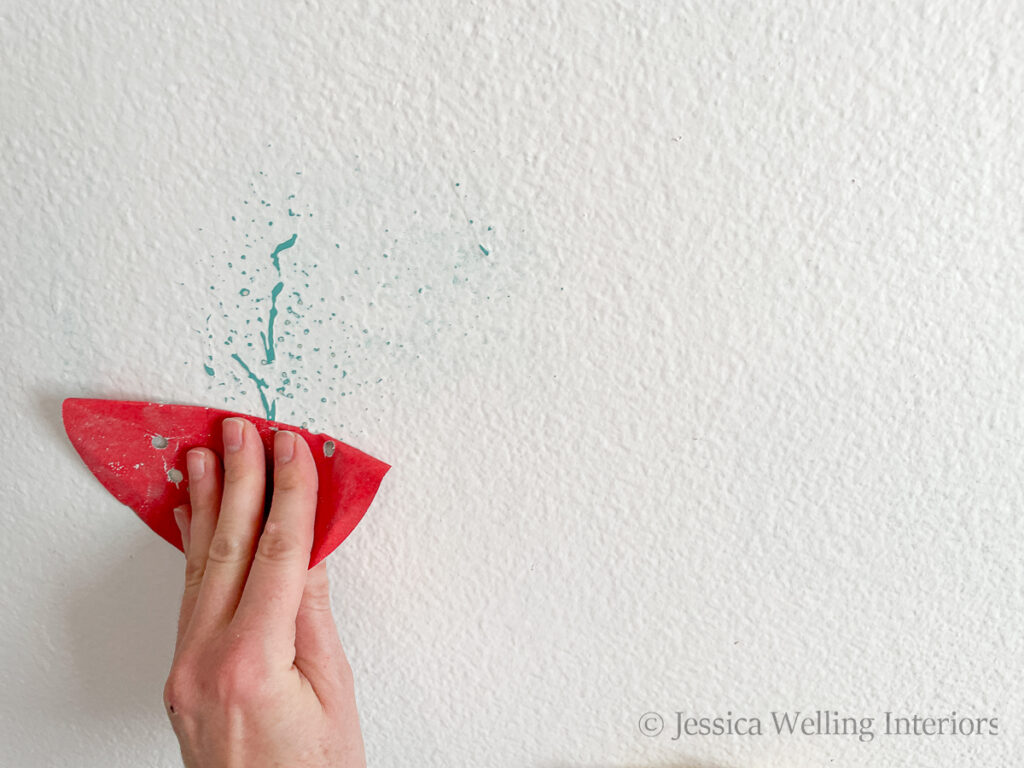
Seams & Edges
If you notice that the edges of your paper aren’t sticking to the wall, mist the back side of the wallpaper with a spray bottle and stick them back down. Then smooth them down with your damp sponge or a seam roller. It’s a good idea to keep that spray bottle handy.
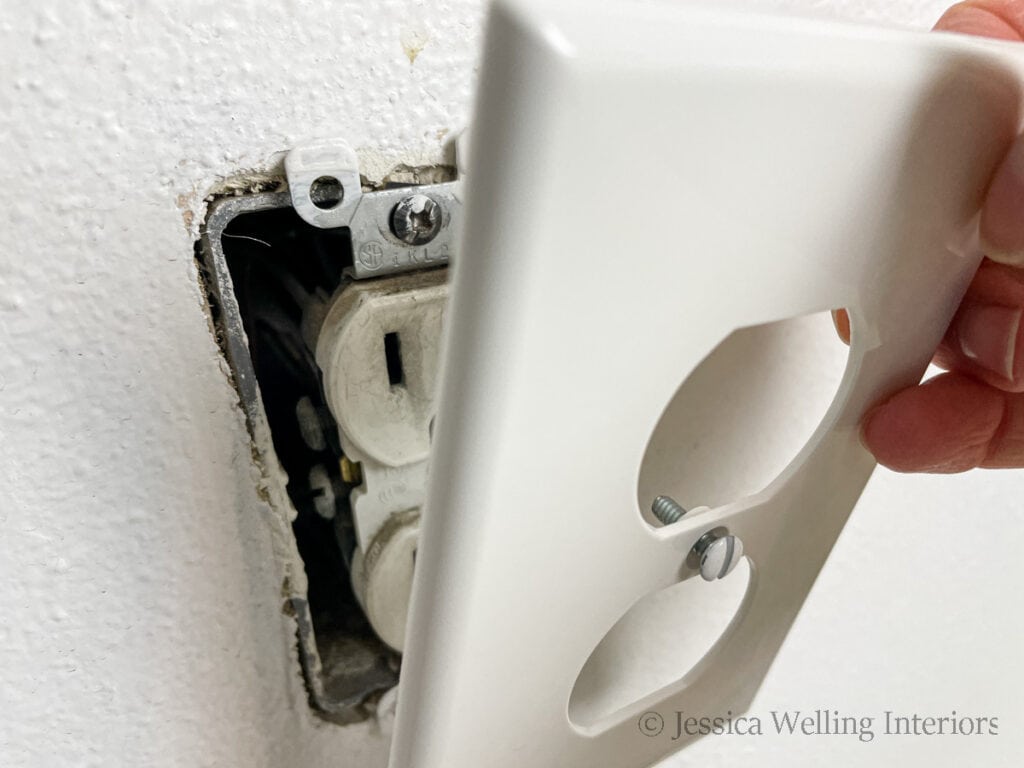
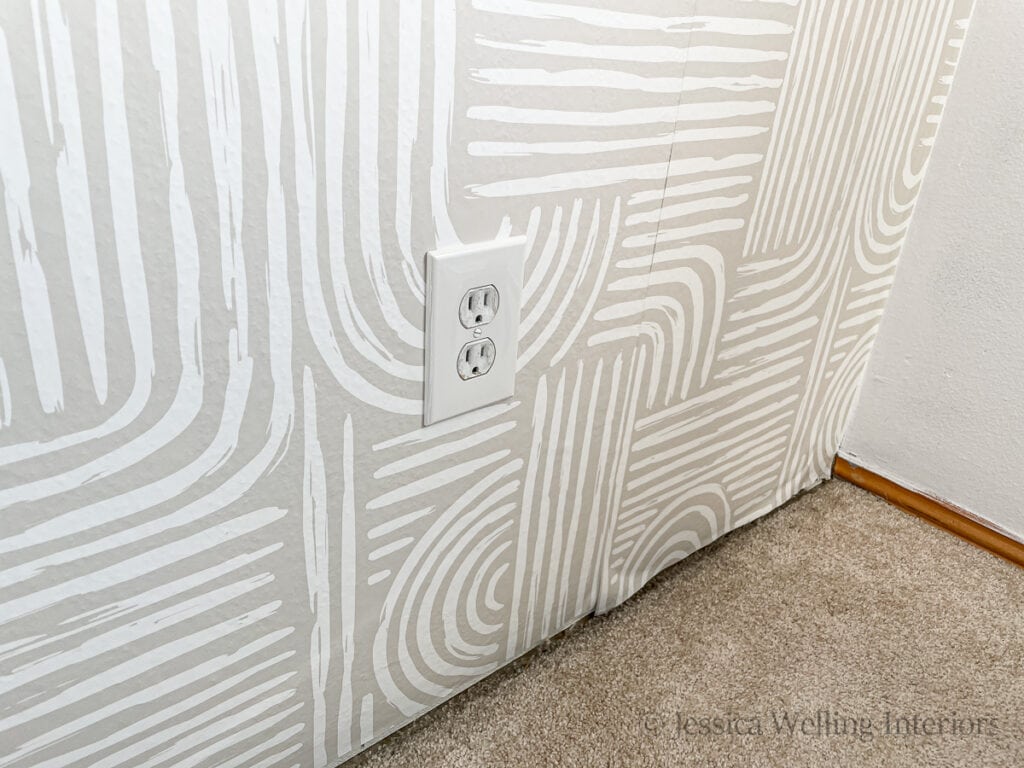
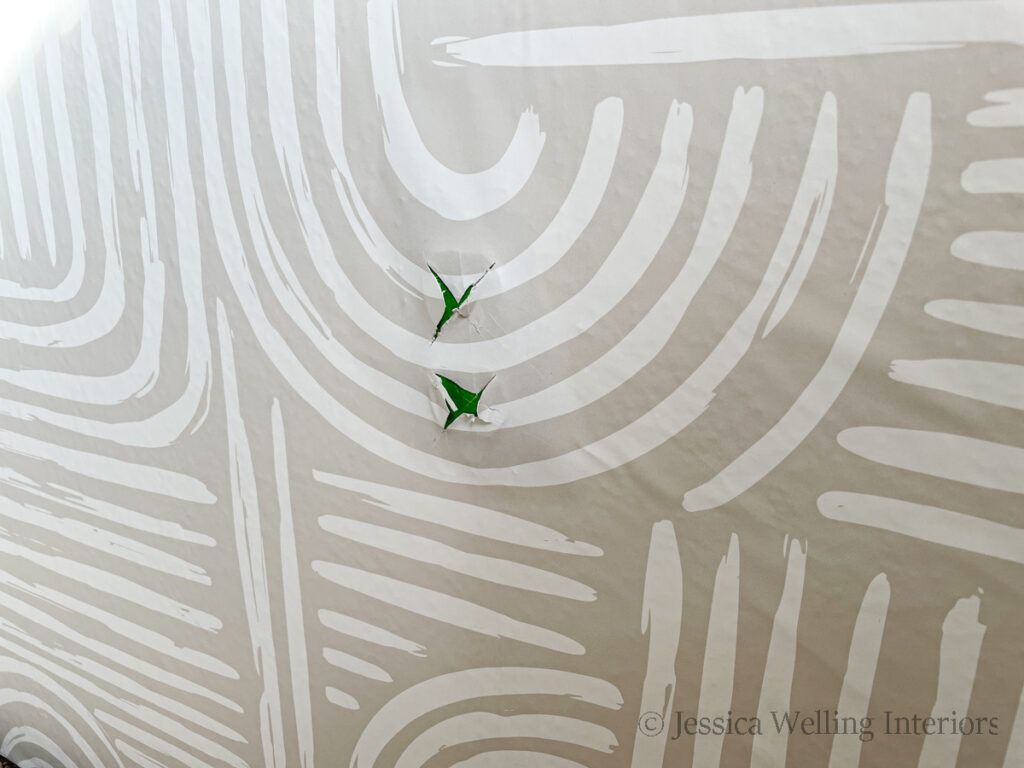
Outlets & Switches
After removing the covers, cover the outlet with masking tape, then run the wallpaper right over the tops of the outlets. I don’t have any light switches on this wall, but you would do the same thing, just making a small incision in the paper where the switch sticks out.
Wait until it’s completely dry (48 hours should do it), then come back and cut around the outlet with a sharp knife.
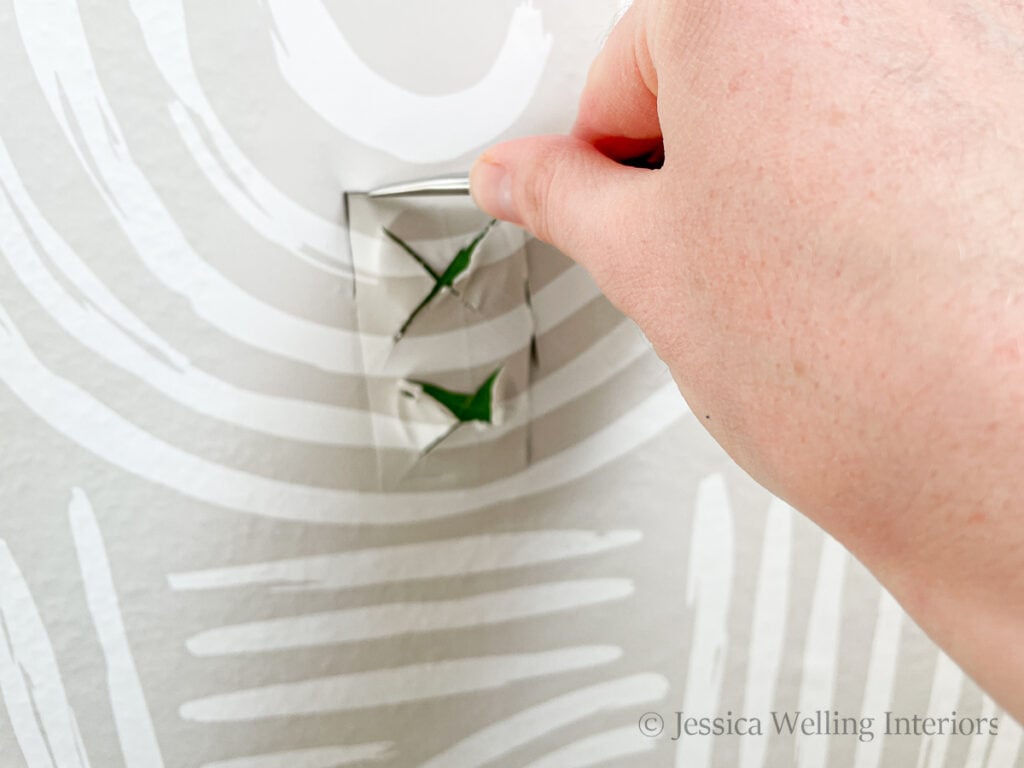
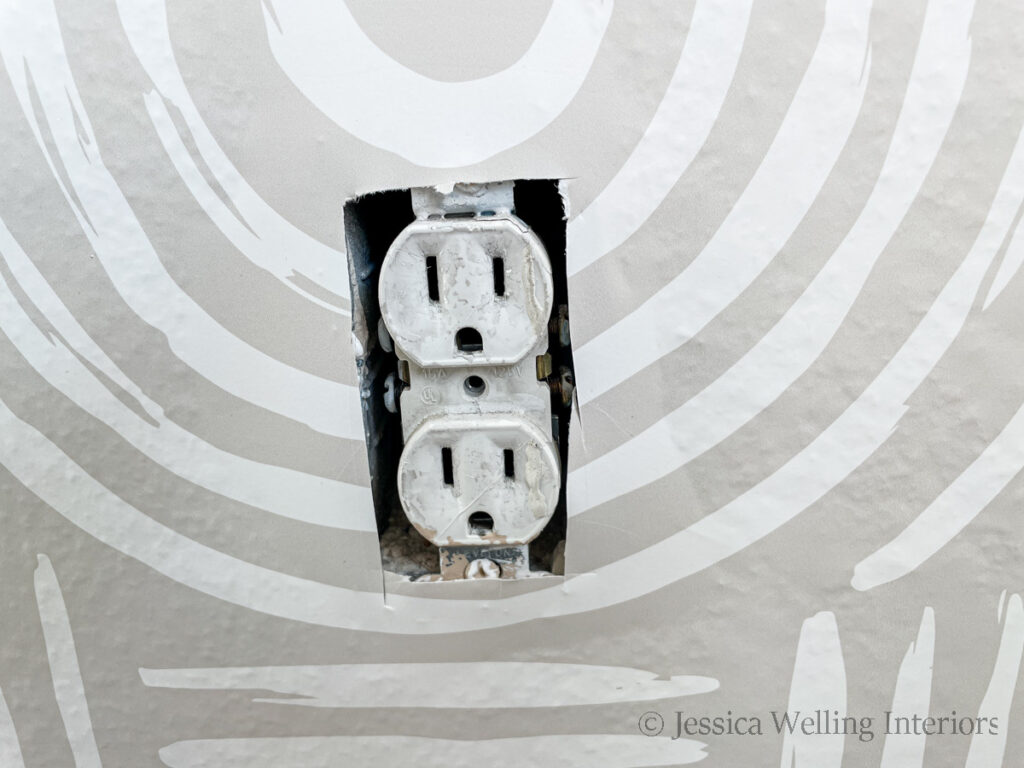
Replace the outlet cover, and you’re good to go.

Helpful Tips
- Recruit a friend to help. This is definitely a two-person job!
- The paper will expand slightly when it gets wet, and shrink as it dries. So it’s best to work quickly and do a whole wall at one time. Otherwise the paper already on the wall will shrink, making it difficult to match up the pattern.
- Once the paper is on the wall, I highly recommend letting it dry for a couple of days before doing any precision cutting, since it will likely shrink as it dries.
My Wallpaper
I think I mentioned it already, but here’s a link to the wallpaper I’m using from Coloritto. I highly recommend it (and no one is paying me to say this!).
Did you find this post helpful? Please share the love and pin it!
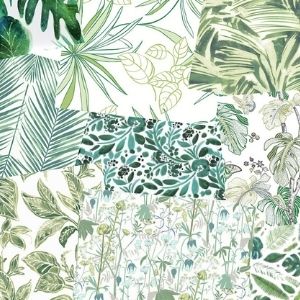
More Wallpaper Ideas…
60 Stunning Botanical Wallpapers for 2024!
200 Cool Wallpapers for Girls’ Rooms
How to Paint a Mural: An Inexpensive Wallpaper Alternative
50 Brilliant DIY Accent Wall Ideas You Need to See!