DIY Wood Jigsaw Puzzle with xTool F1
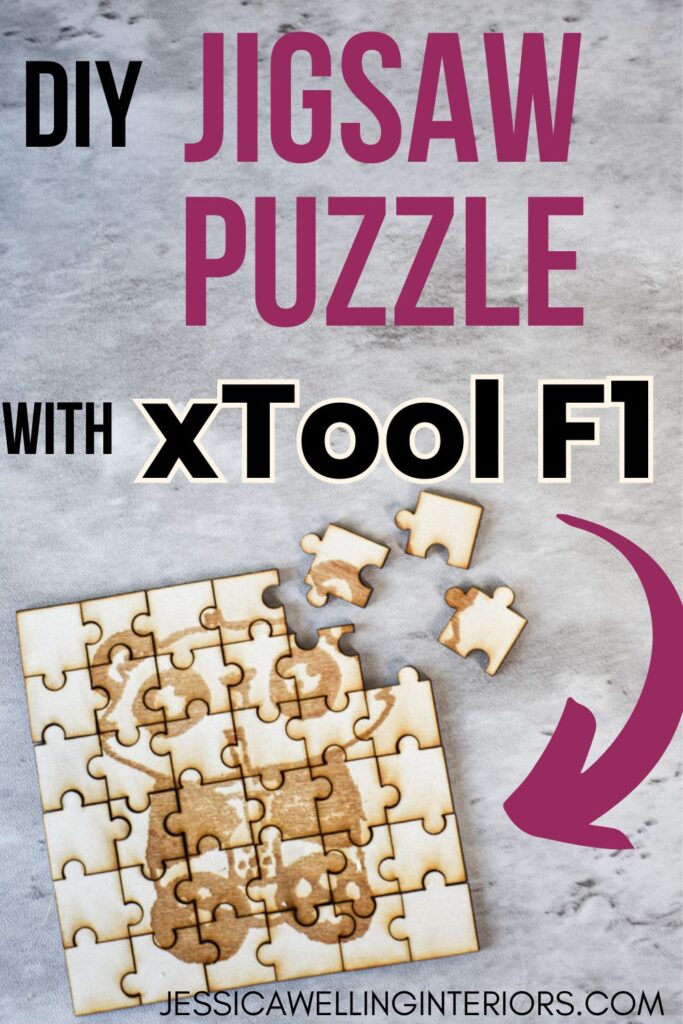
My girls and I have had so much fun playing with our new xTool F1! Today my 10-year-old daughter and I are partnering with xTool making a mini wood jigsaw puzzle engraved with some of her artwork. You can engrave whatever you like on your puzzle, or paint the wood directly and then cut it into a puzzle.
Materials
3mm basswood plywood (I’m using these 12 x 12 sheets from Amazon)

Part 1: Engraving
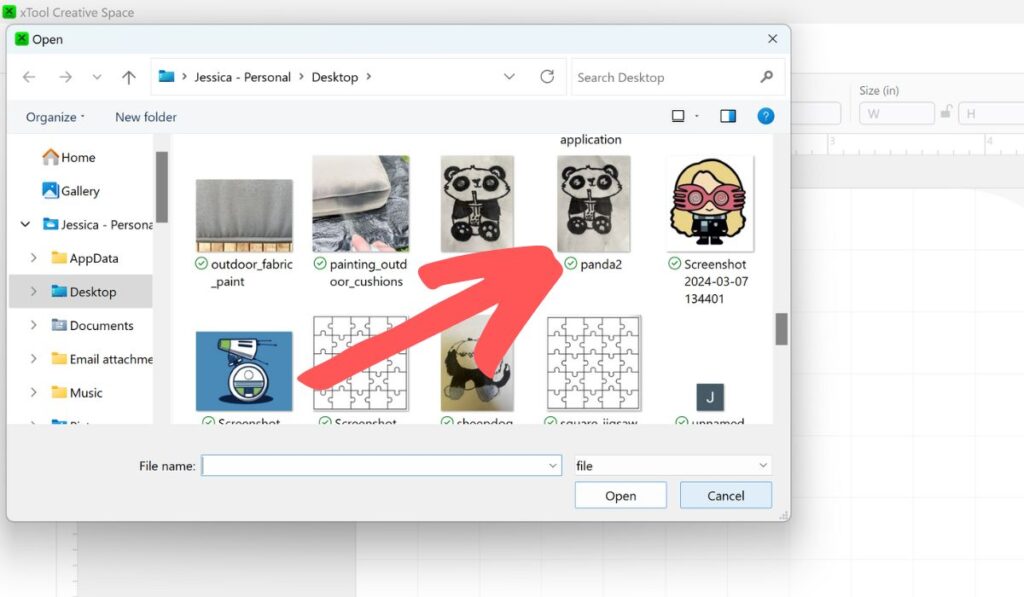
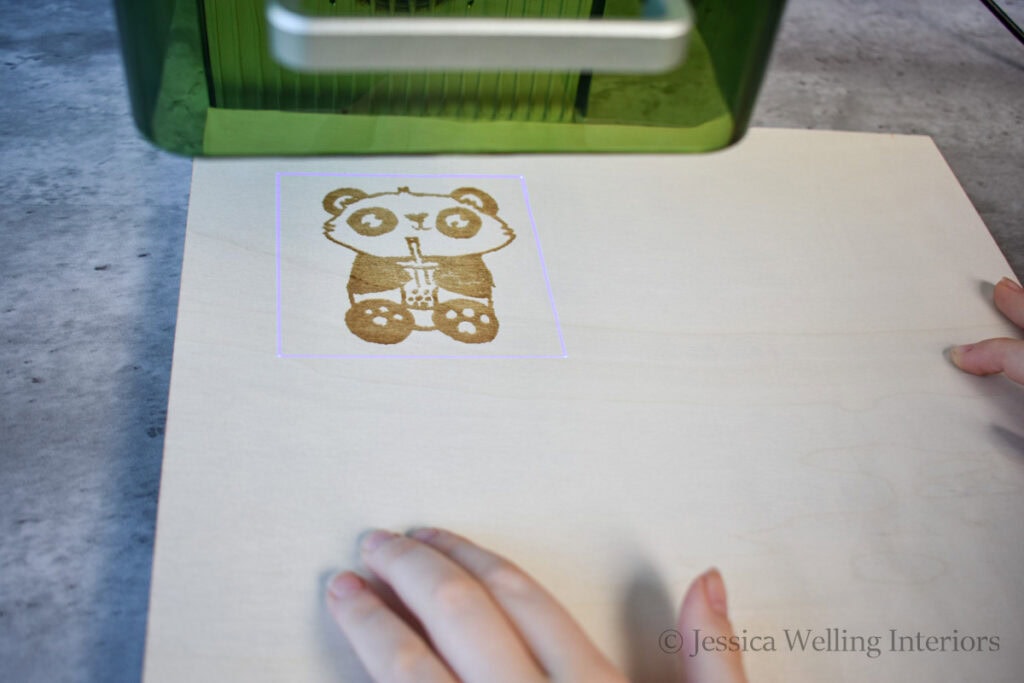
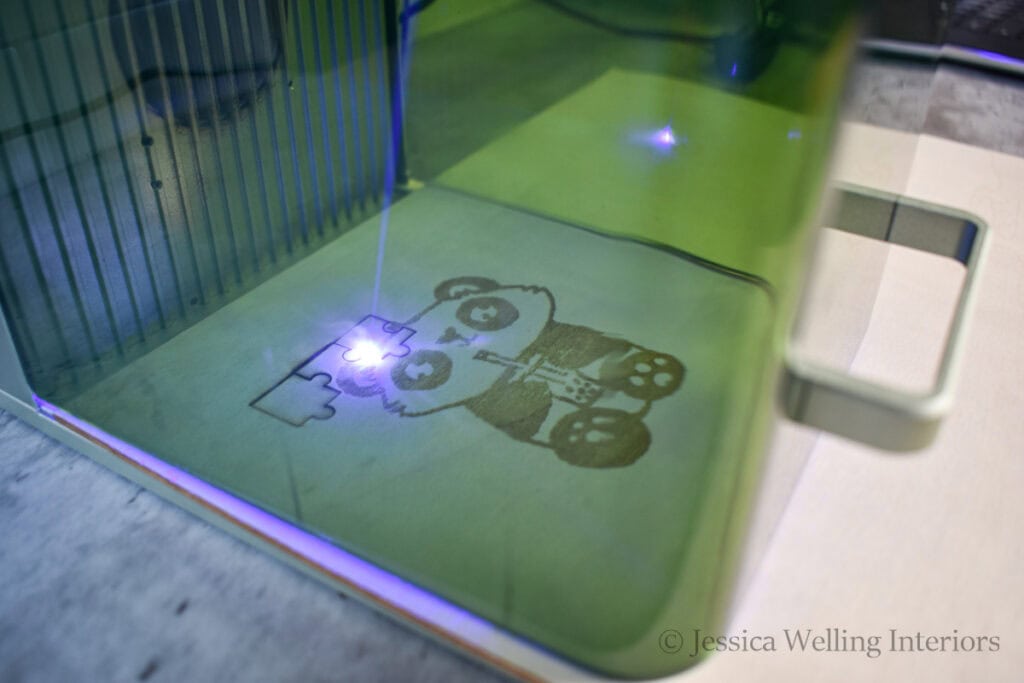
1. Scan your artwork.
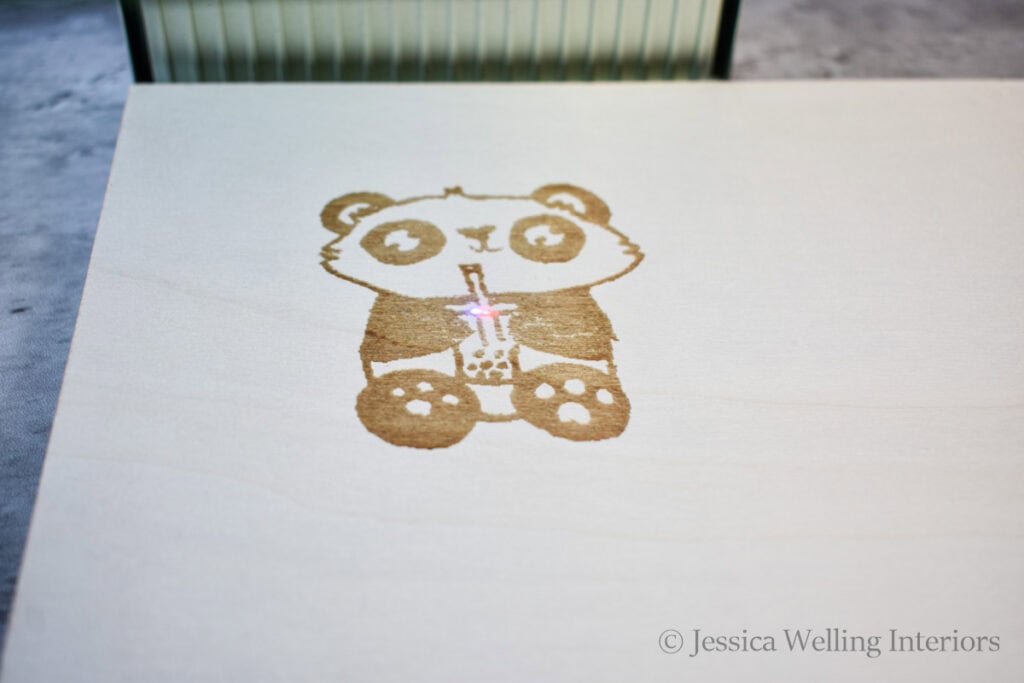
My daughter drew this panda, and we took a photo of it with my phone. You could also scan it, or use any other image you like.
2. Import image.
Open up xTool Creative Space and click “image” in the upper right corner.
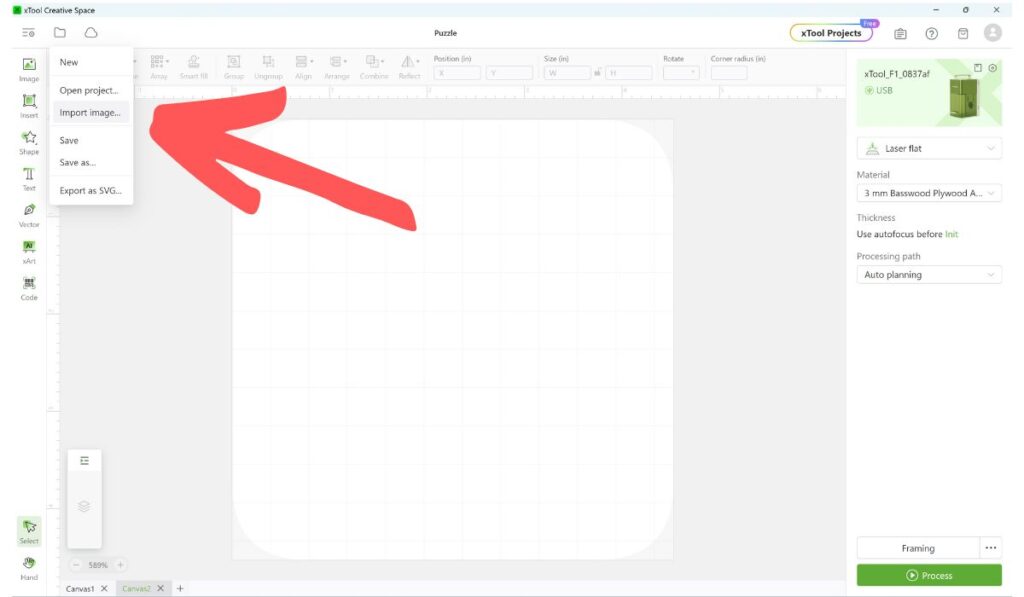
Then select the file you want to open from your computer.
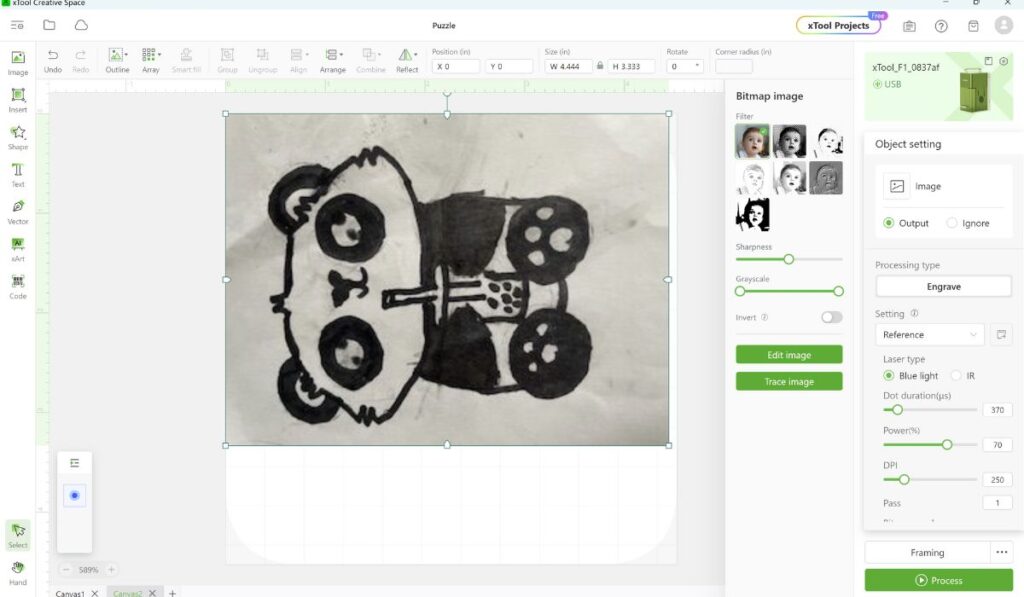
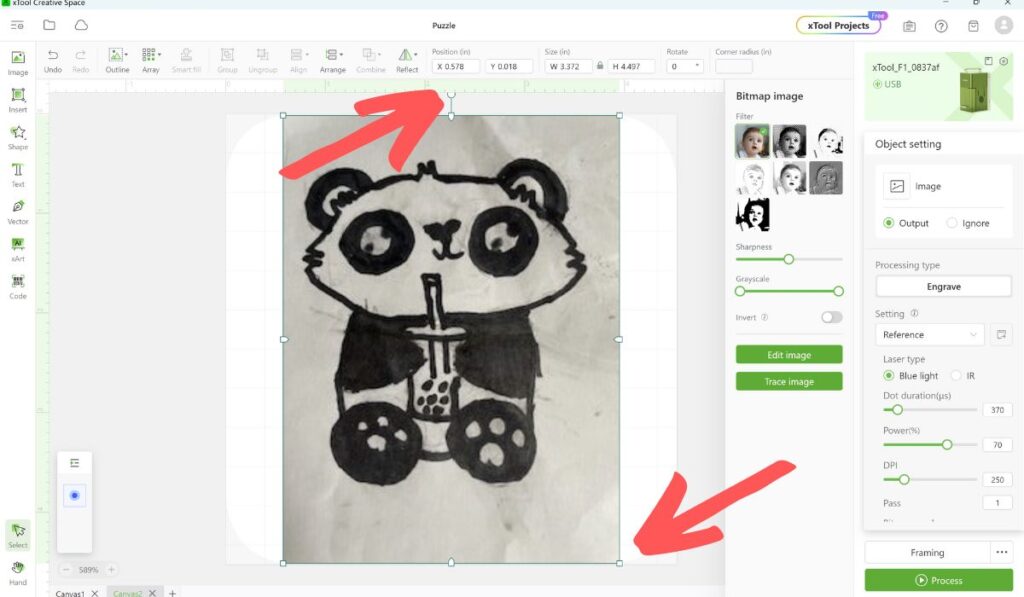
3. Adjust size & rotate image.
Drag your image to resize and rotate it if necessary.
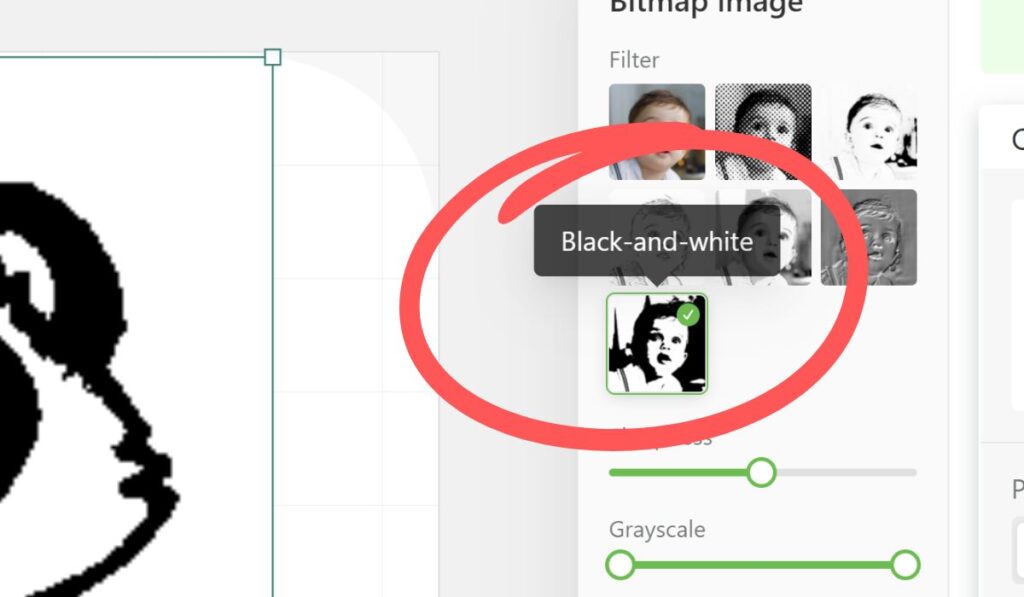
4. Convert image to black & white.
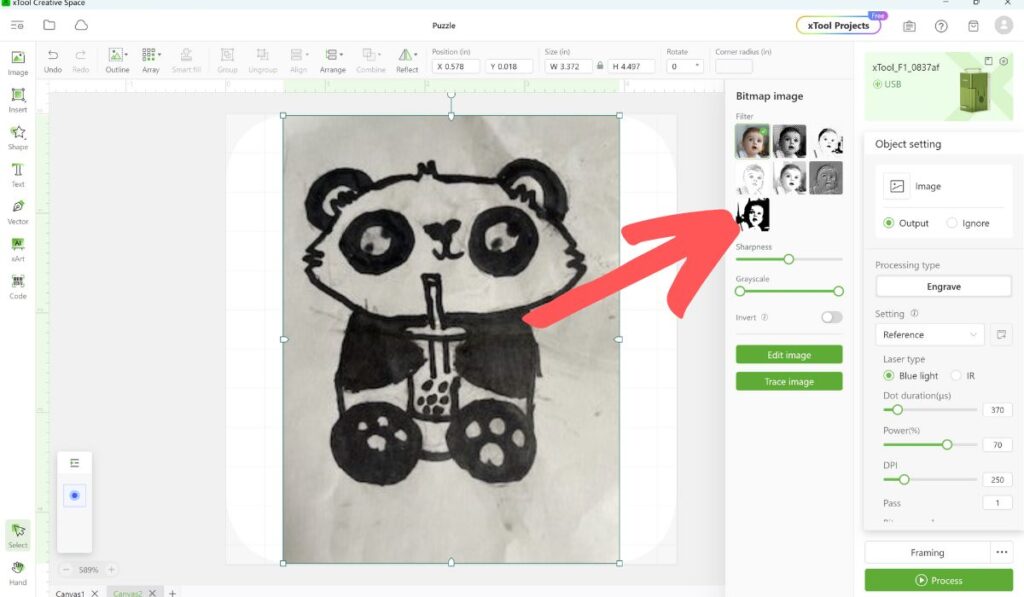
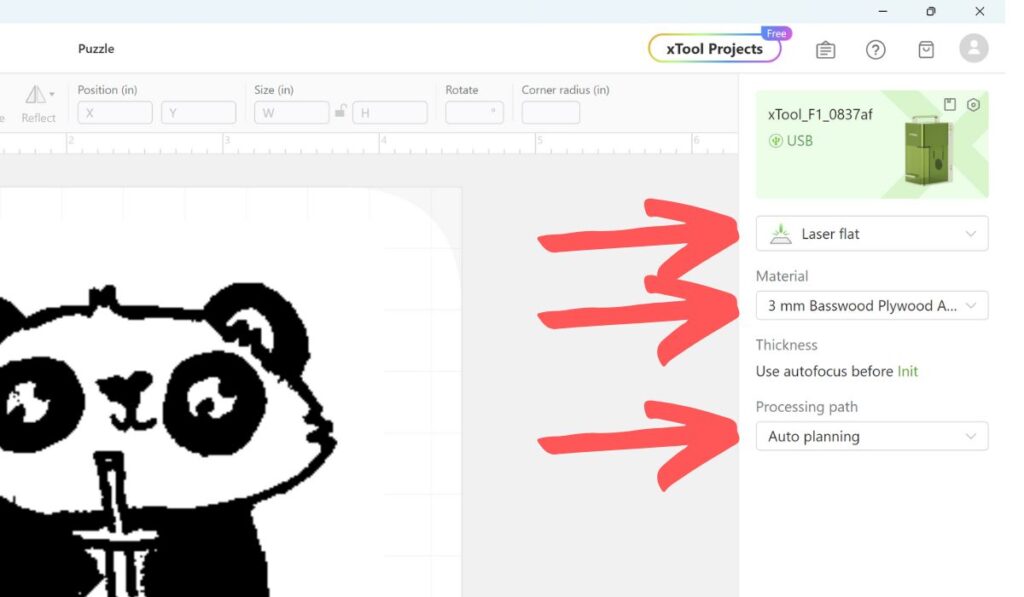
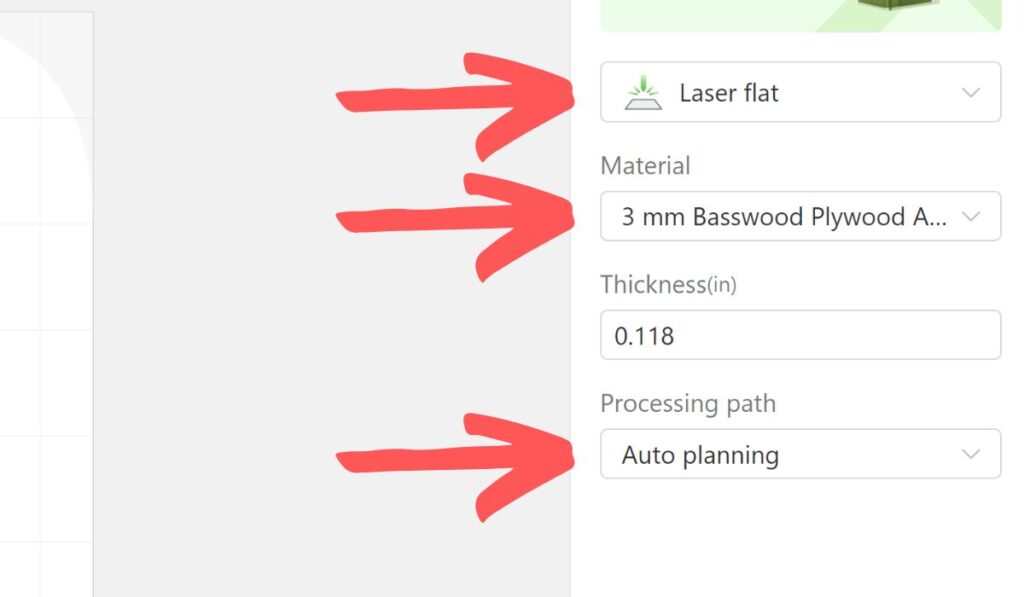
5. Select material settings.
On the right sidebar menu, select the following settings:
Laser flat
Material: 3 mm Basswood Plywood
Processing path: Auto planning
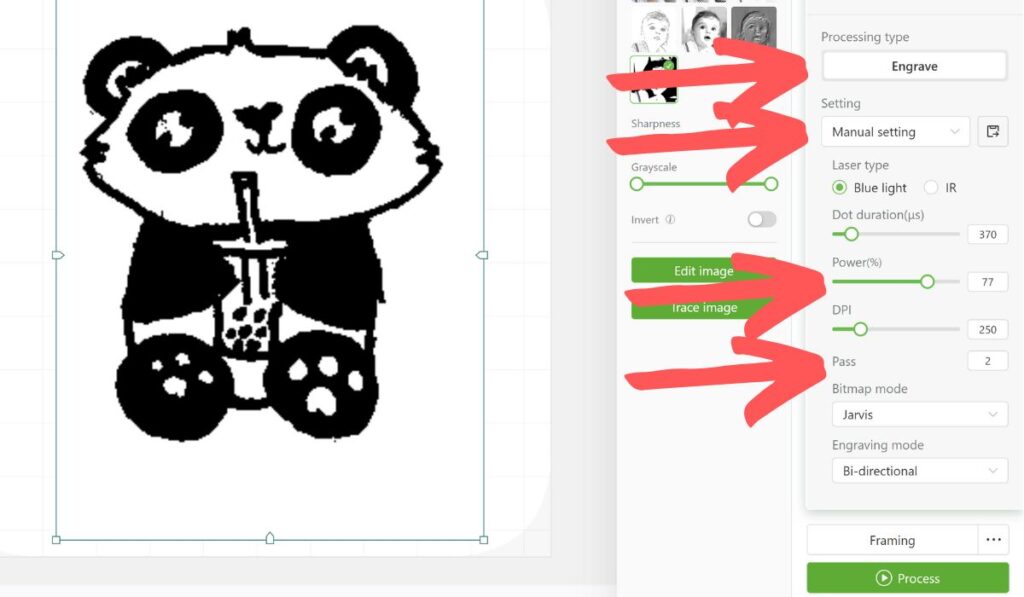
6. Select engraving settings.
Select the following:
Processing type: Engrave
Setting: Manual setting
Power: 77
Pass: 2
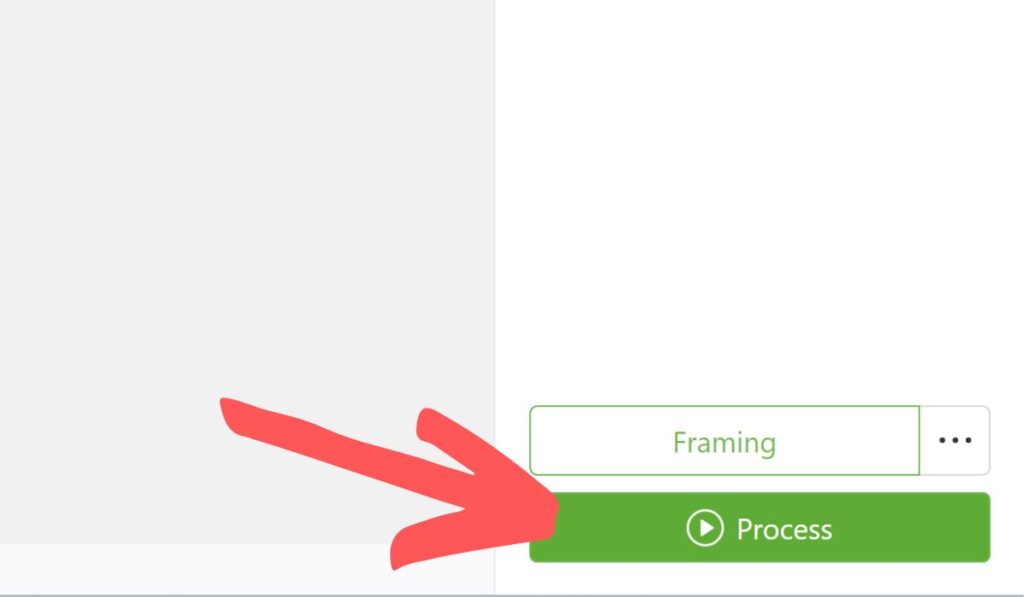
6. Framing
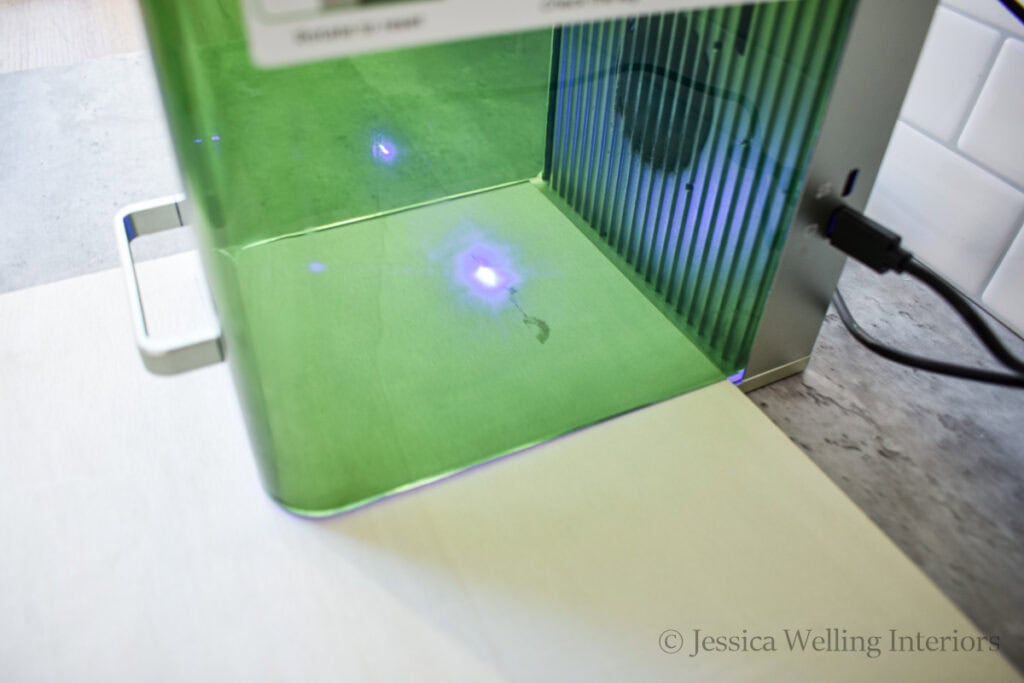
Now click the “Framing” button at the bottom right of the screen.
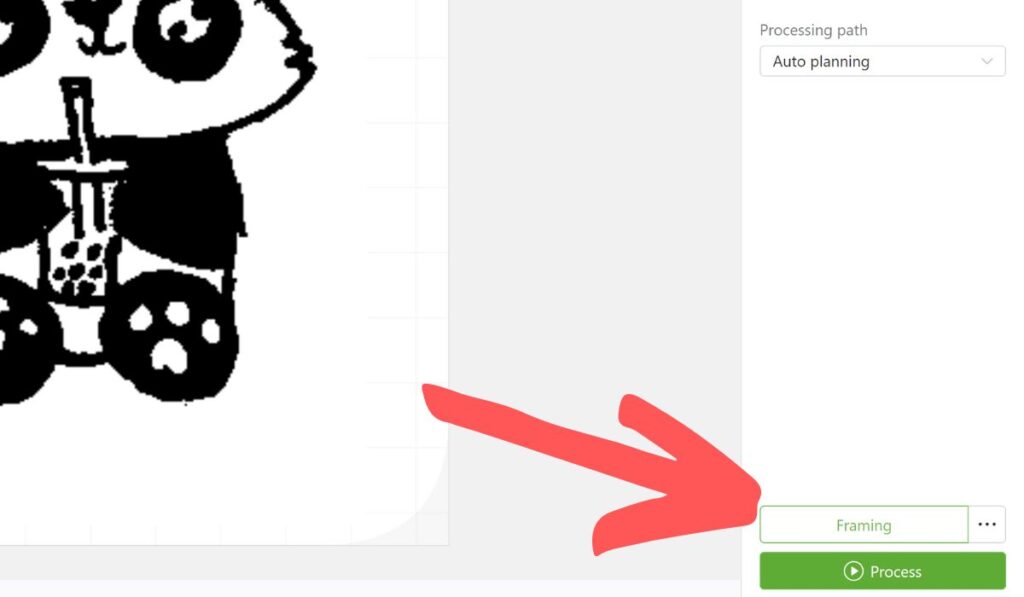
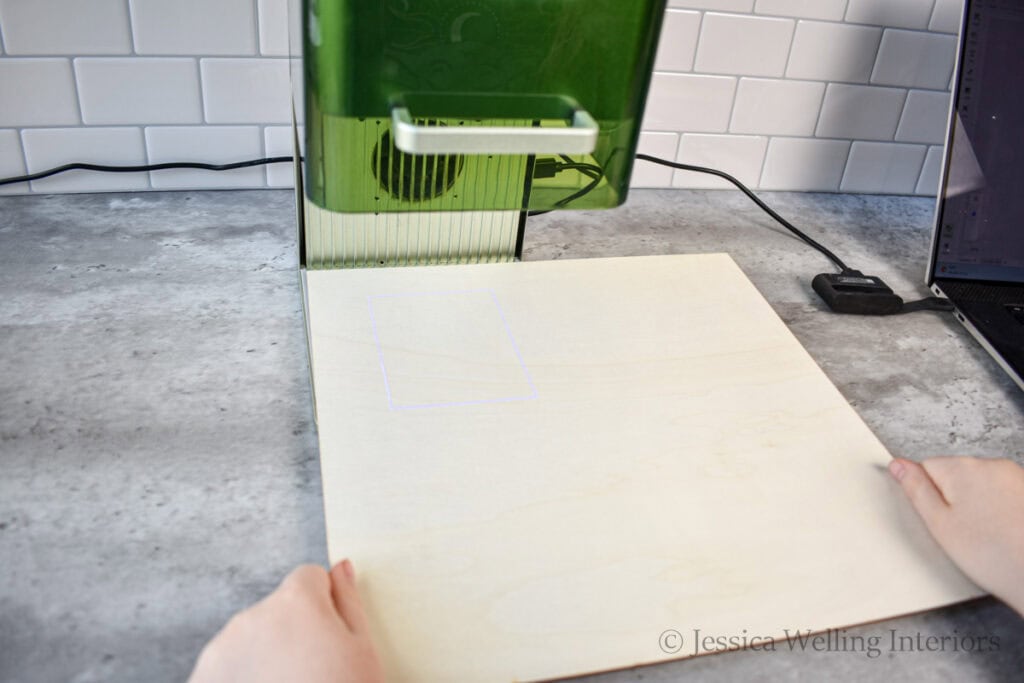
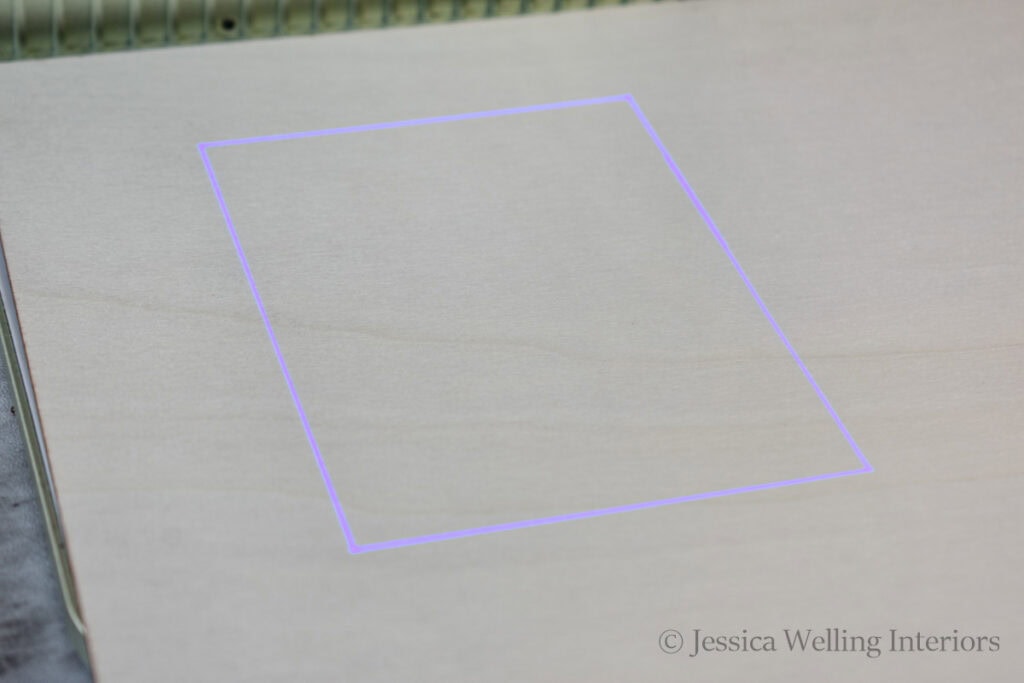
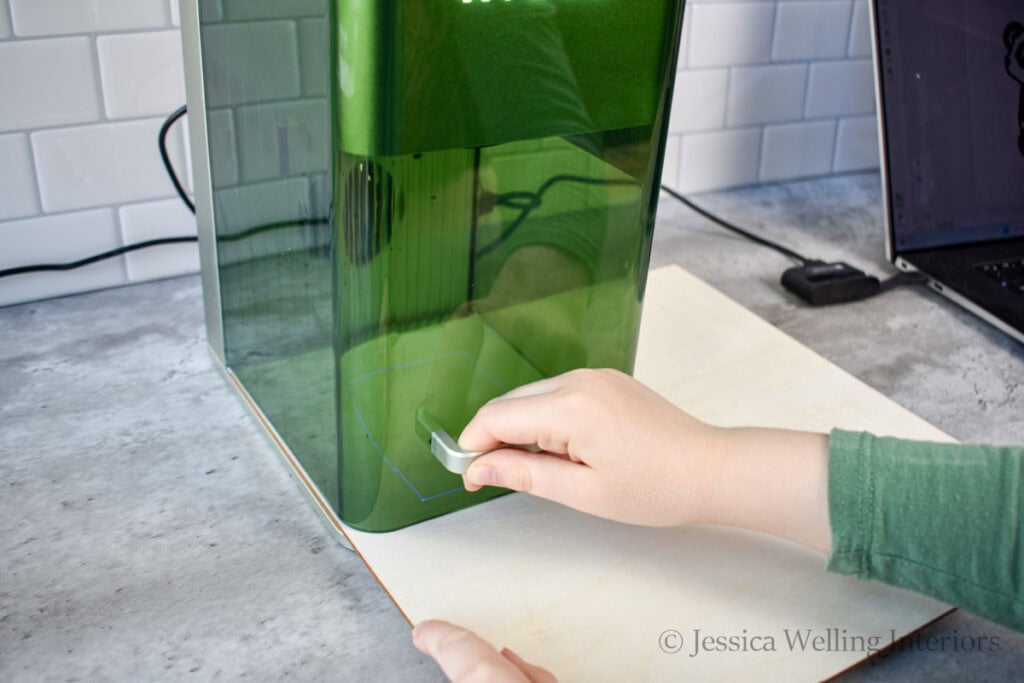
You should see a rectangle outlined with blue light. Place your plywood where you want your image to go.
7. Close the safety cover.
8. Process engraving.
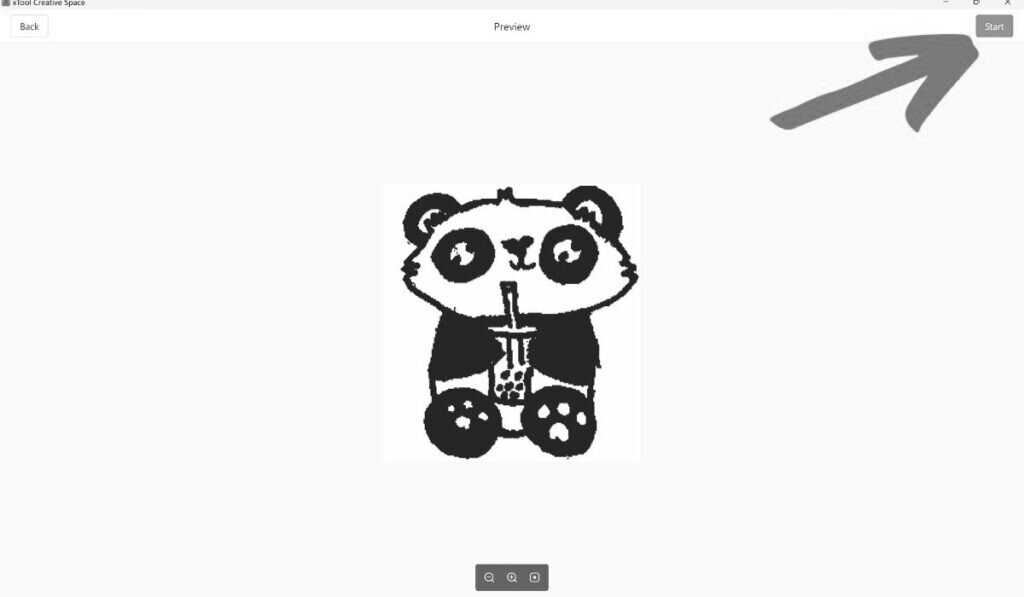
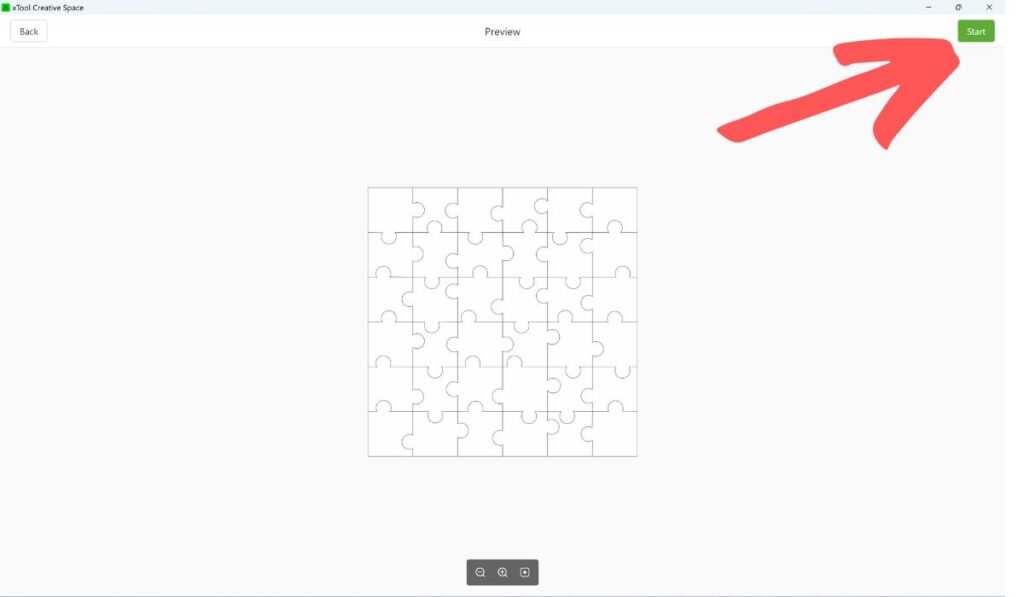
Click “Process.”

You should see the following screen. Click the “Start” button in the upper right corner.
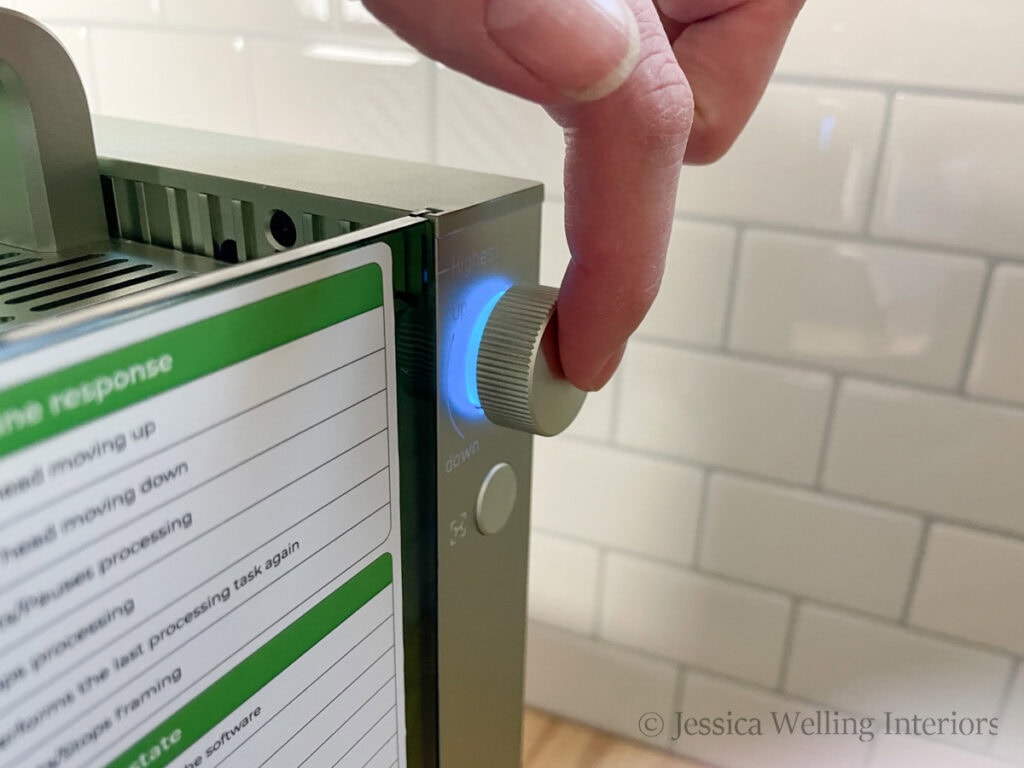
You should hear the machine beep. Press the start button the the right side of the machine.
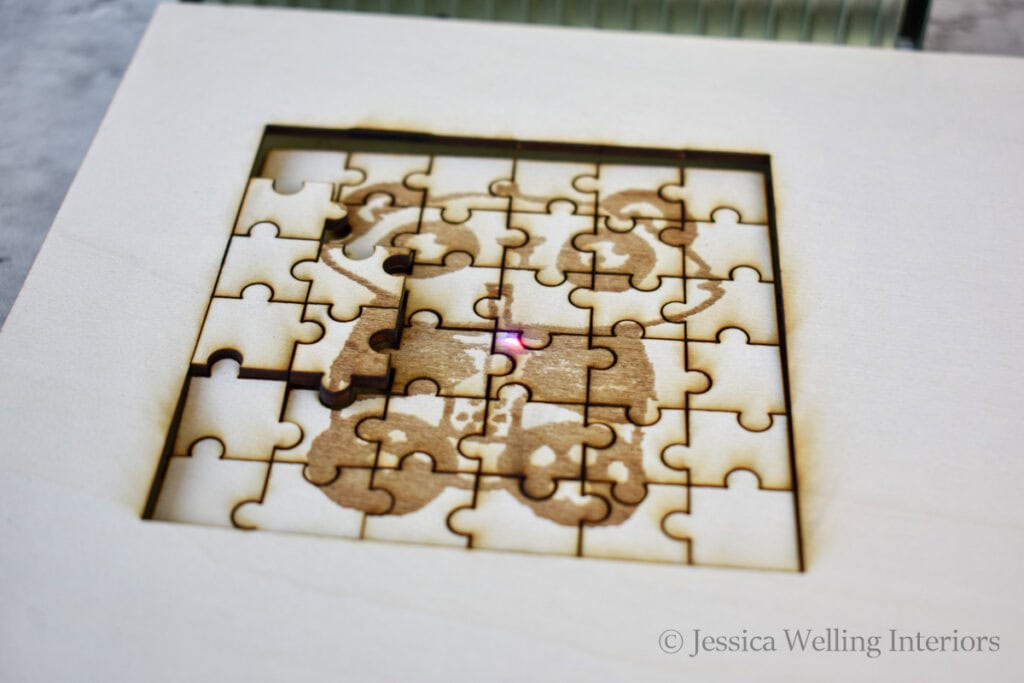
Part 2: Cutting
Now that we’ve engraved our image onto the wood, we’re going to cut it into a jigsaw puzzle.
1. Import the puzzle outline.
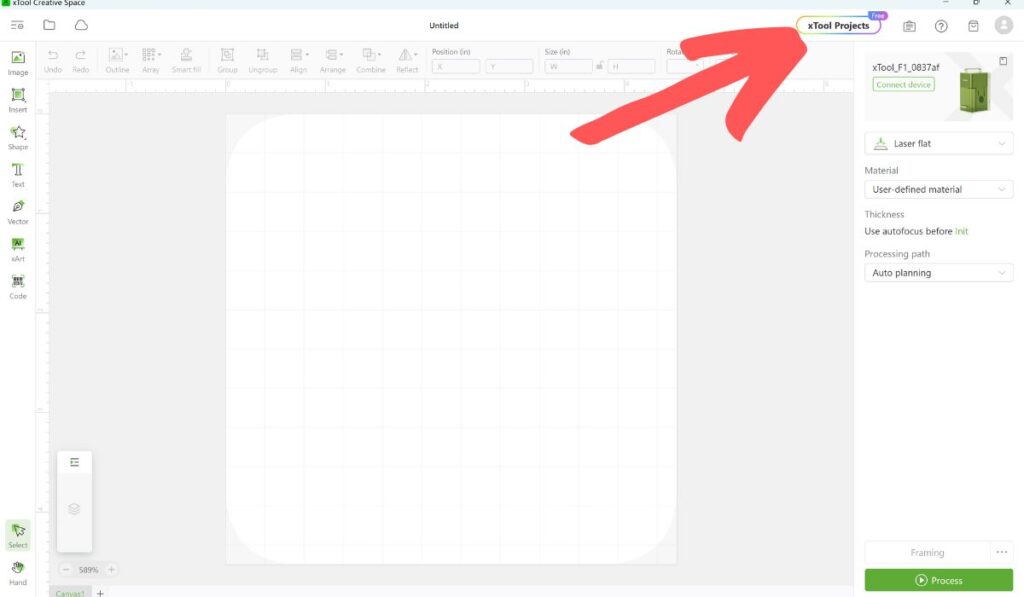
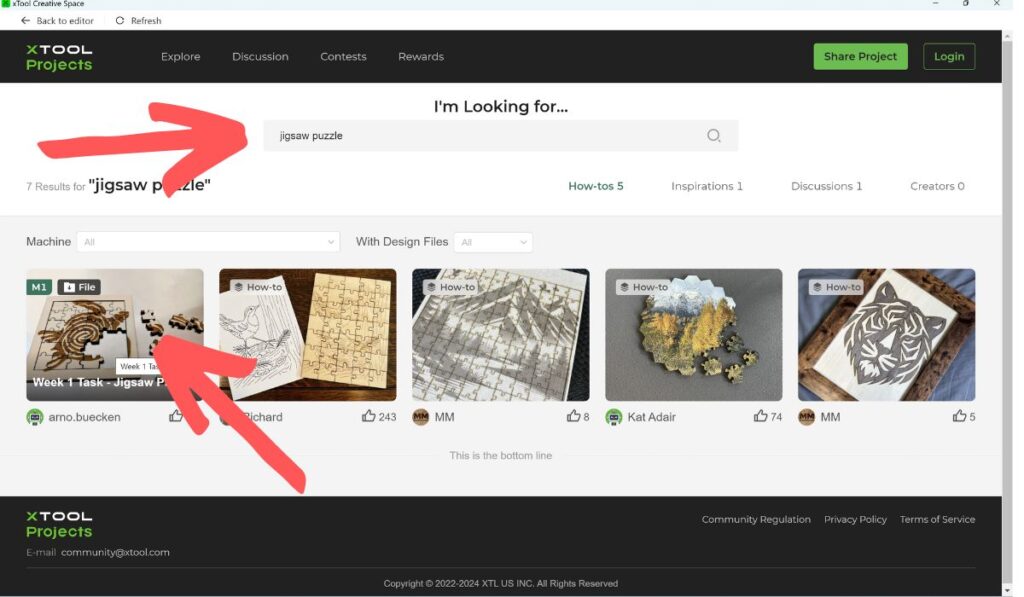
Click “xTool Projects” at the upper right of the screen to open the project library.
Search “jigsaw puzzle” and select the one with the turtle on it.
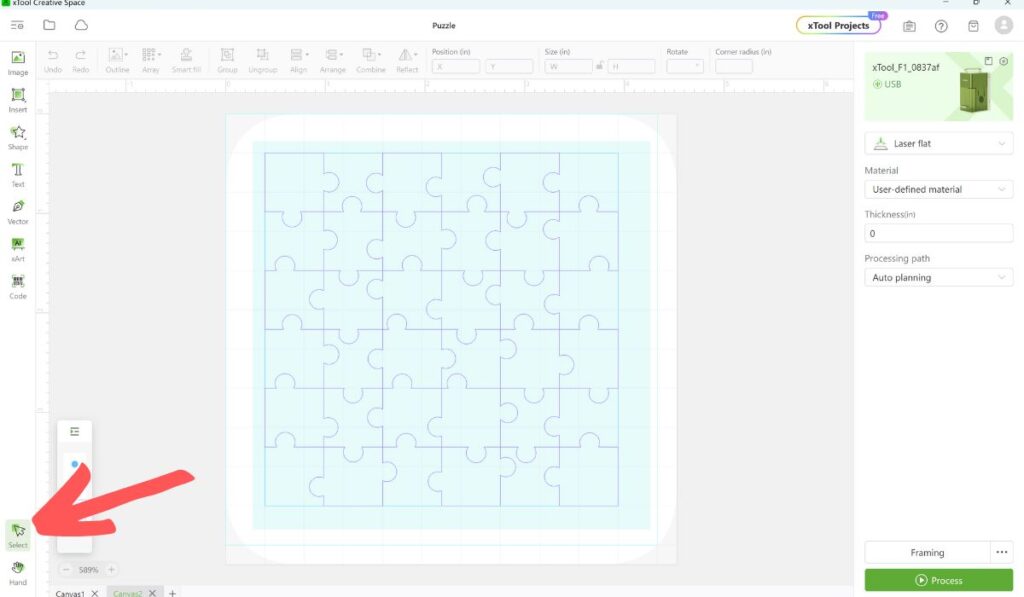
2. Adjust the image size.
Click “Select” at the lower left side of the screen. Then drag the mouse to select all of the jigsaw puzzle lines. This one includes a wood border around the puzzle, but I’m only using the puzzle pieces for this project.
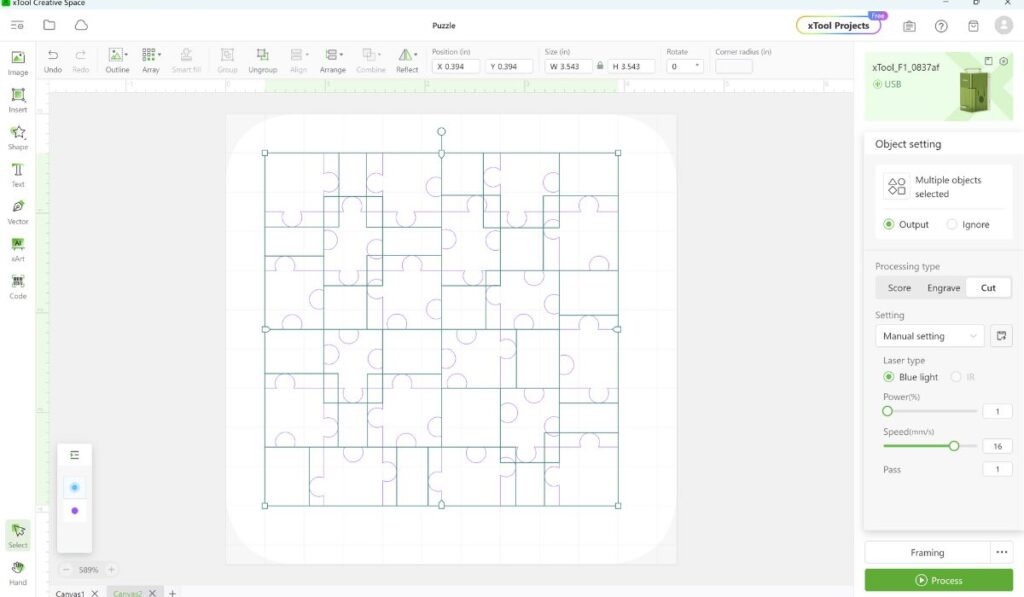
3. Select settings
Select the following:
Laser flat
Material: 3 mm Basswood Plywood
Processing path: Auto planning
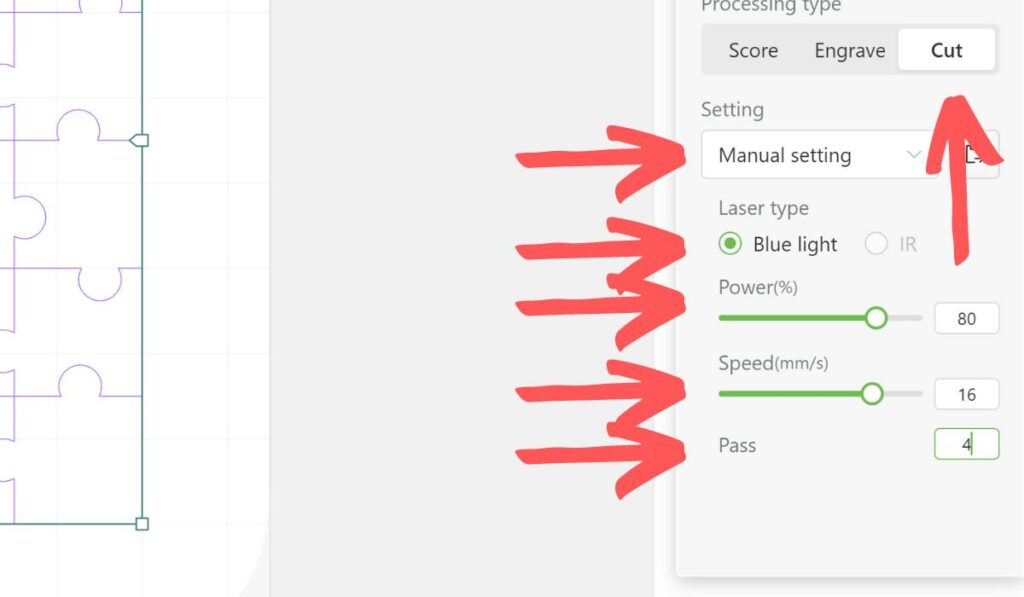
Then select the following cutting settings:
Processing type: Cut
Setting: Manual setting
Laser type: Blue light
Power: 80
Speed: 16
Pass: 4
4. Framing.
Click the “Framing” button at the lower right corner of the screen.
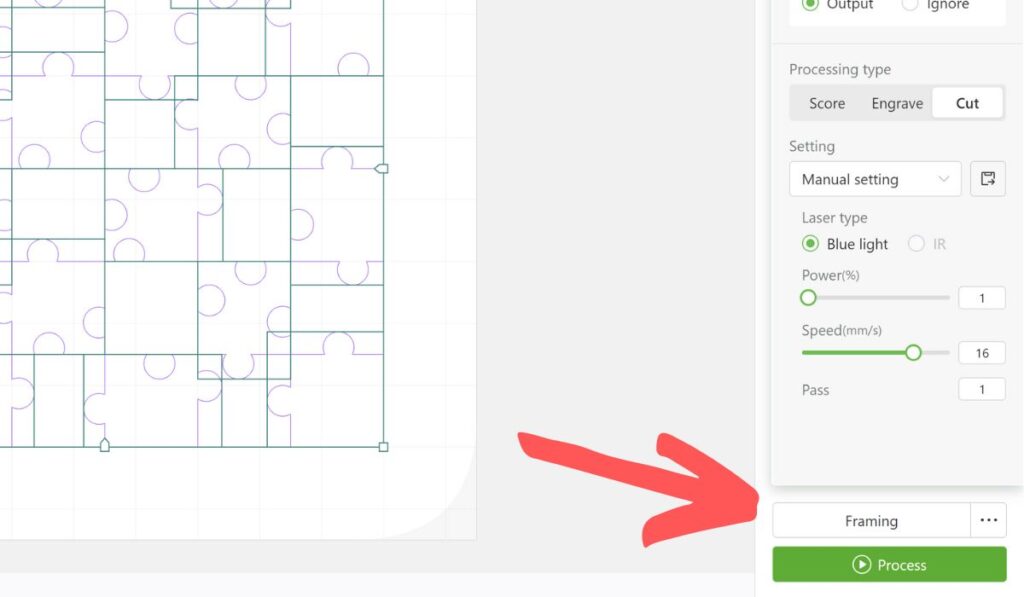
You should see a blue rectangle. Adjust the wood so it’s framing your image, then close the green safety cover.
5. Start cutting.
Click the “Process” button at the lower right corner of the screen.
Click the “Start” button at the top right corner of the screen. You should hear the machine beep. Press the start button on the machine, and watch it do its magic!
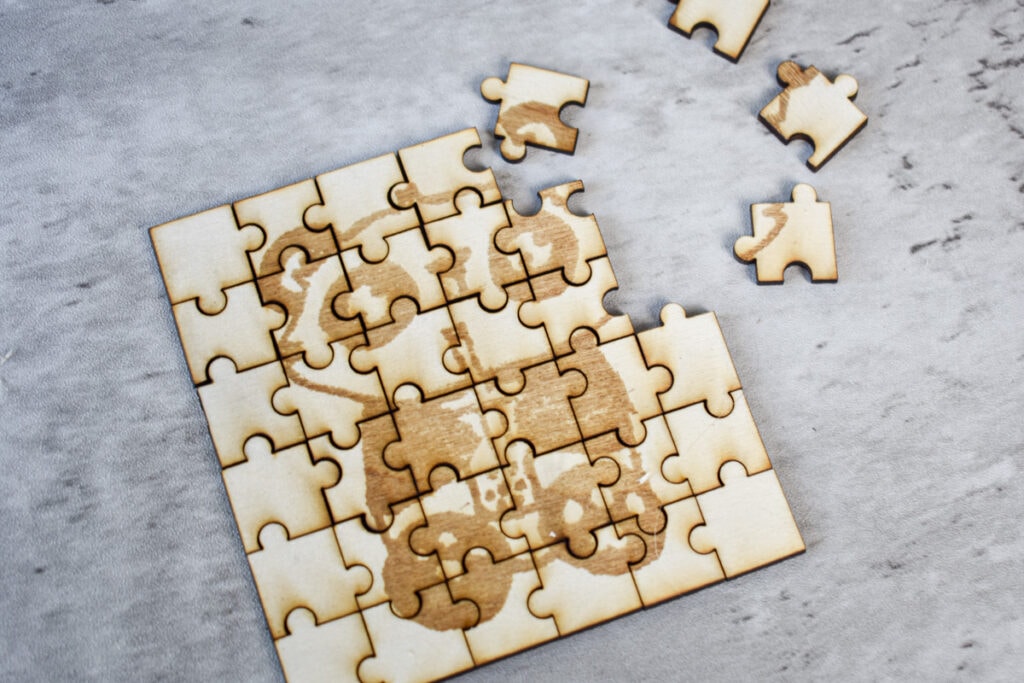
And that’s it! My daughter has had so much fun making puzzles to give to her friends.
More xTool Ideas…
Engraving Metal Candle Lids with xTool F1
Engraved Wood Coasters with xTool F1
Engraving Wood Candle Lids with xTool F1