
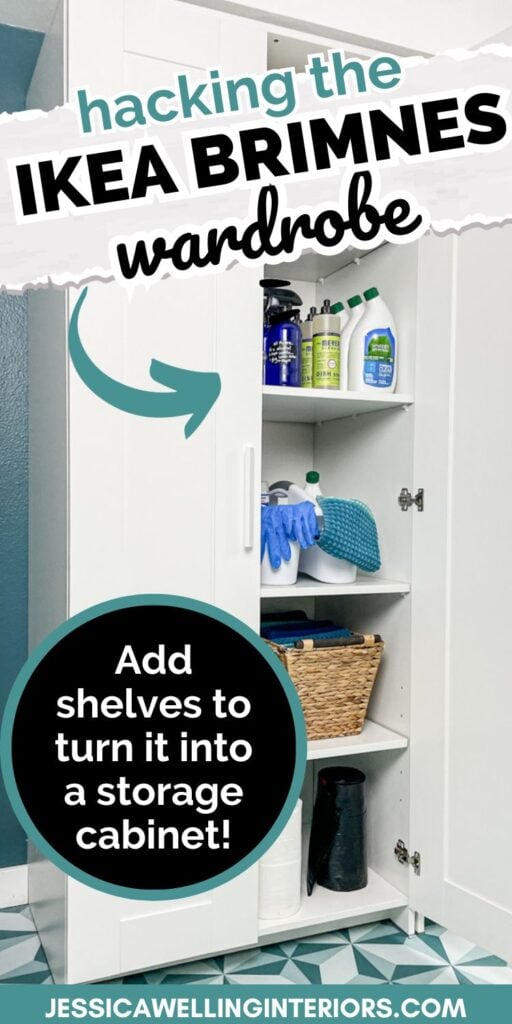
Ikea Brimnes Wardrobe Hack: Adding Shelves
Turn an inexpensive wardrobe into a chic and functional storage cabinet with this easy Ikea Brimnes wardrobe hack!
After a couple of years in this house, I decided it was time for a laundry room makeover. No walls were moved, but I did rearrange things and make the space MUCH more functional. I had open shelving on the right to store extra pantry items and cleaning supplies, but it always looked messy. And around here I like to try and pretend there’s no mess by hiding it inside cabinets.
Pretty, huh? Don’t worry this is the BEFORE pic.
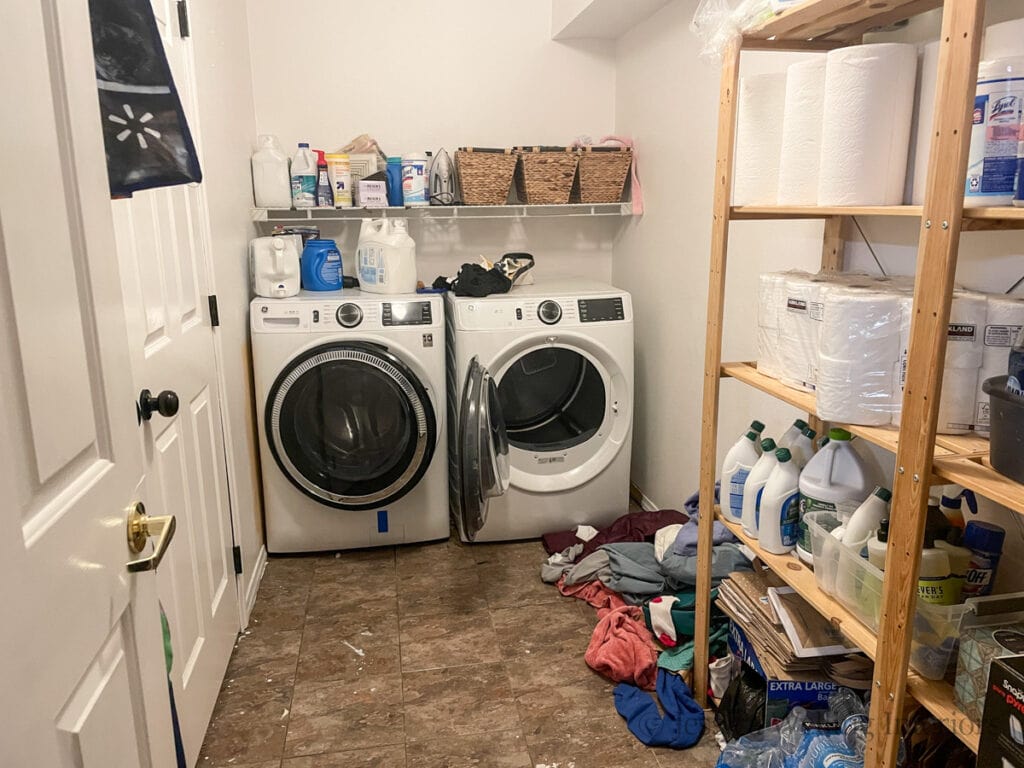
This is also the passage from the garage into the house, so keeping the main pathway clear was a top priority.
Why Use Brimnes Wardrobes?
I looked into a few different options for my laundry room storage cabinets. I’m a big fan of Ikea’s PAX wardrobe system and I already have 10 (yes you read that right- 10!) of them in other places in my house. But I needed something a bit shallower and less expensive for this space.
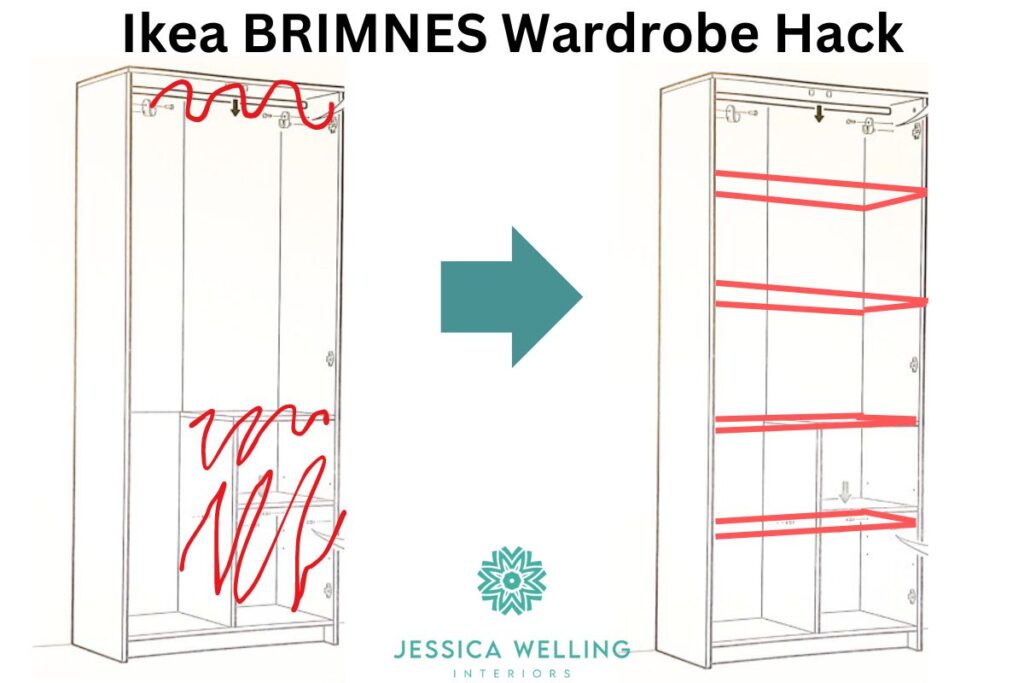
At just under 20 inches deep, the BRIMNES wardrobe was just the thing. Plus it comes with doors and hinges, which can really add up. The only downside? It isn’t set up for multiple shelves, and I want to use it as a storage cabinet instead of a wardrobe.
A similar setup of the PAX system would have cost over $600, while this one was about $340.
Materials
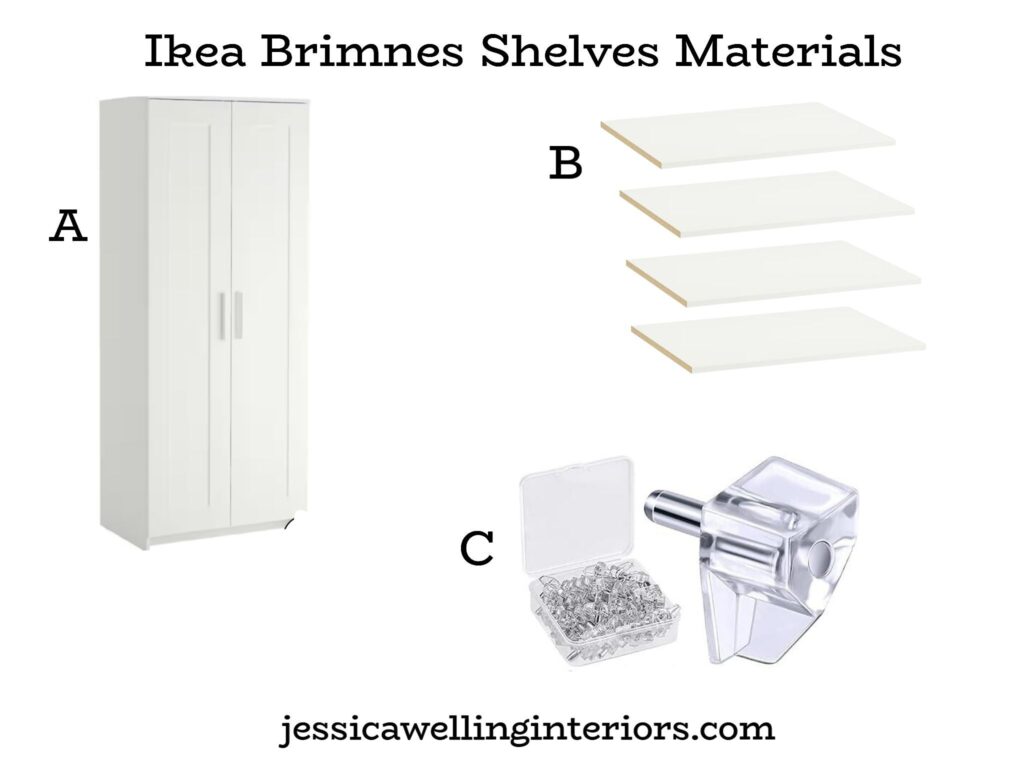
A. Ikea Brimnes Wardrobe (I’m using the 2-door version the this could also work with the 3-door model)
B. shelves
C. Shelf support pegs (6 per shelf)
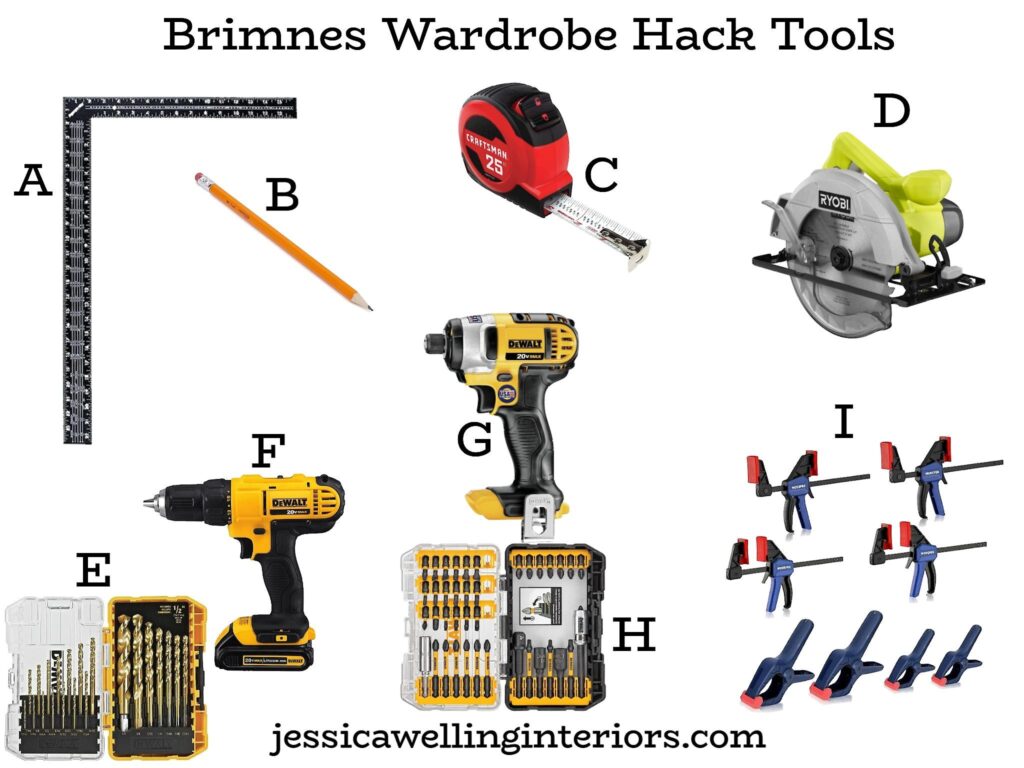
Tools
Directions
1. Build the wardrobe.
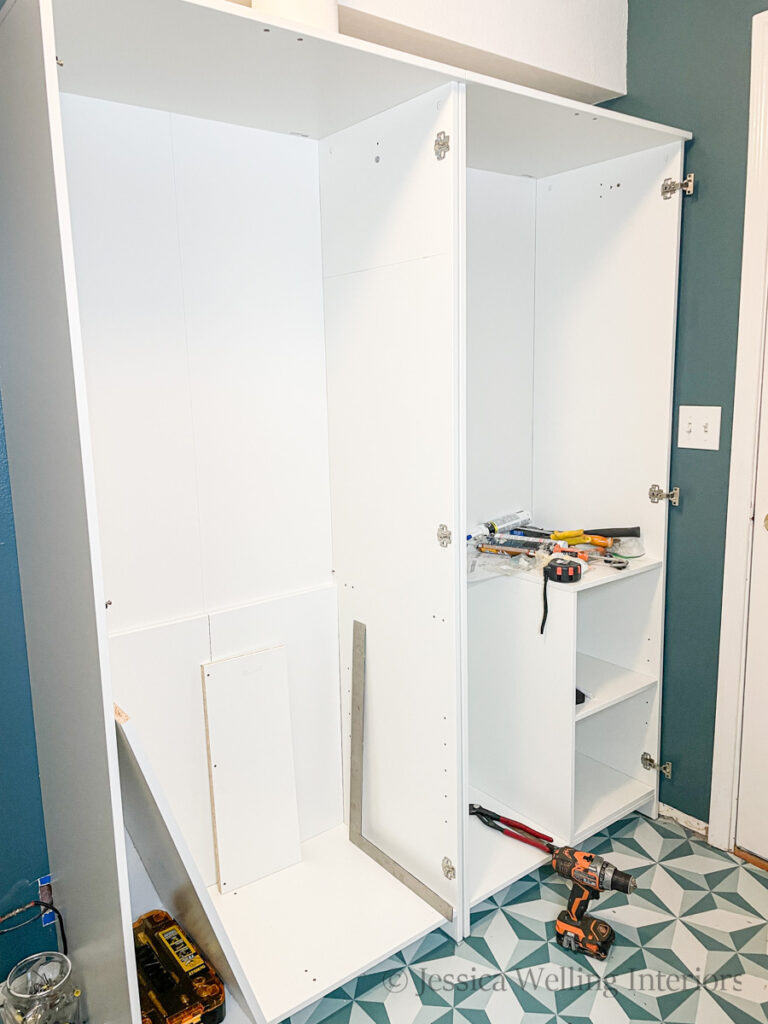
Assemble the cabinet/s according to the instruction manual. The wardrobe comes with a short half-shelf and a closet rod. I omitted both of those in the wardrobe on the left in my photos.
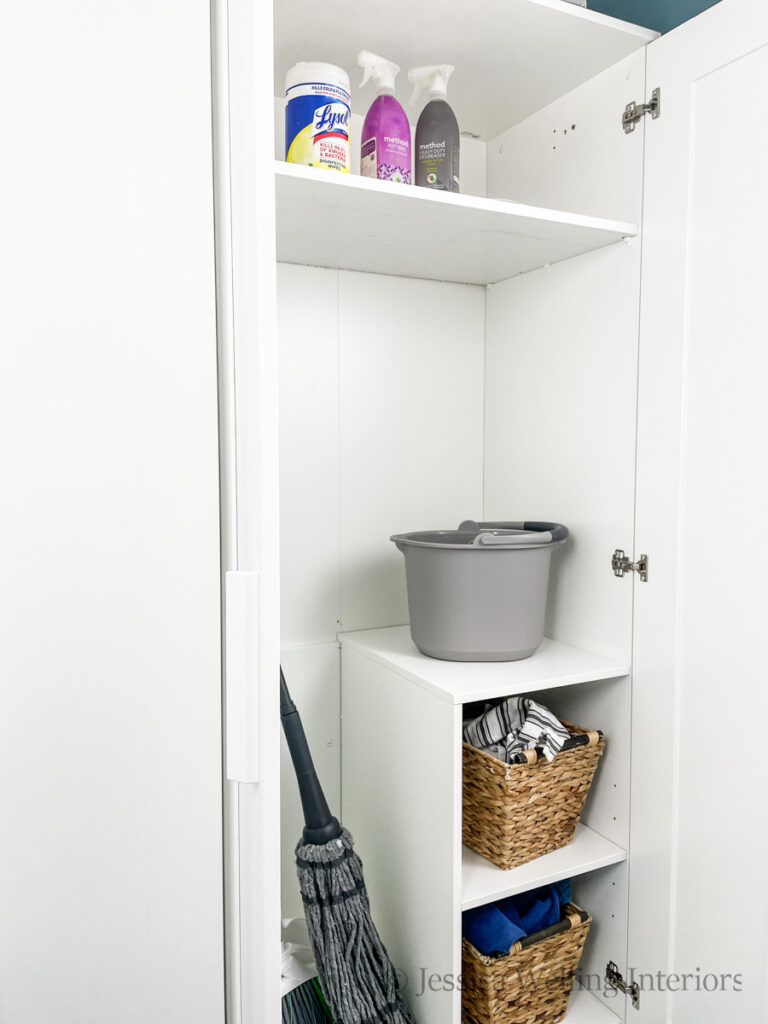
Note: On the second one, I omitted the rod but included the small half shelf because I wanted a tall skinny space to store a broom, mop, and vacuum cleaner. I just added a single shelf toward the top of the cabinet. Most of the photos will show the other cabinet, but I’ll show you this one as well at the bottom of the post.
Then stand them up. We secured them to the wall as well, using the included hardware.
2. Measure & determine desired number of shelves.
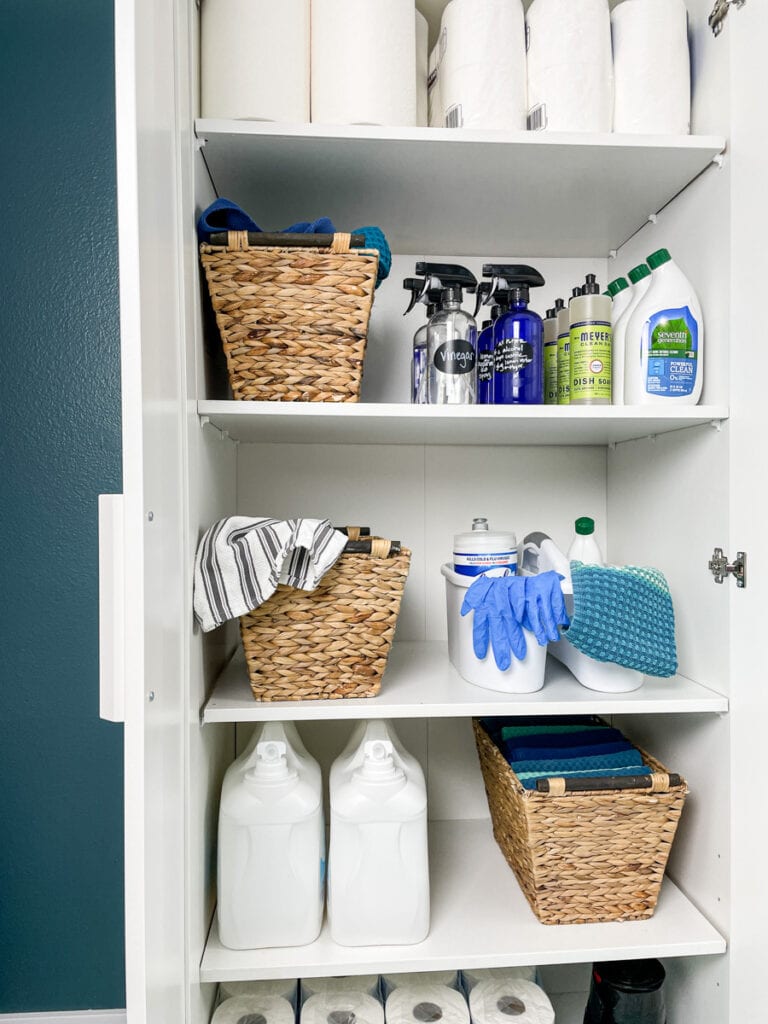
I’m planning to store cleaning supplies in these cabinets, with the tallest items I need to store being extra rolls of paper towels, so I opted for four shelves.
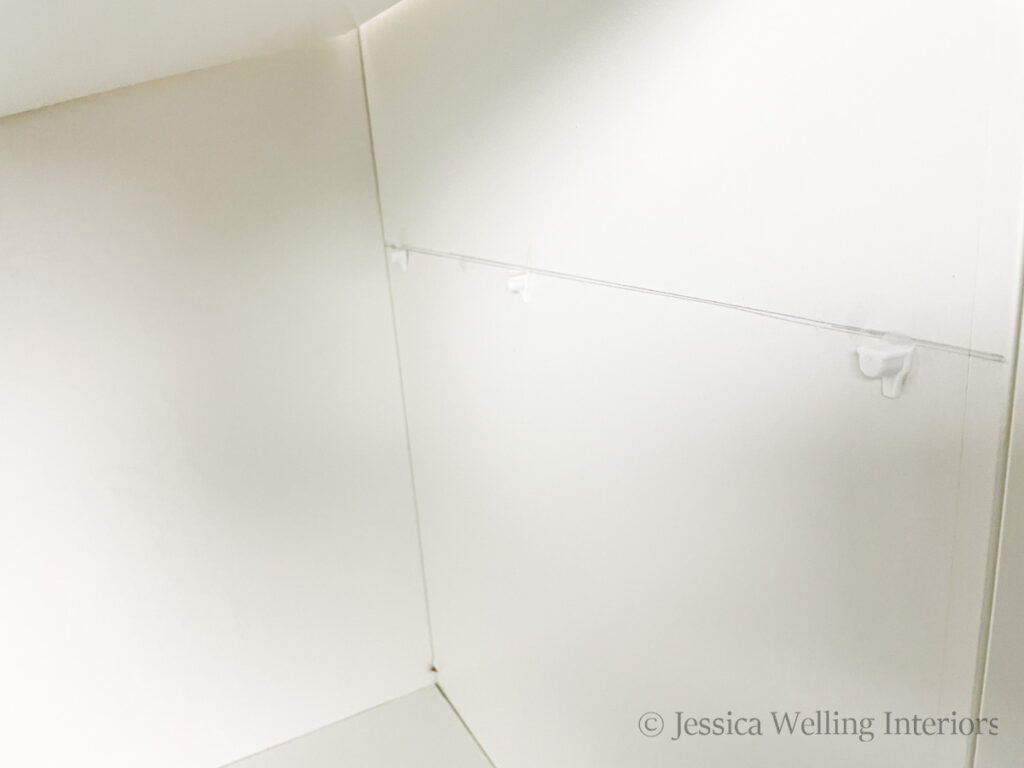
3. Draw level lines
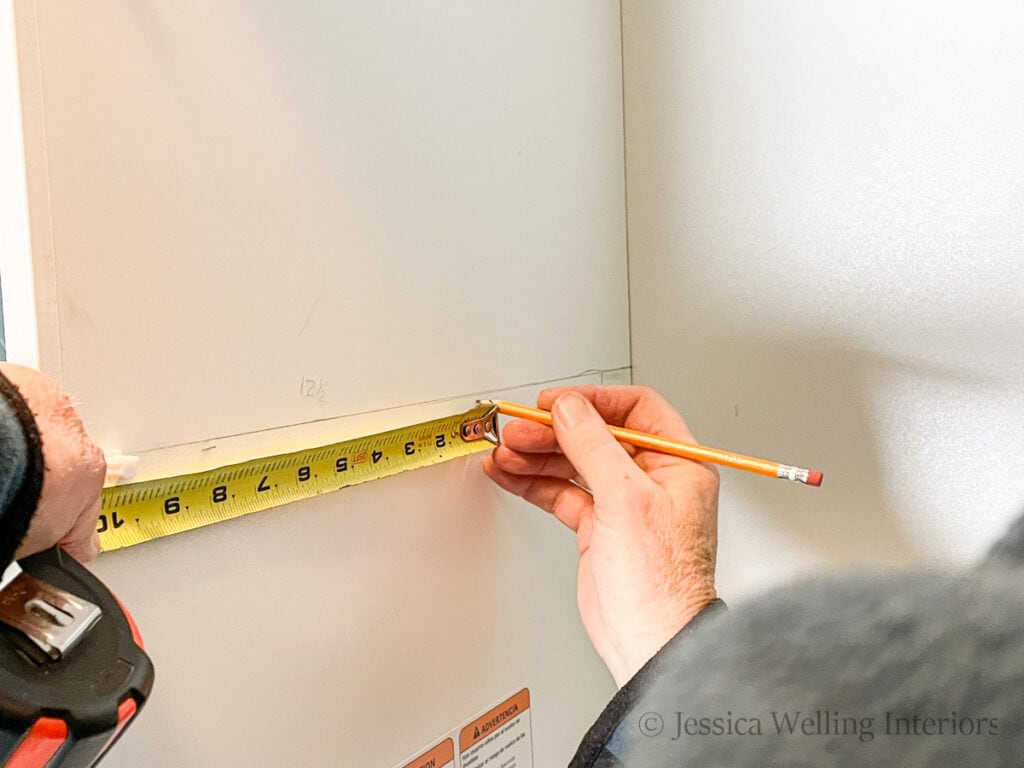
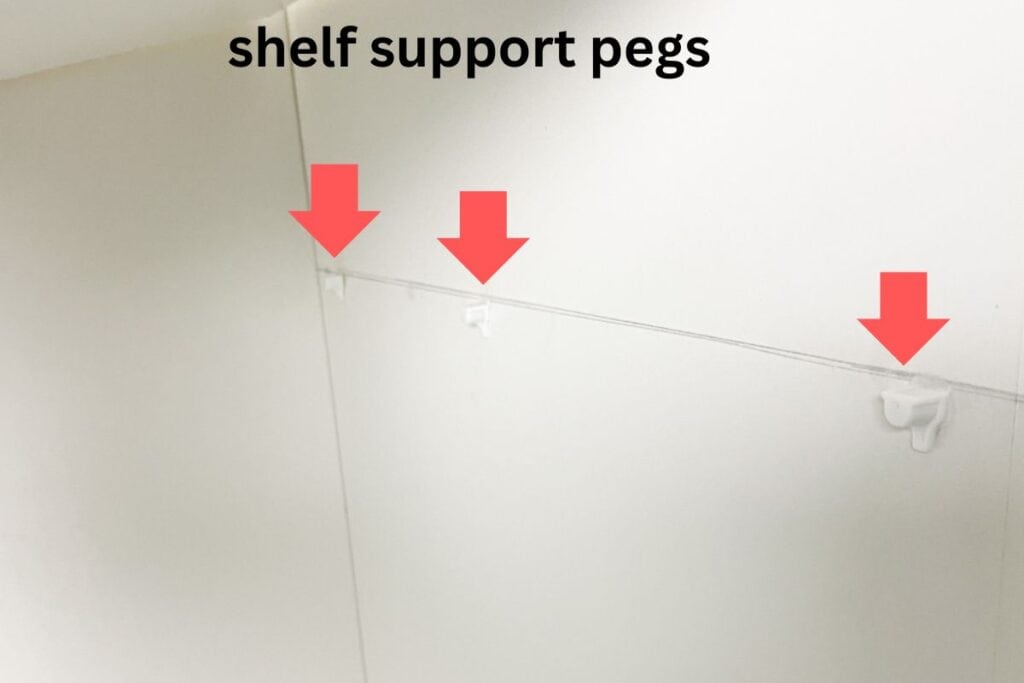
4. Line up shelf support pegs.
Be sure the flat top surface (where the shelf will sit) is in line with the line you drew. The white pegs are hard to see against the white wardrobe, but these are their locations.
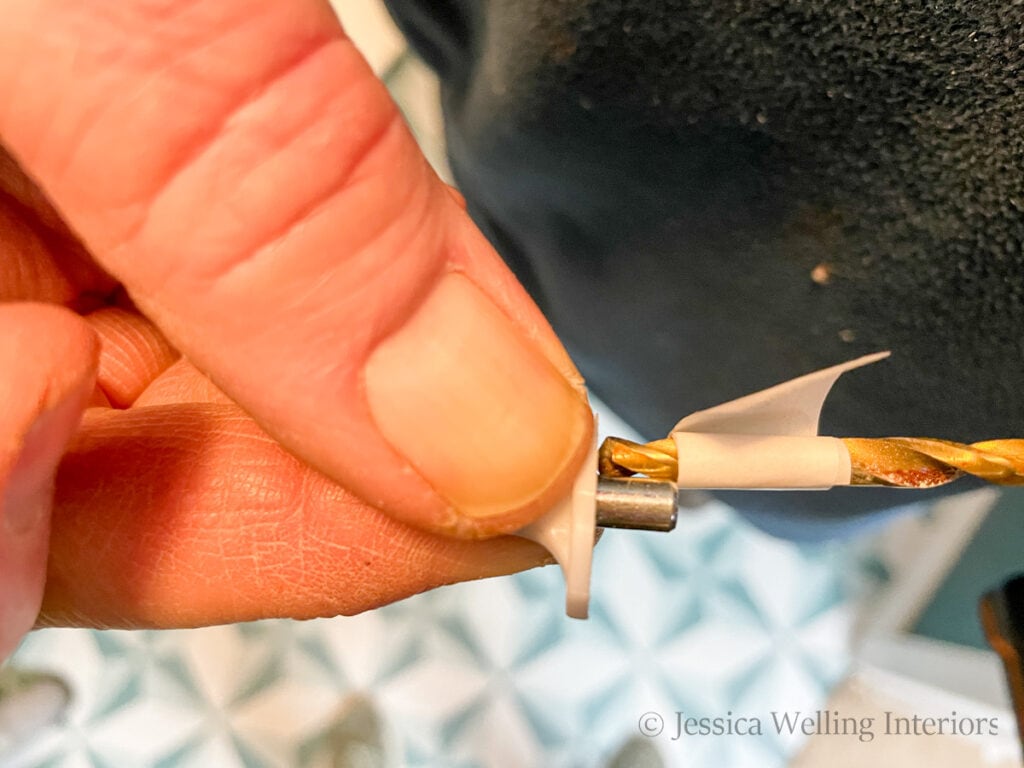
5. Mark drill bit with tape for depth
We don’t want the holes to go all the way through the outside of the cabinet, so we’re marking the drill bit with a piece of masking tape as a guide for the hole depth.
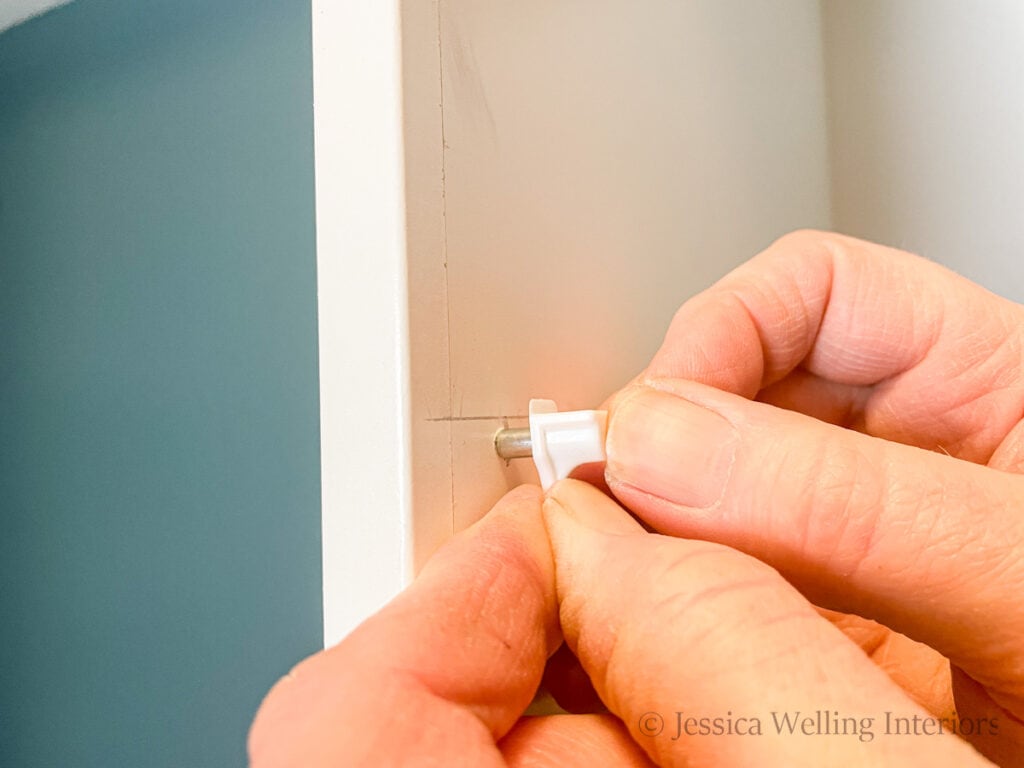
6. Drill Hole
7. Insert bracket piece so the flat top is facing up
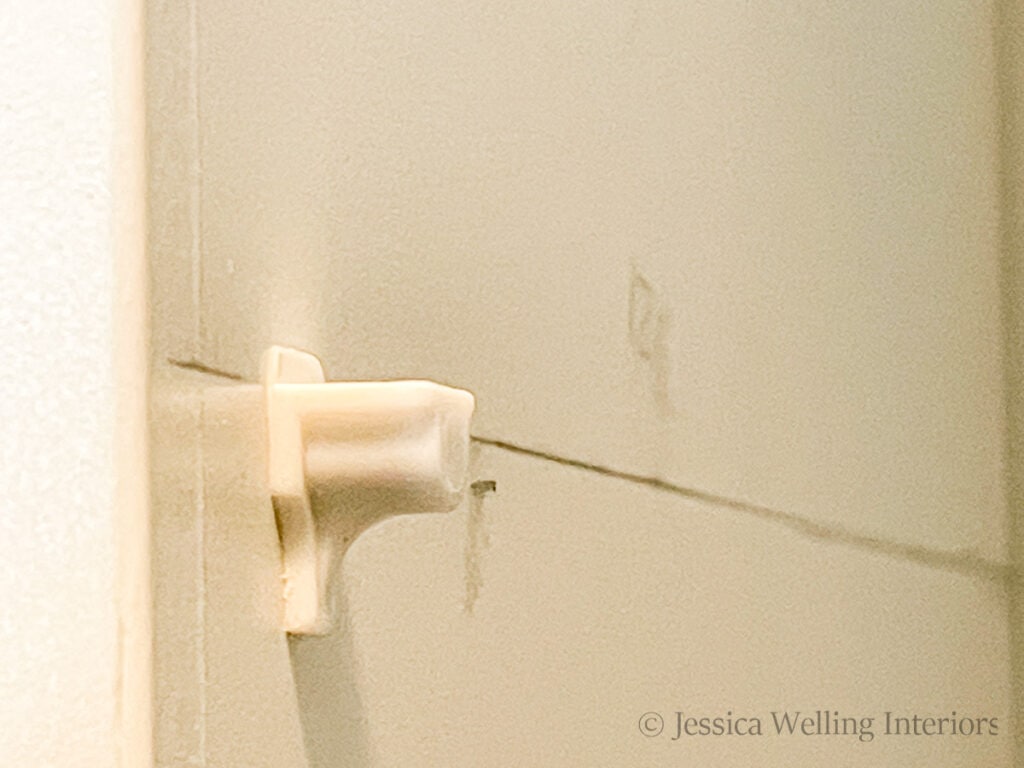
8. Repeat.
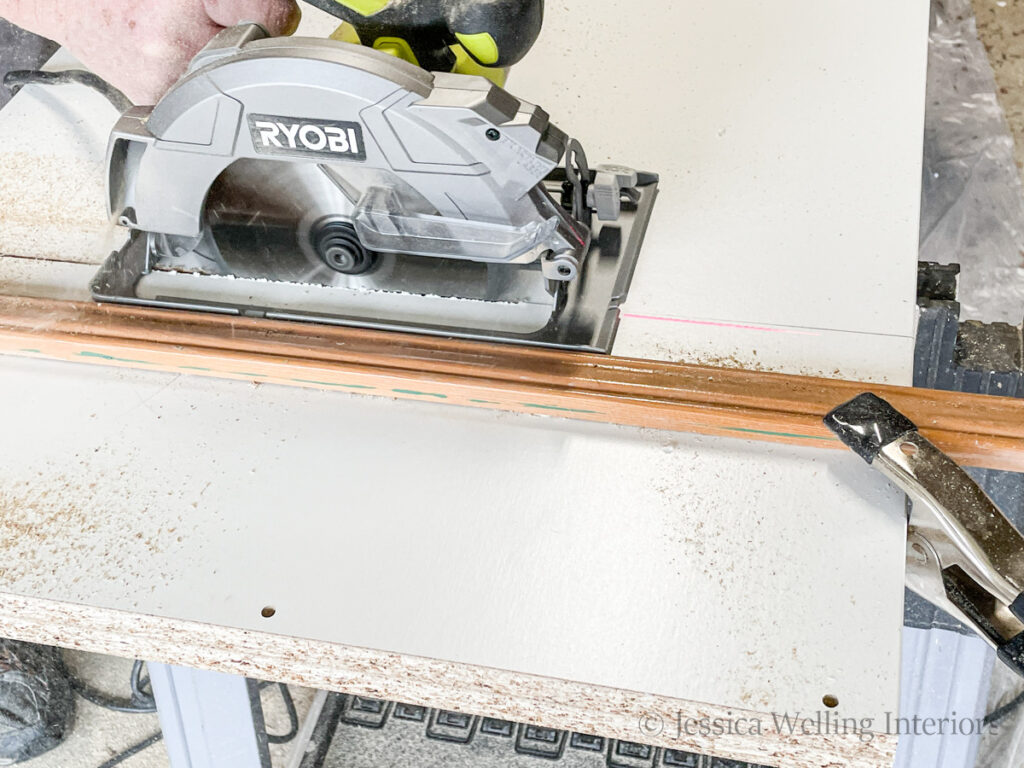
9. Measure & cut shelves down to size.
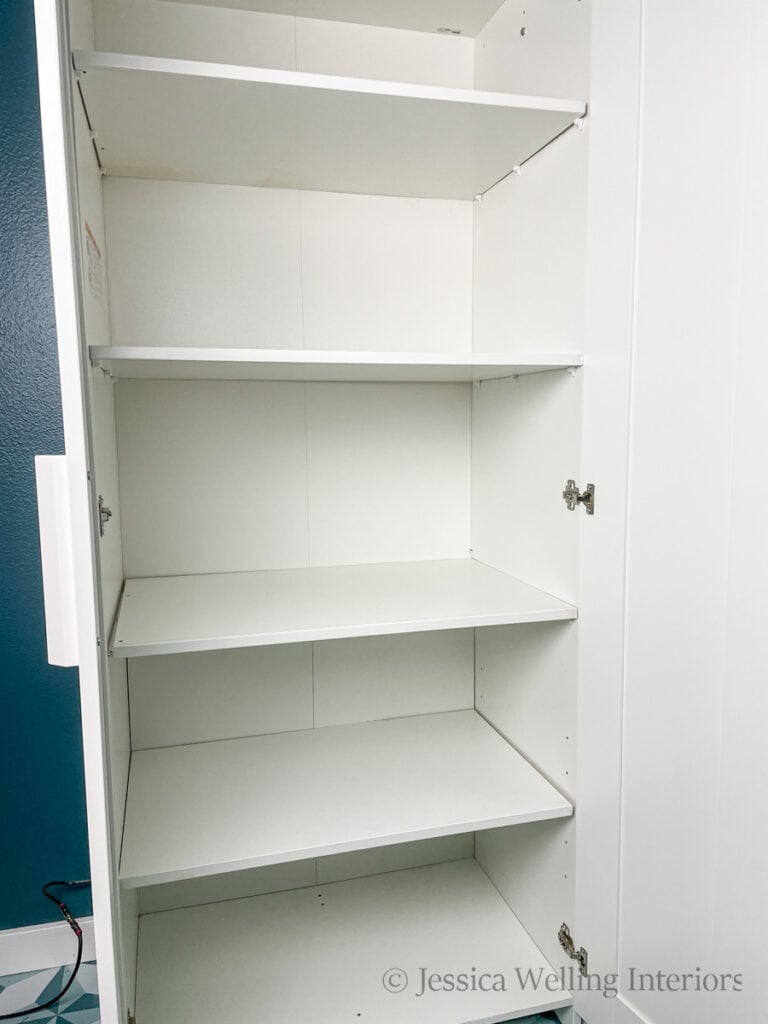
10. Set shelves in place.
Set each shelf in place resting on top of the support pegs.

11. Attach doors.
Attach the cabinet doors and handles according to the included instructions.
And that’s it!
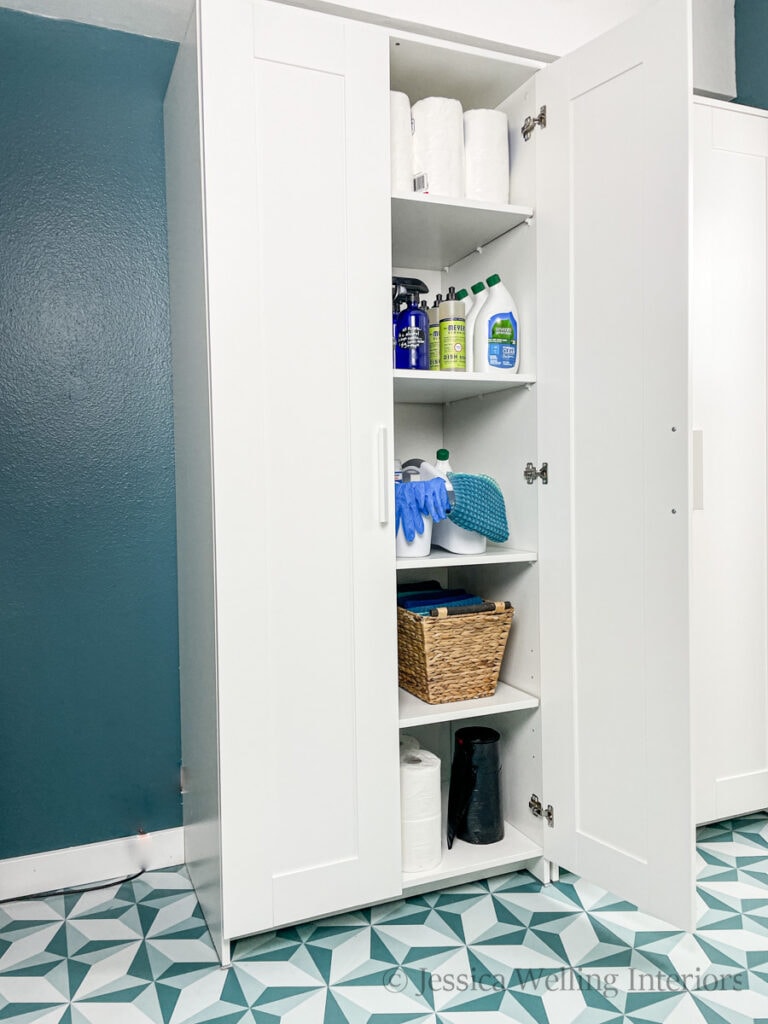
And here’s the inside of the cabinet on the right. We built the wardrobe with the included half-shelf in order to create a tall skinny space to store brooms and mops, but we did add one shelf at the top.
You can see the rest of my small laundry room makeover here!
More Fabulous Ikea Hacks…
Simple Ikea Desk Hack Tutorial
Under Bed Storage for Kids: A Simple Ikea Hack
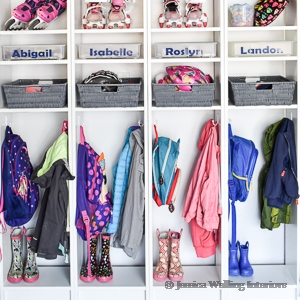
Backpack Organizer: A Brilliant Ikea Mudroom Hack


Hi! This is great. What/where are the shelves from? Having a hard time finding some opinions
Thanks
Jennie
Hi! Good question. I happened to have a bunch of extra Ikea PAX shelves, so I used those. But they’re a little pricey to just go and buy. I would look at Home Depot. Good luck!
Great Brimes hack idea – thank you so much!
Thanks! Glad you liked it. It’s made my laundry room so much more functional!