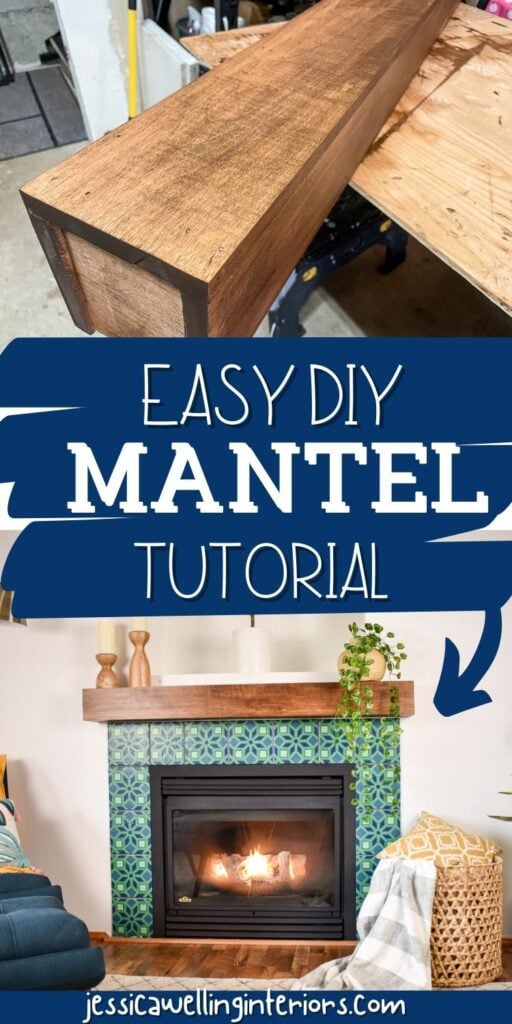
Easy DIY Fireplace Mantel Tutorial
Build a quick and easy DIY fireplace mantel with this simple tutorial.
The girls and I just moved into our new (to us) house. We’ve been busy unpacking and organizing and repainting the whole interior.
Here’s the fireplace before…
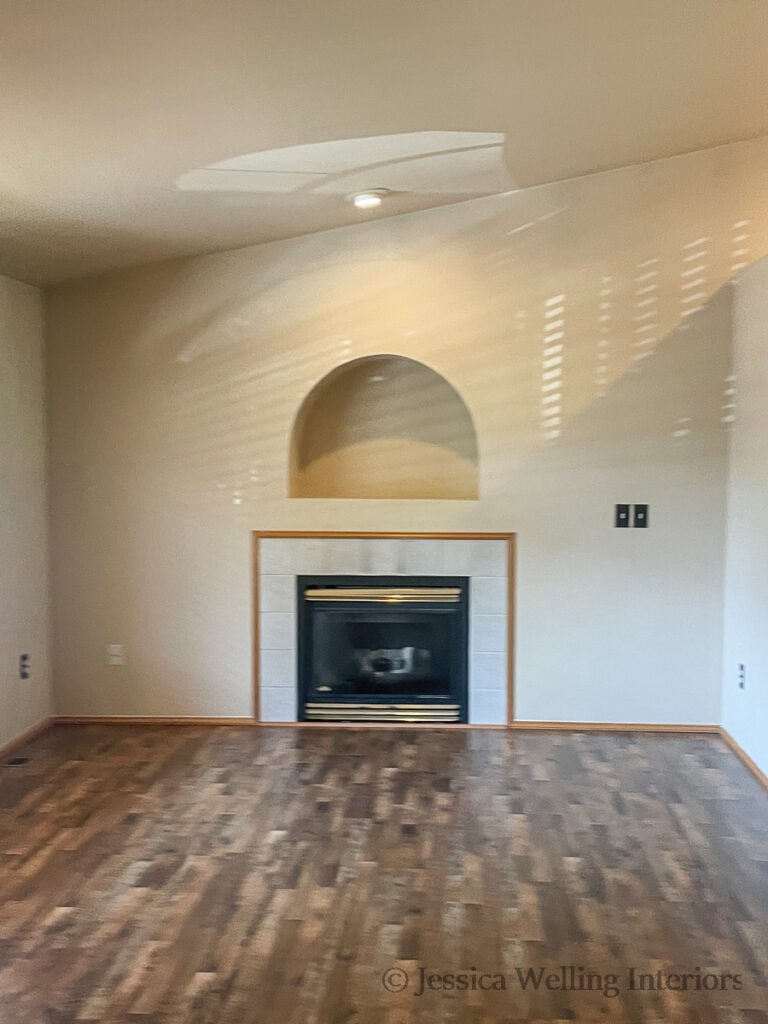
But I finally got to tackle one of the first fun projects I’ve been dreaming up: The fireplace makeover! And just in time to decorate for Christmas.
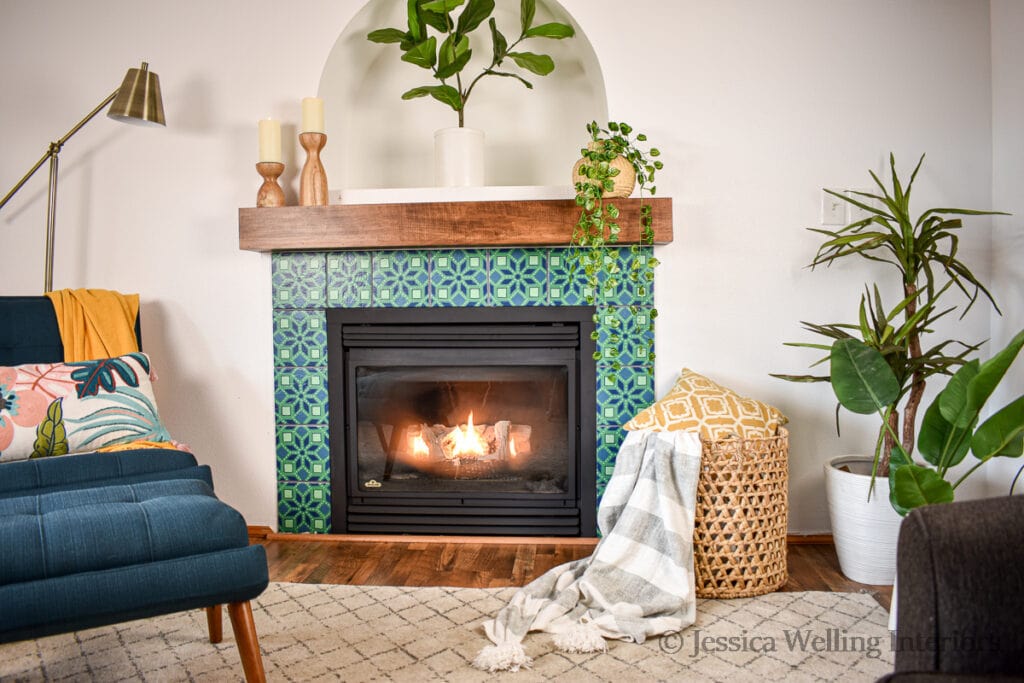
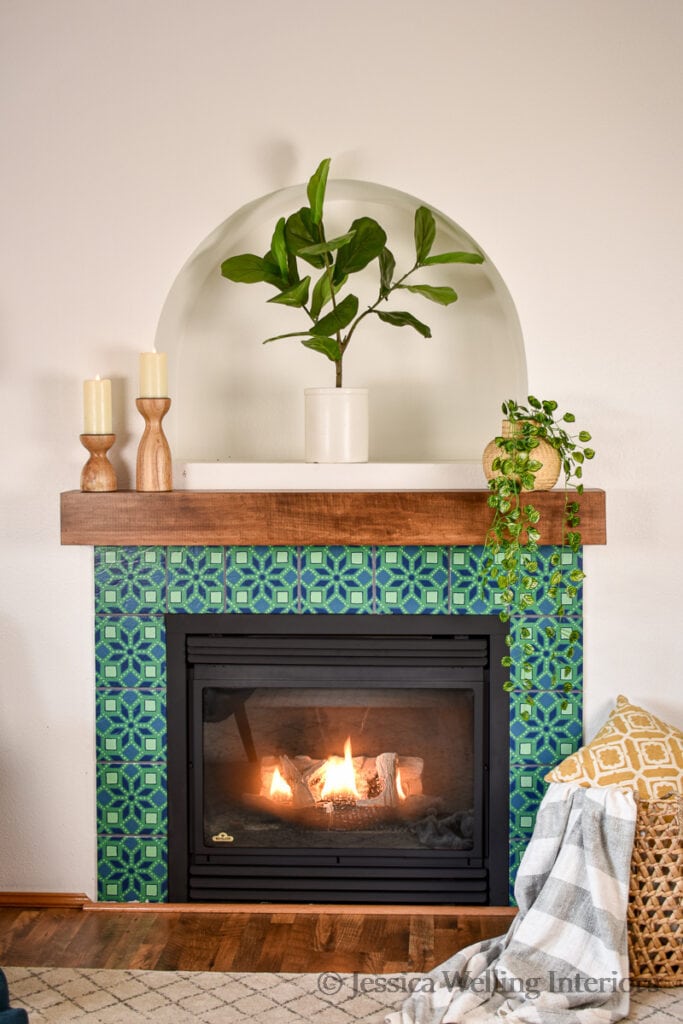
Fireplace Makeover
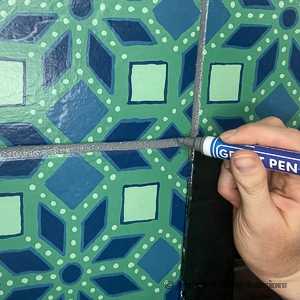
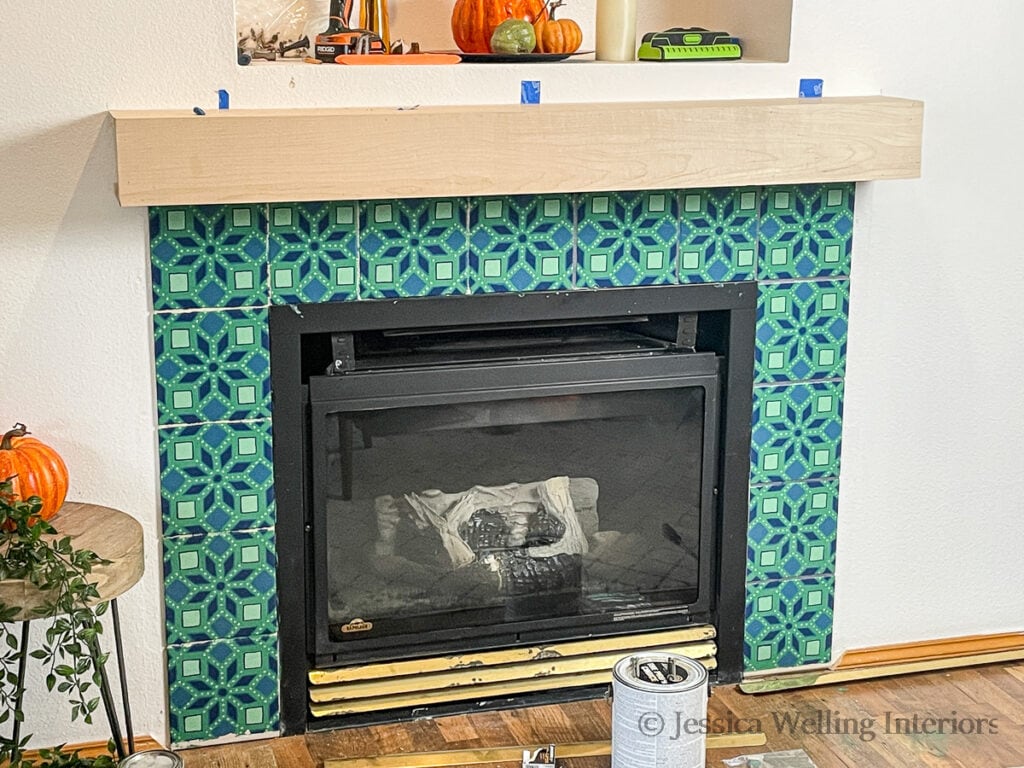
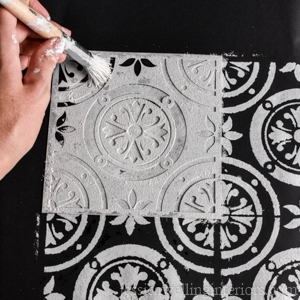
I began by painting and stenciling the tile fireplace surround. You can see the tutorial for that project here.
Next, I gave the old gas insert a refresh with high-heat paint. Here’s the tutorial for that:
DIY Fireplace Makeover With High Heat Paint
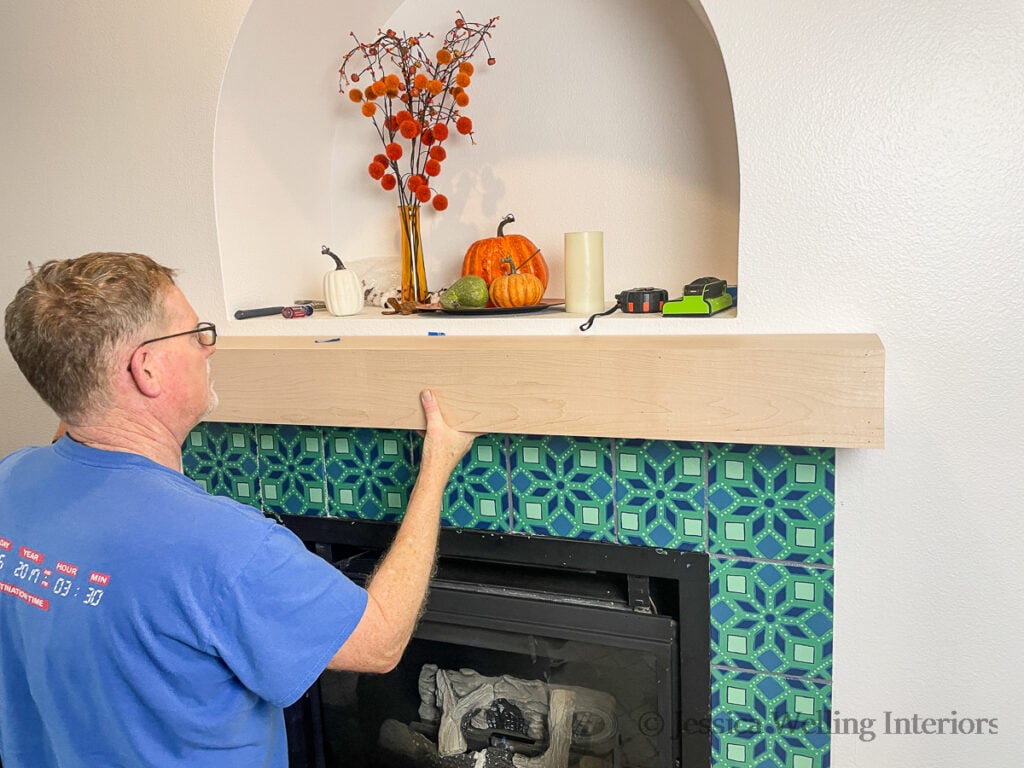
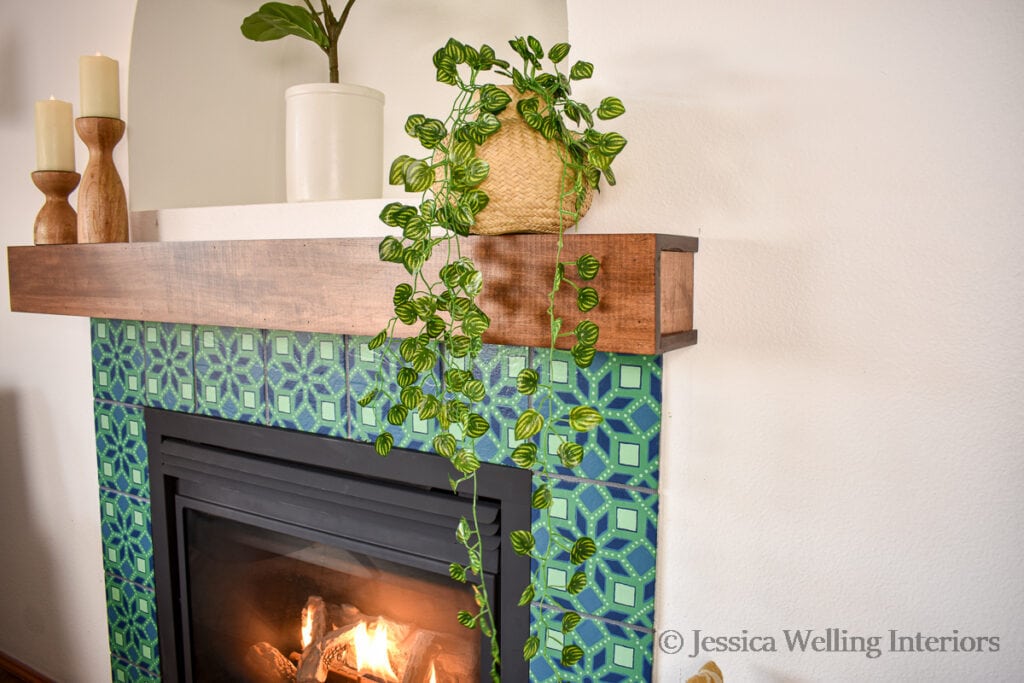
Once everything was painted, the fireplace was just begging for a mantel. So my dad and I built this quick and easy box beam mantel last week. Then I sanded, stained, and varnished it, and now it’s done!
We built a similar box mantel at our old house, but with pine instead of alder.
I opted for harder and more expensive wood this time because I didn’t want as rustic of a finish for this space. But you could use pine and save a lot of money.
How to Build A DIY Fireplace Mantel
Box beam mantels are pretty simple, and you’ll see different methods for constructing them. I wanted to keep all the seams off the front of the mantel. So the top, bottom, and side boards are all behind the front face board.
Materials
3 1″x7″ hardwood boards (I’m using clear alder)
1 2×4″
4 3″ wood screws
Tools
miter saw
pencil
tape measure
speed square
orbital sander & 220 grit sanding disc
wood glue
pin nailer
drill/impact driver
Directions
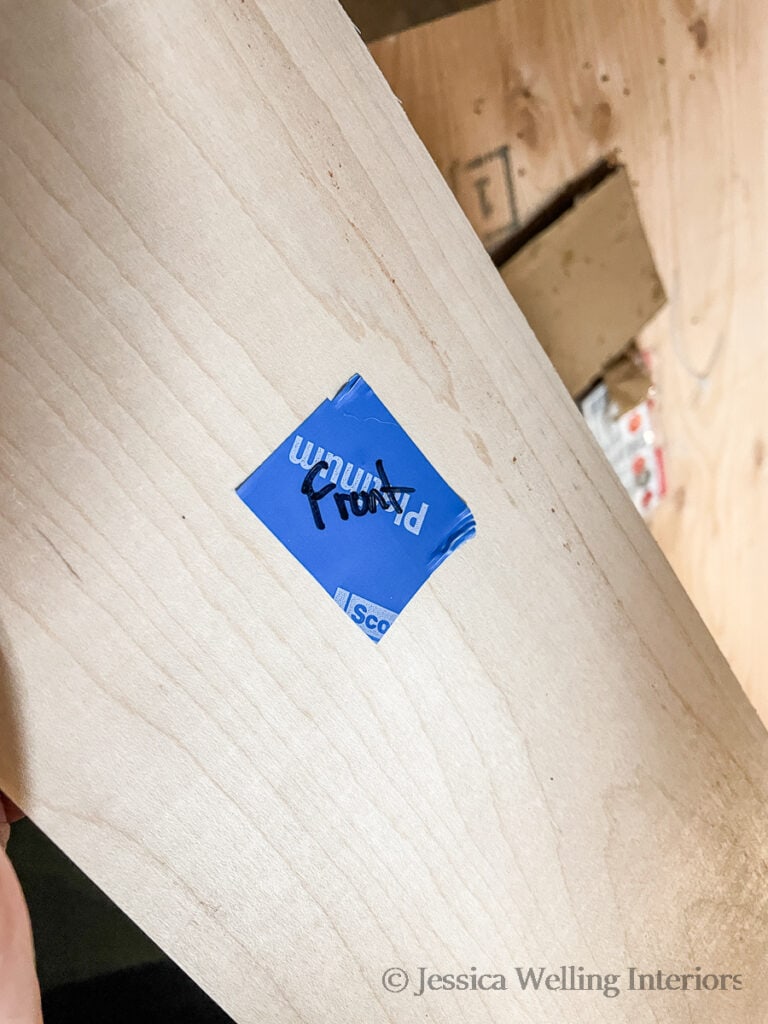
1. Choose Sides
We began by choosing the best (prettiest) sides of the wood, and designating which piece would go on the front, top, and bottom. We marked them with painter’s tape to help us keep track.
It’s easy to mix up the boards once you get going, since they’re all going to be cut to the exact same size.
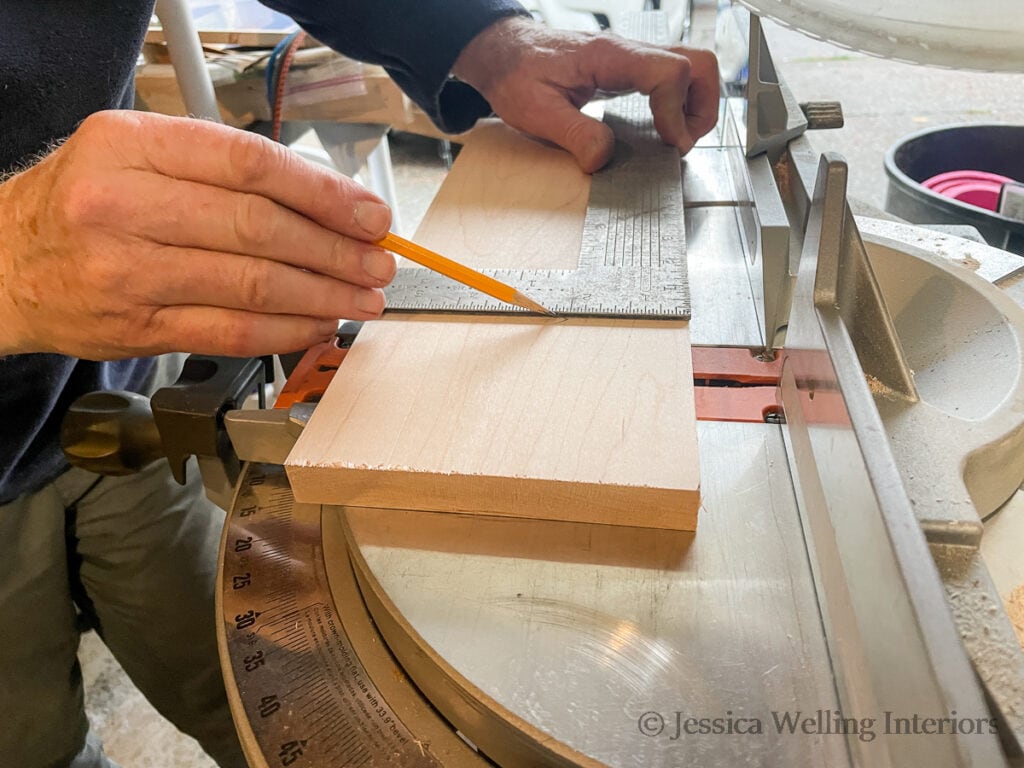
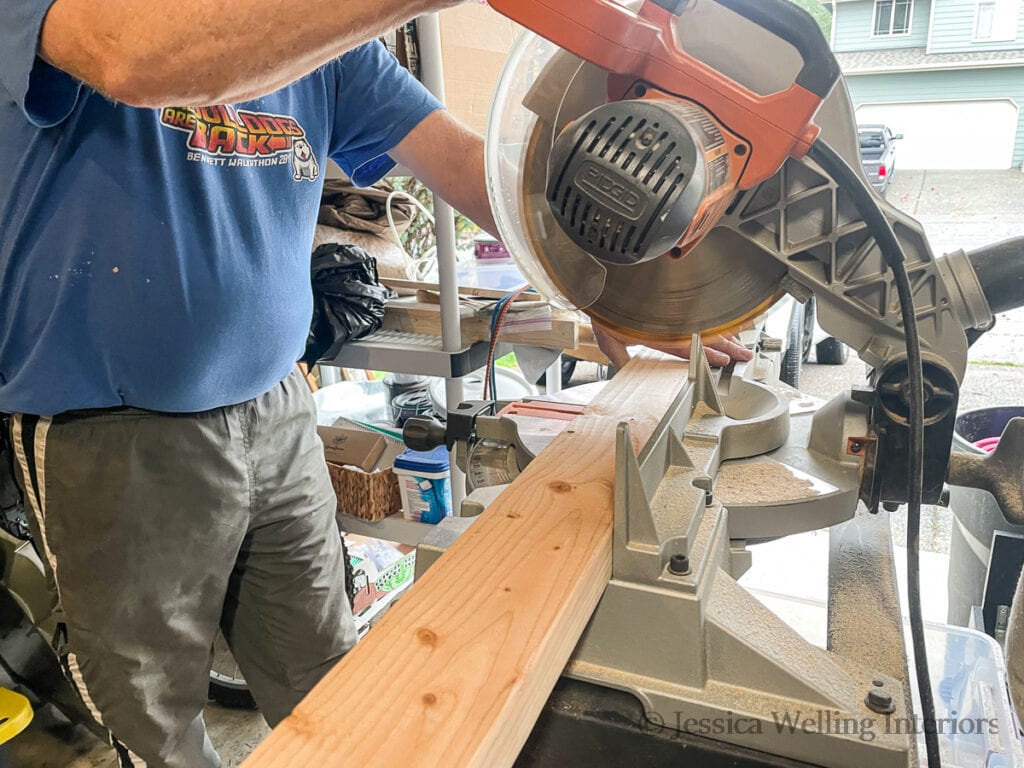
2. Cut Boards
Measure and cut the board to the precise length. Mine are 57″ long because I wanted the mantel to extend just two inches past the tile surround on each side.
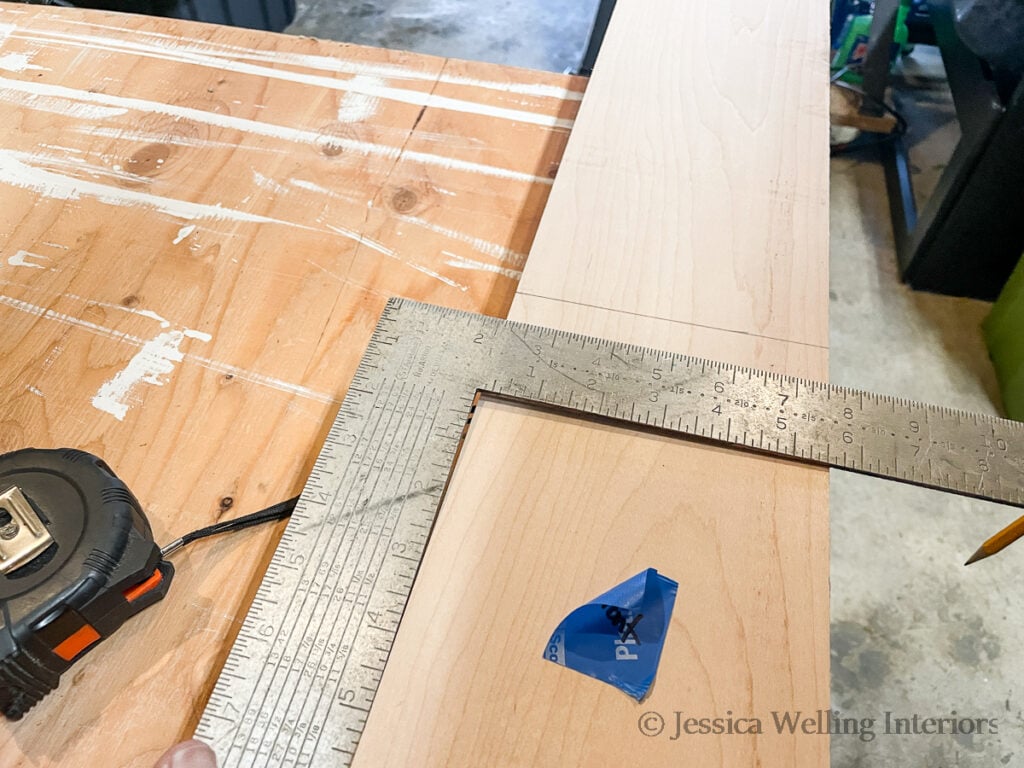
A miter saw works best for this.

3. Glue Front & Bottom Together
It’s helpful to have two sets of hands for the next few steps. And if you don’t have a second person to help, you’ll probably need to use some wood clamps.
Line up the front and bottom boards, and apply a thin line of wood glue along the top edge of the bottom board.
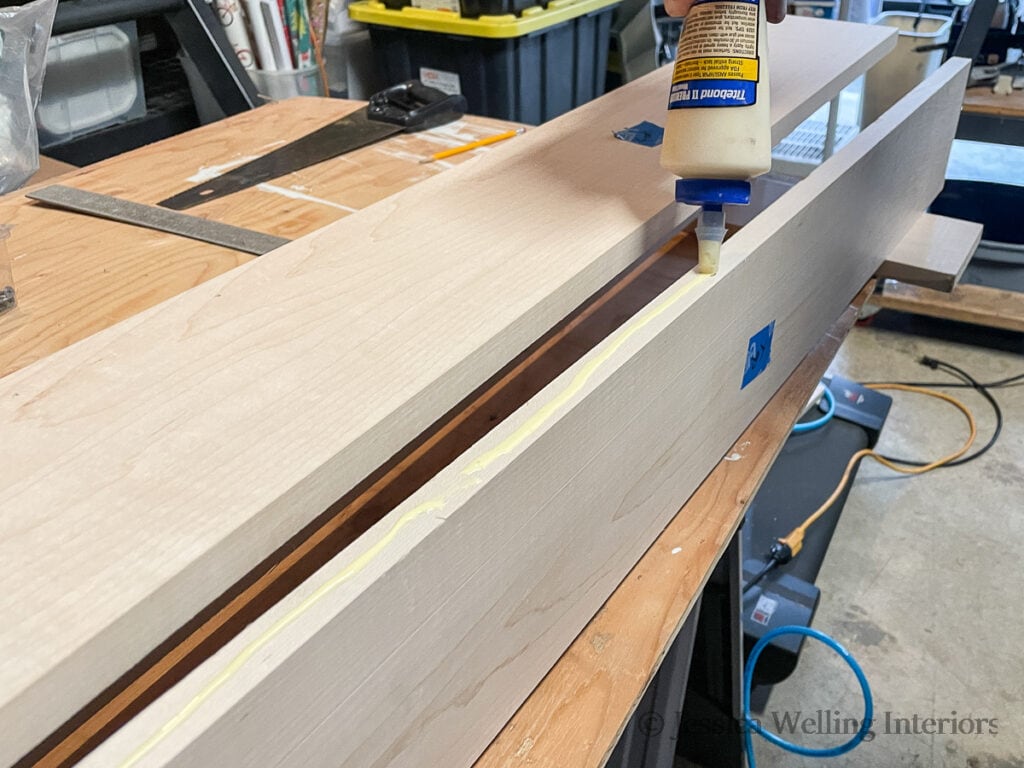
Then secure the boards together, making sure both ends and sides are flush.
4. Nail
Use a pin-nailer to attach the front and bottom boards together. The tiny nail holes will hardly be visible on the front once this is finished.

5. Glue Front & Top Together
Next use the wood glue again to glue the front and top boards together.
6. Nail
And pin-nail these two board together as well.
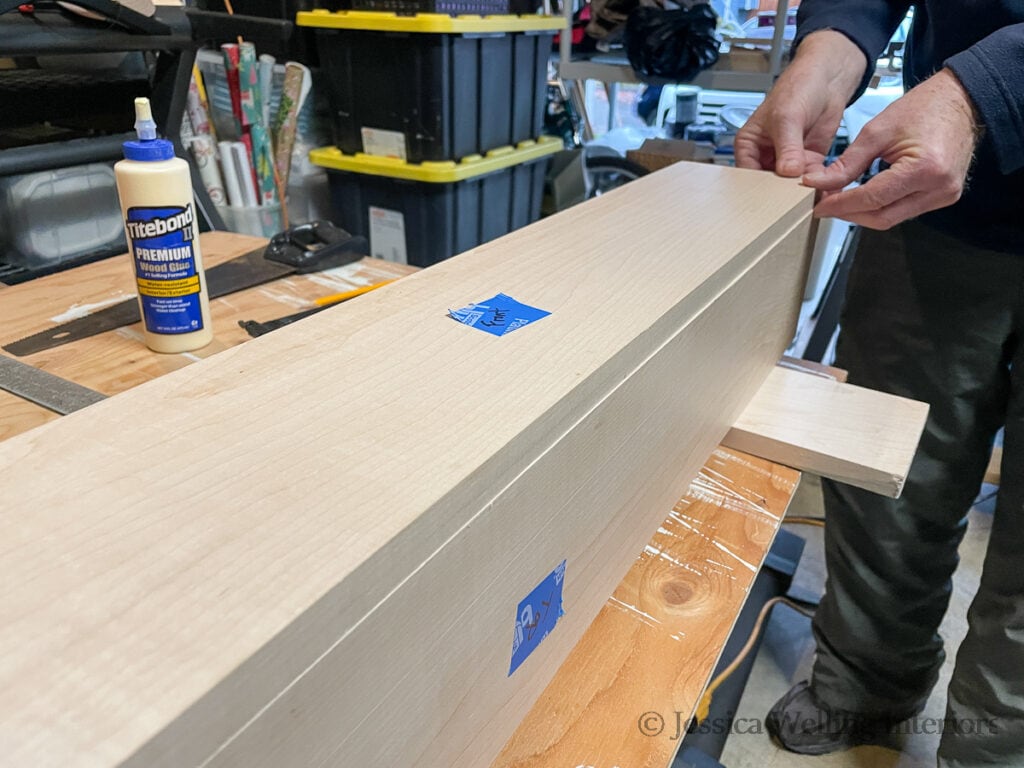
7. Measure Inside
Once the three long boards are assembled, measure the inside opening on each end of the mantel. This needs to be very precise, so measure both ends.
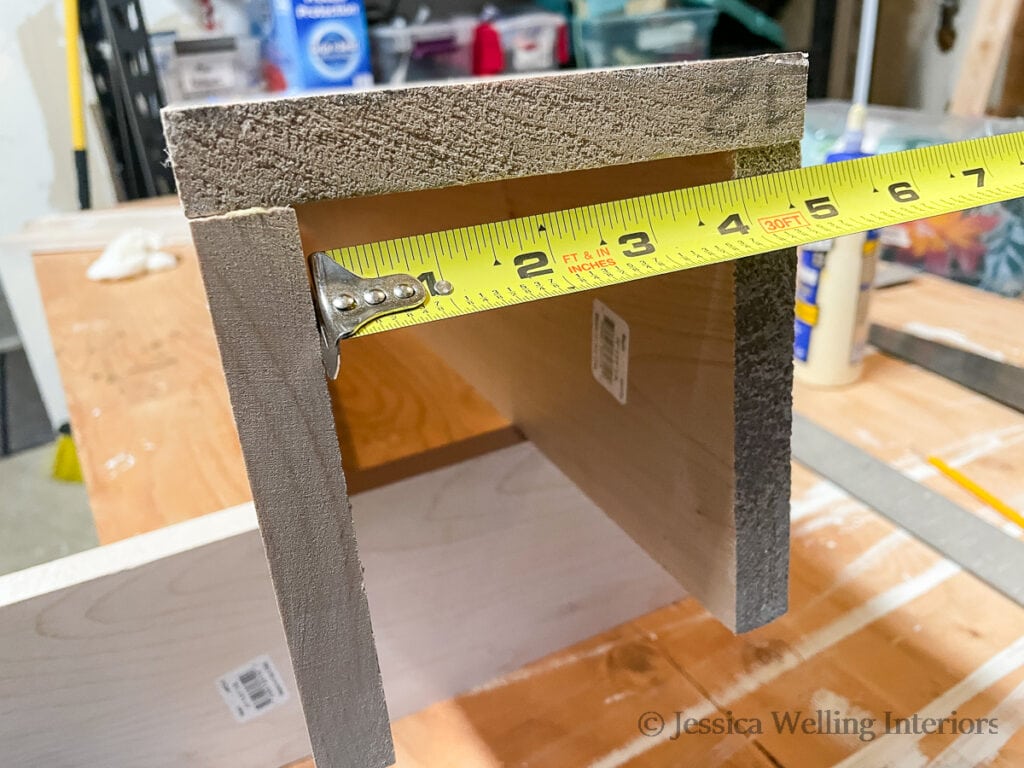
8. Cut End Pieces
Mark the end pieces with a speed square and cut them to size with the miter saw.
9. Glue End Pieces
Run a line of wood glue along the inside of the mantel end, then smear is with your finger.
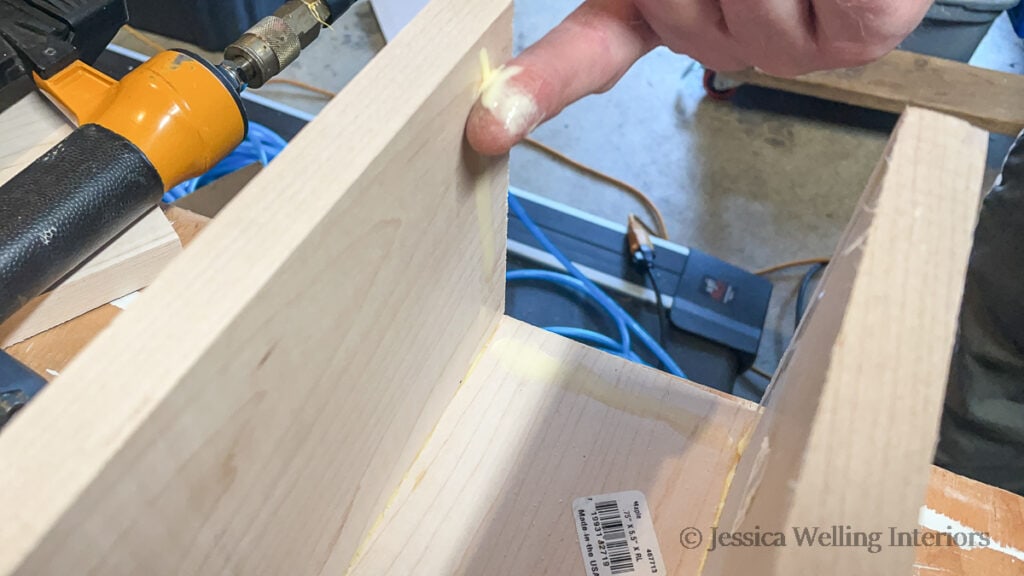
Set the end piece in place, wiping away any excess glue that squeezes out on the outside end.
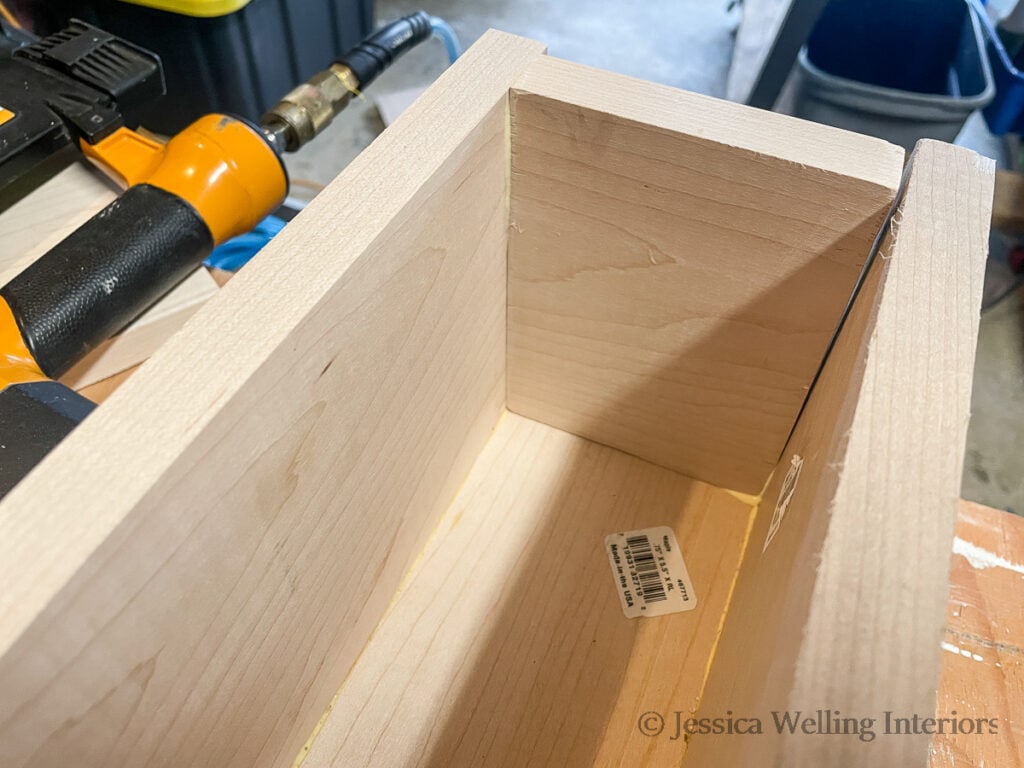
As you can see, we in-set the ends a little bit just because. You can do this or make the end pieces flush with the ends of the other boards.
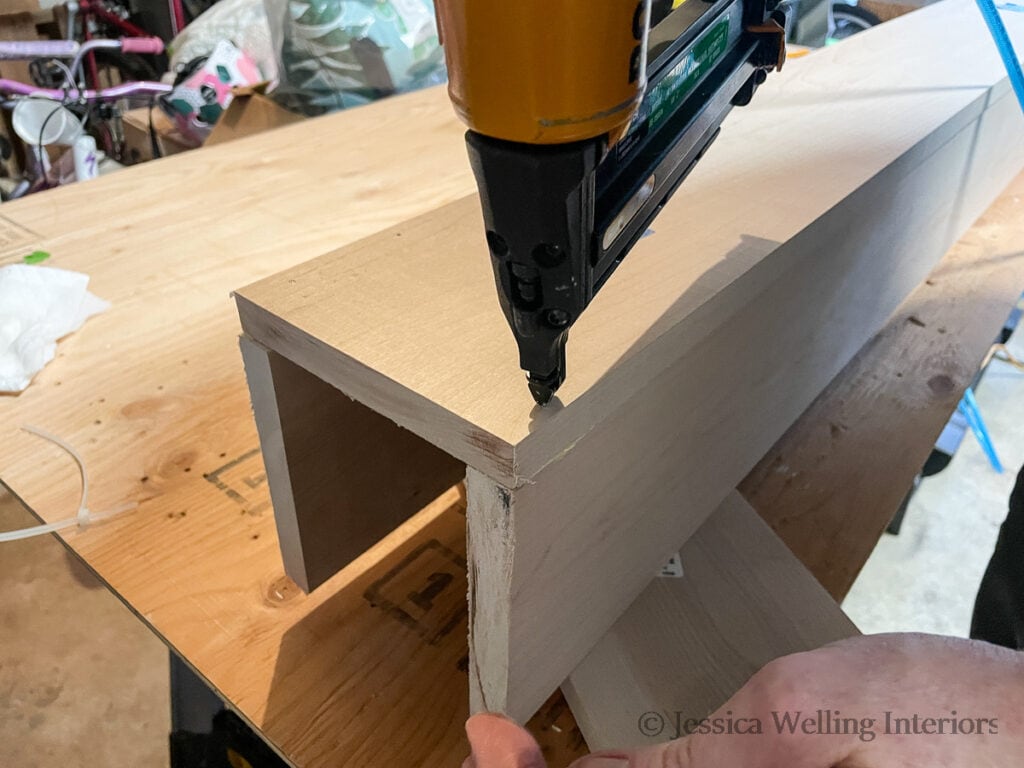
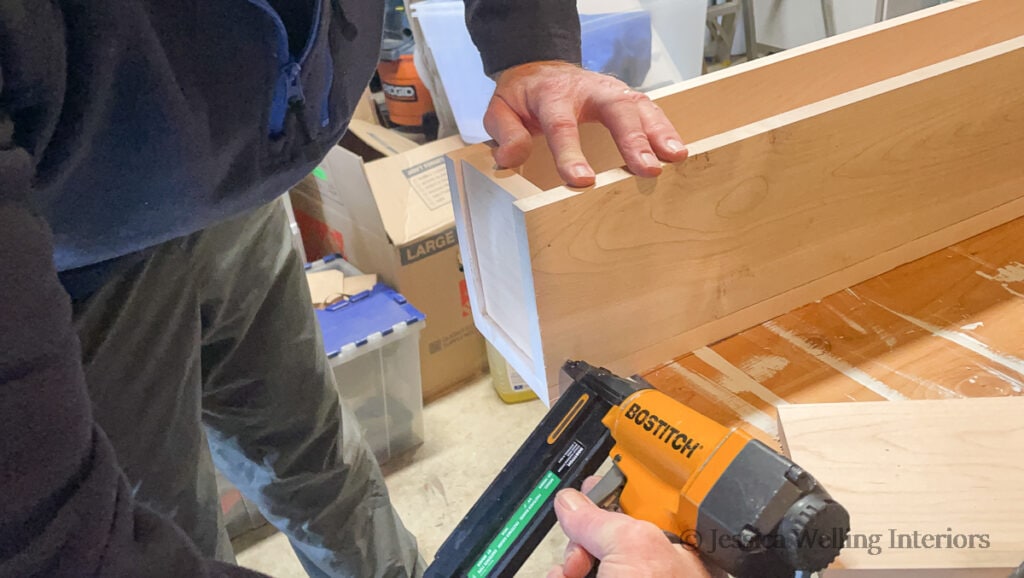
10. Nail End Pieces In Place
Nail the end piece in place with the pin-nailer. We did two nails on the bottom and two on the top.
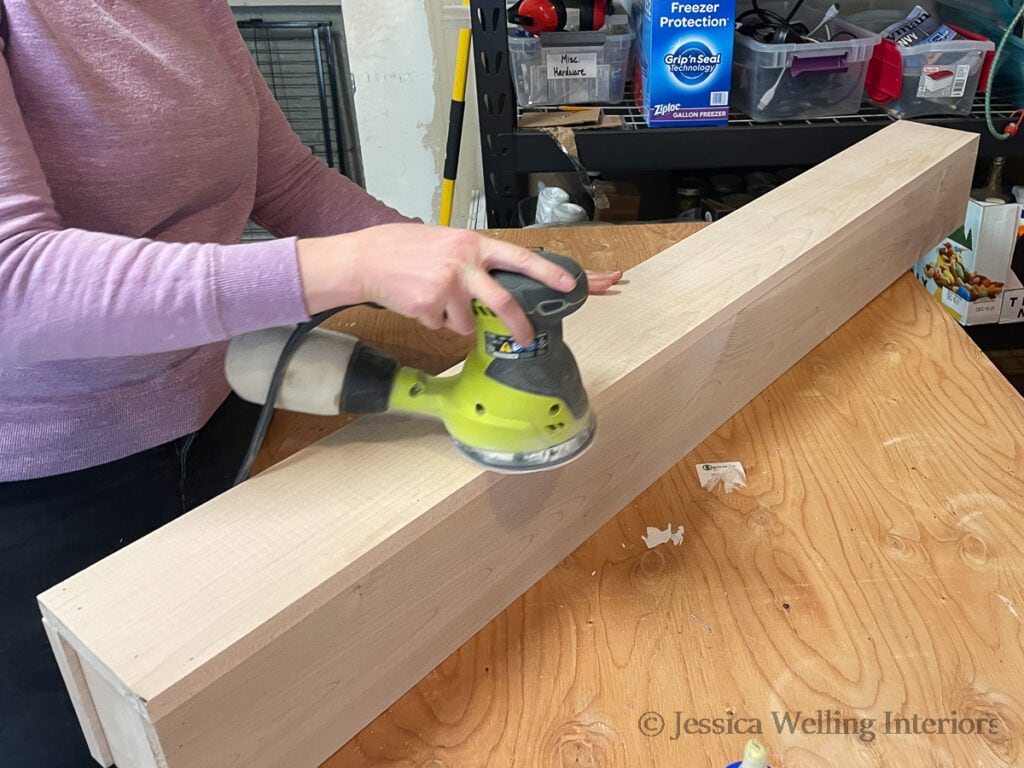
11. Sand
Use an orbital sander with a 220 grit (very very fine) sanding disc to go over the whole mantel and smooth out any rough edges. Be sure to wipe it down with a damp rag afterward so you don’t get any sawdust in the finish.
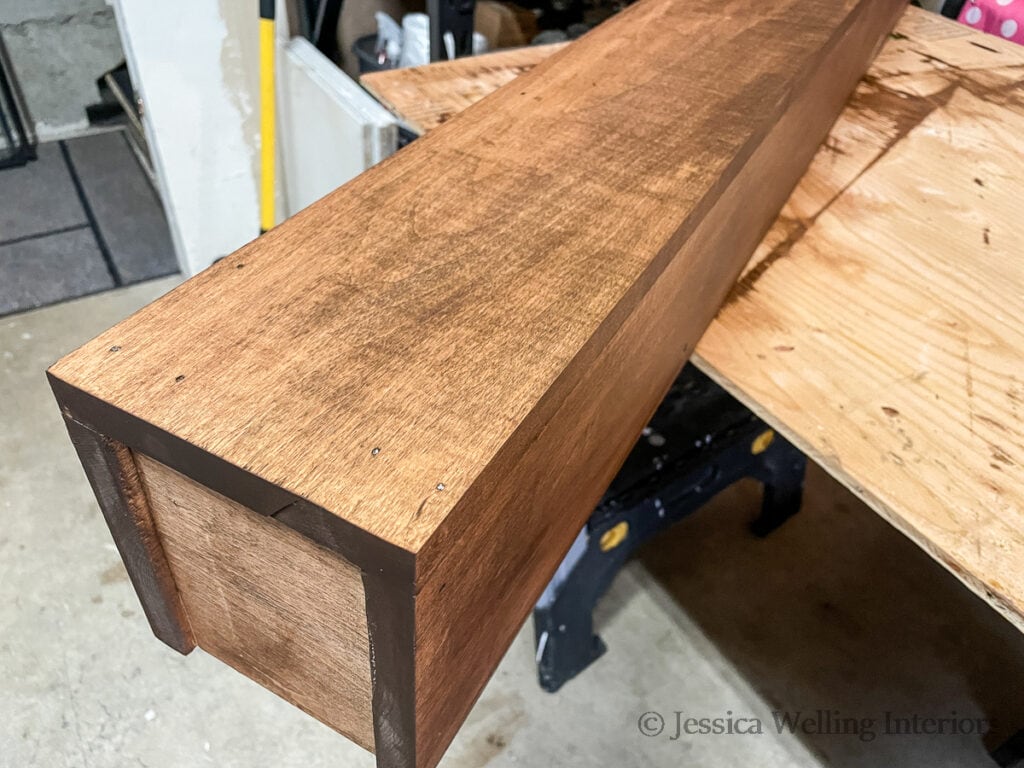
12. Apply Stain
Choosing wood stain is difficult. I highly recommend doing a test on a scrap of the same wood you used for your project to be sure you like the final color.
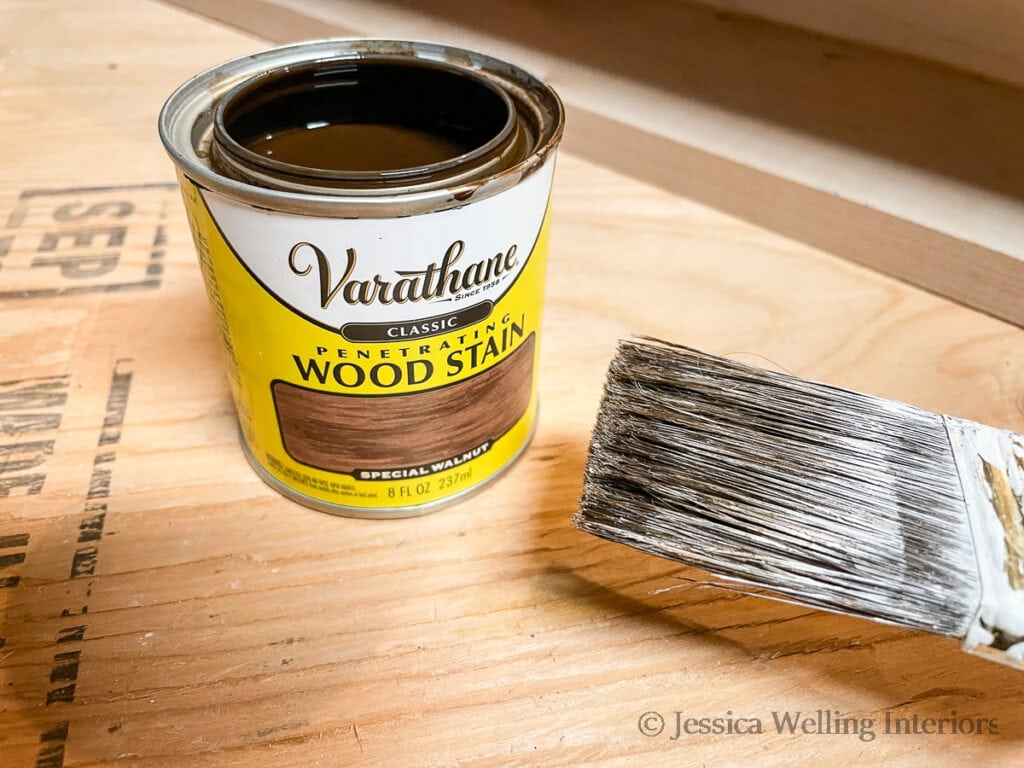
My go-to wood stain color is “special walnut”, so that’s what I’m using for this project too.

You’ll want to be sure to read the instructions on the can.
Apply the wood stain with a paintbrush or chip brush (disposable paintbrush). Let it sit for 10 minutes or so, but no more.
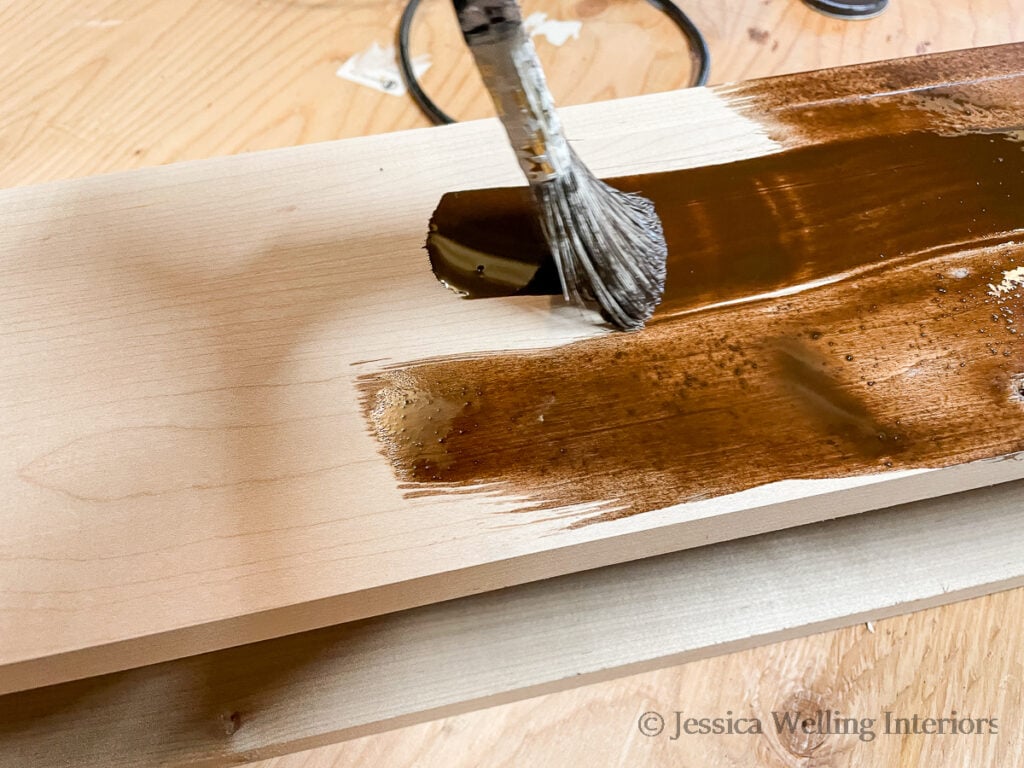
Then use a rag to wipe it off, following the direction of the wood grain.
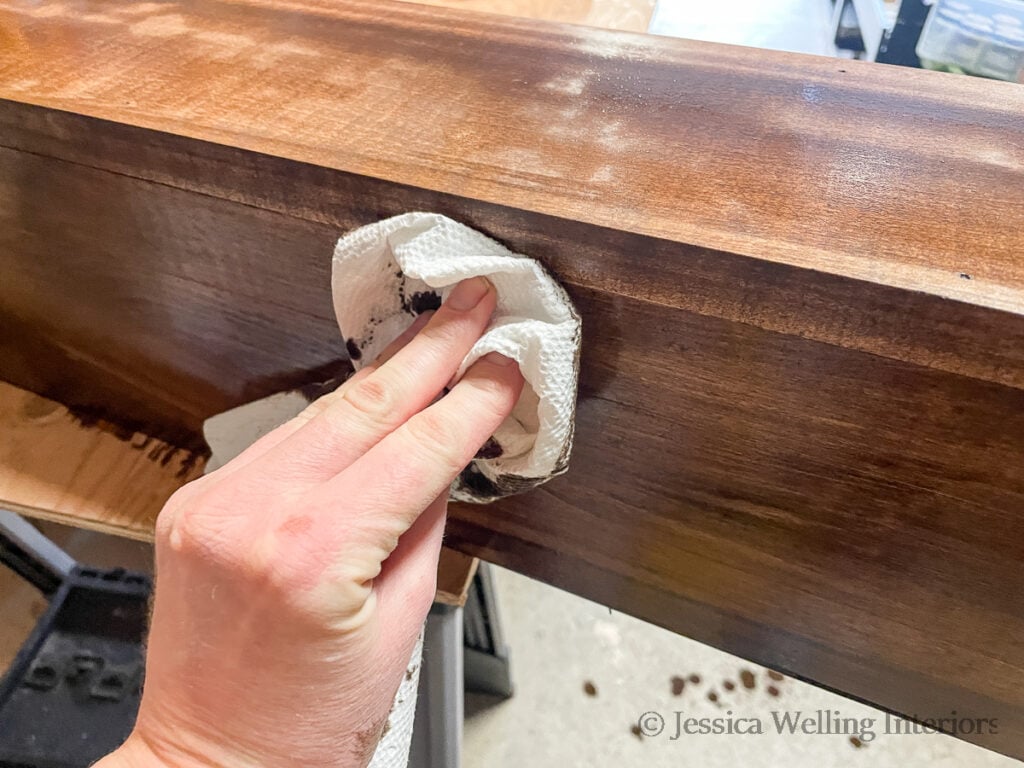
Let this dry for at least two hours before applying a second coat (optional). It’s important to note that the cut ends of the wood will end up much darker than the broad sides of the boards. I find it’s easiest if you can just embrace this.
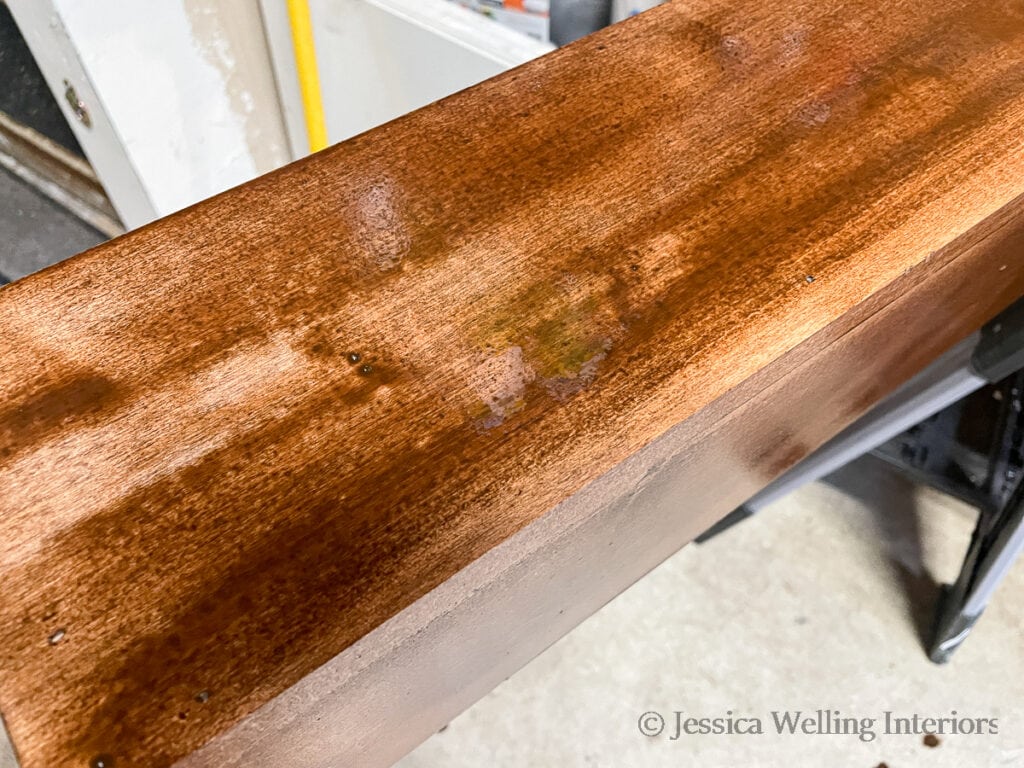
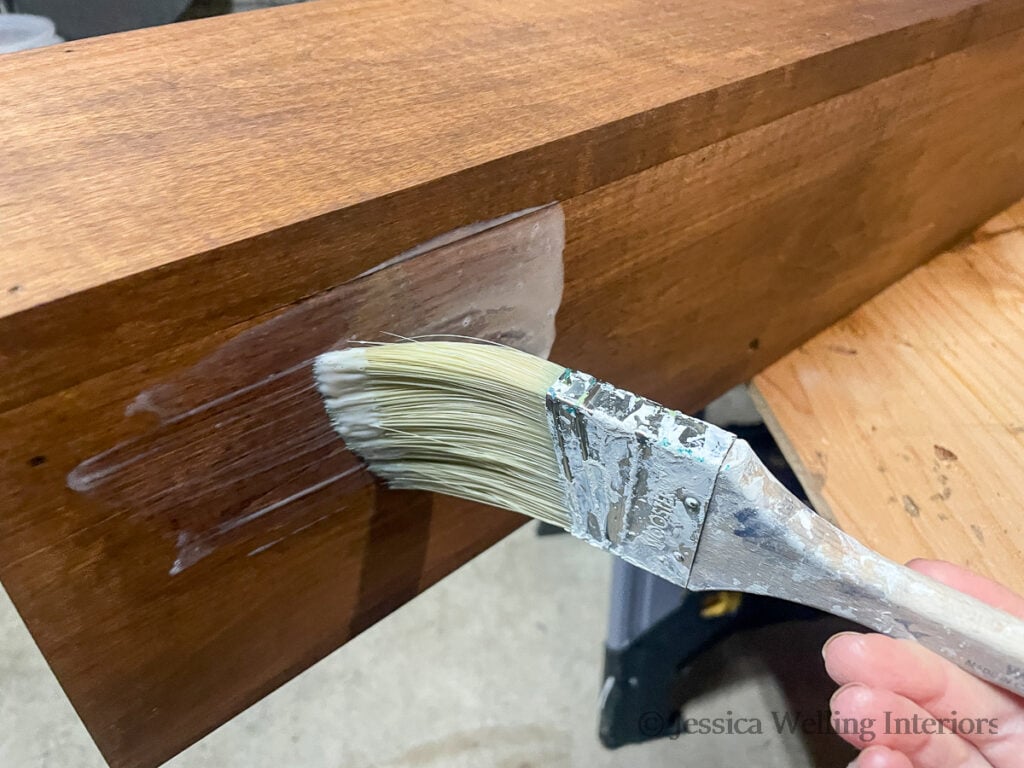
13. Apply Polyurethane
Next apply polyurethane to protect the wood. I’m using a matte finish because I don’t want my mantel to be shiny. But you can choose whichever sheen you like.
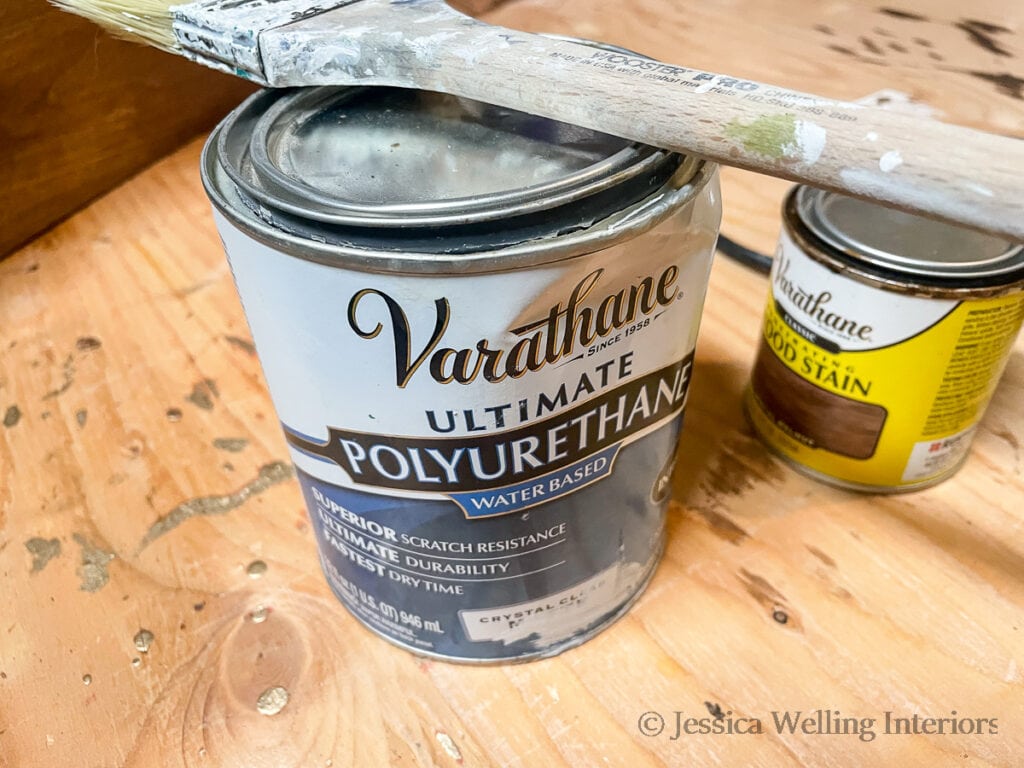
The polyurethane looks a bit milky in the can, but it will dry clear. Let it dry and then apply a second coat.
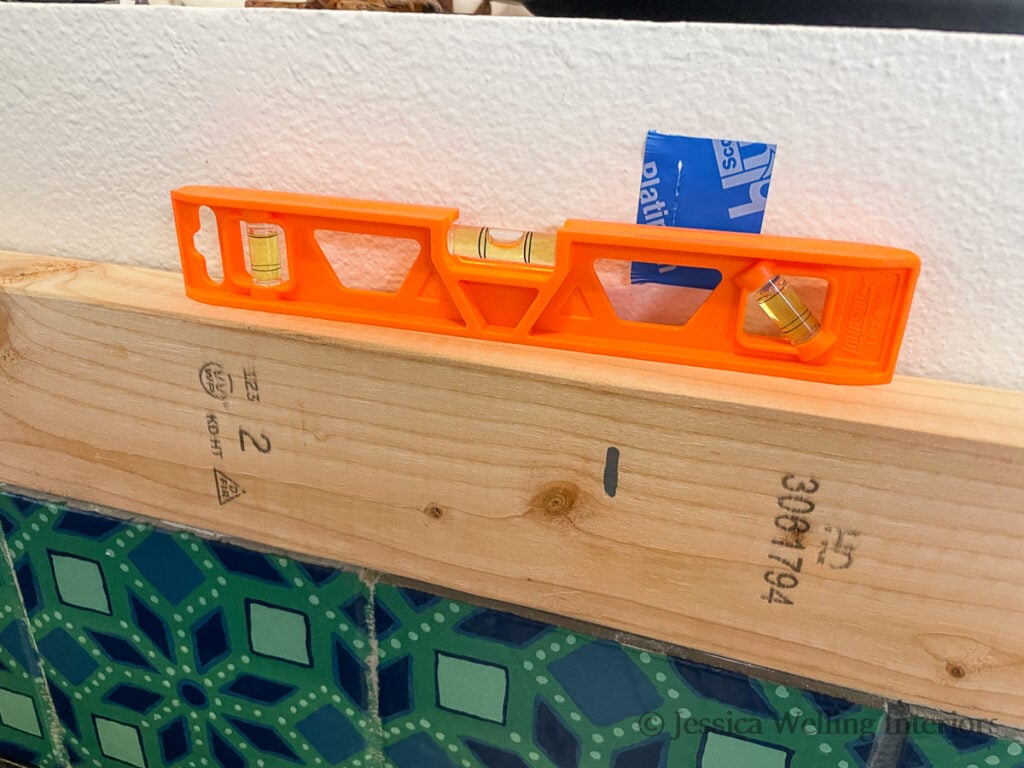
14. Mount 2″x4″
We used the 2″x4″ method to mount the mantel on the wall. This is pretty simple, but it’s important to be sure the screws are going into studs on both ends. No one wants this thing to come crashing down!
We first used a stud finder to locate the studs, and marked their positions on the wall.
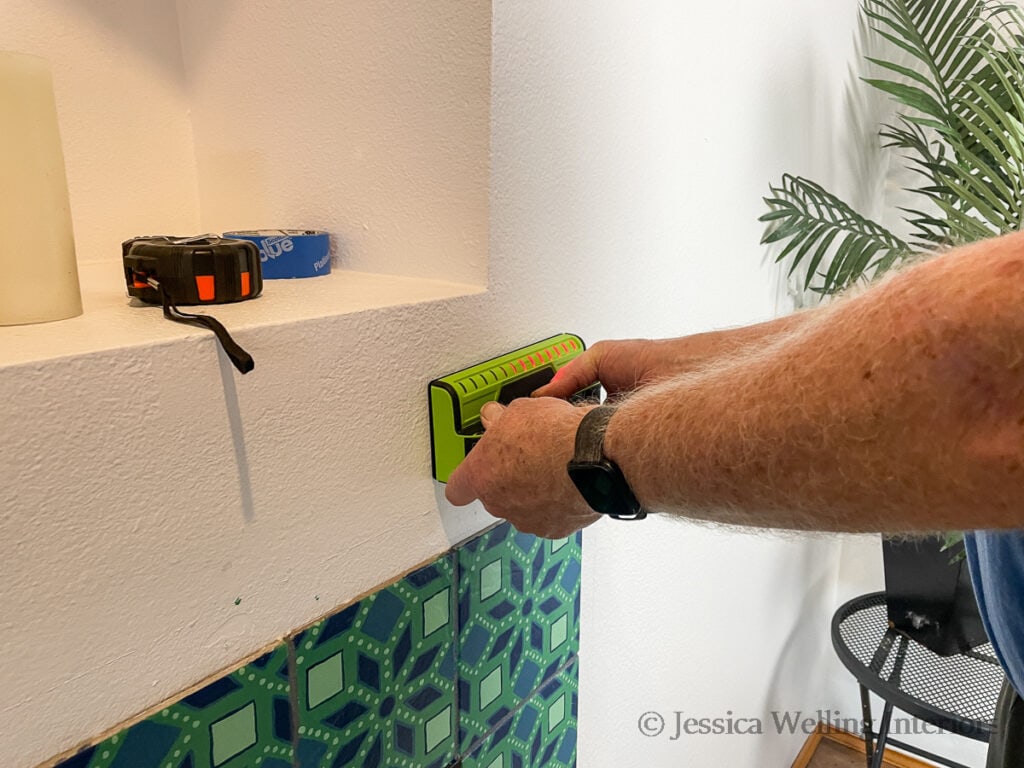
Then we cut a 2″x4″ to mount directly on the wall, making sure it’s long enough to be anchored to at least 2 studs.
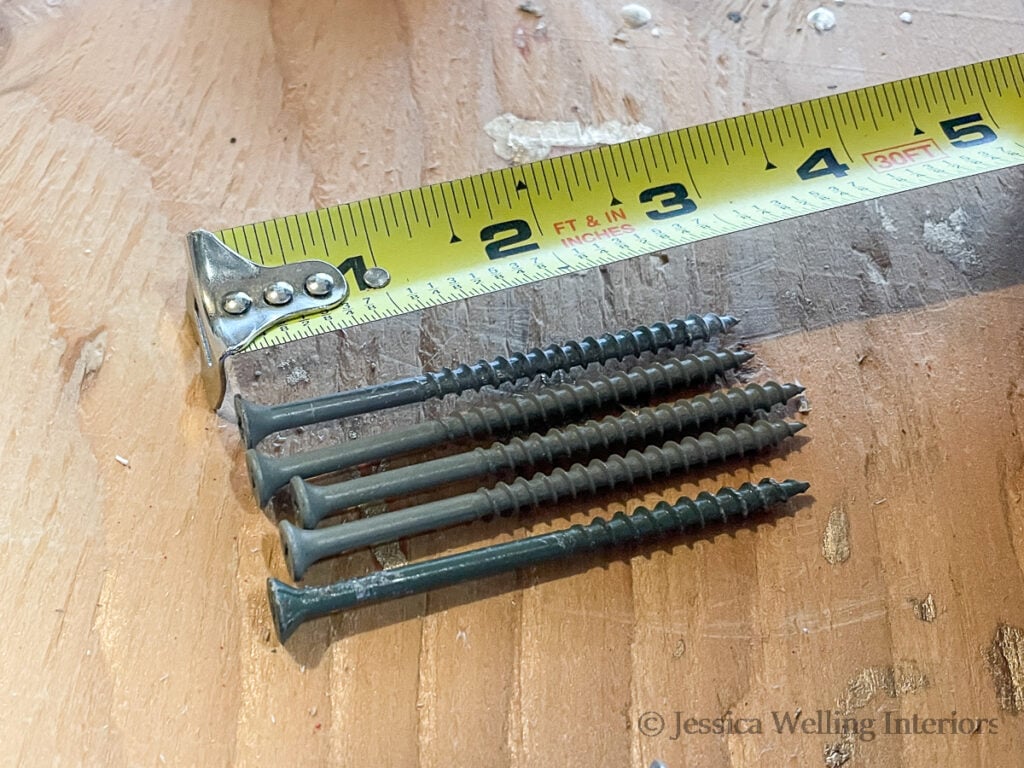
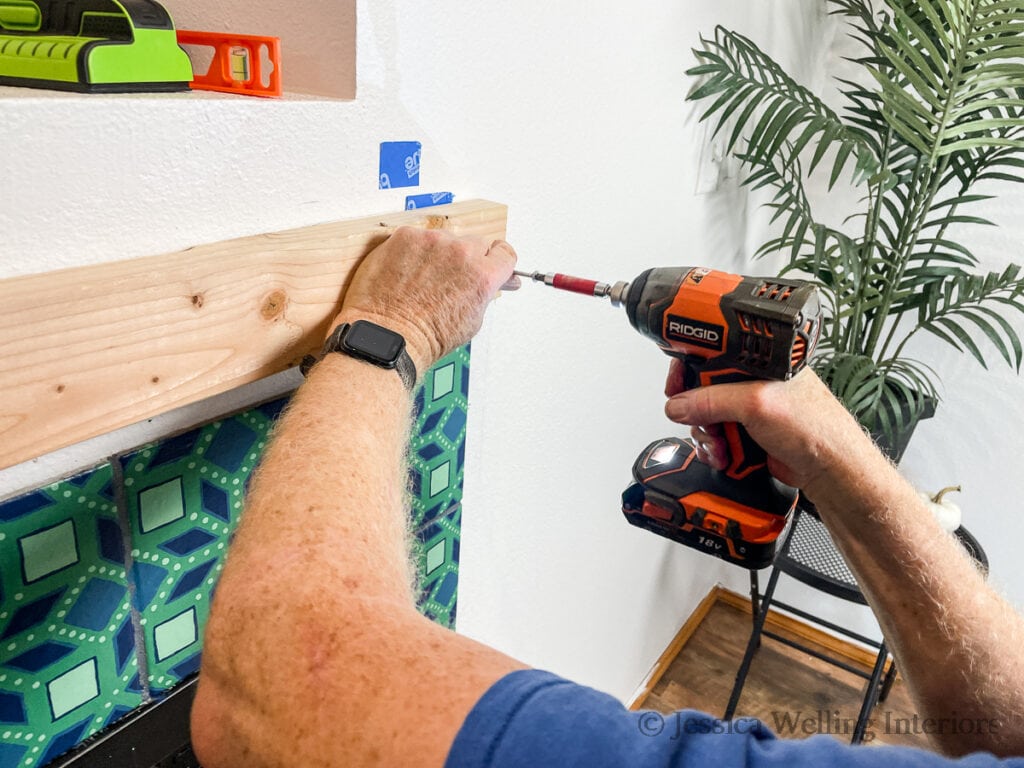
When it was time to mount the mantel on the wall, we set it over the 2×4 and attached it with 3 3″” screws.
Fireplace Insert Makeover
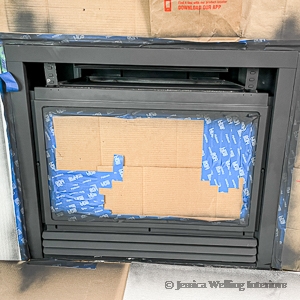
And last, but not least, the gas fireplace insert needed some love. As you can see, the finish had corroded and it had seen better days.
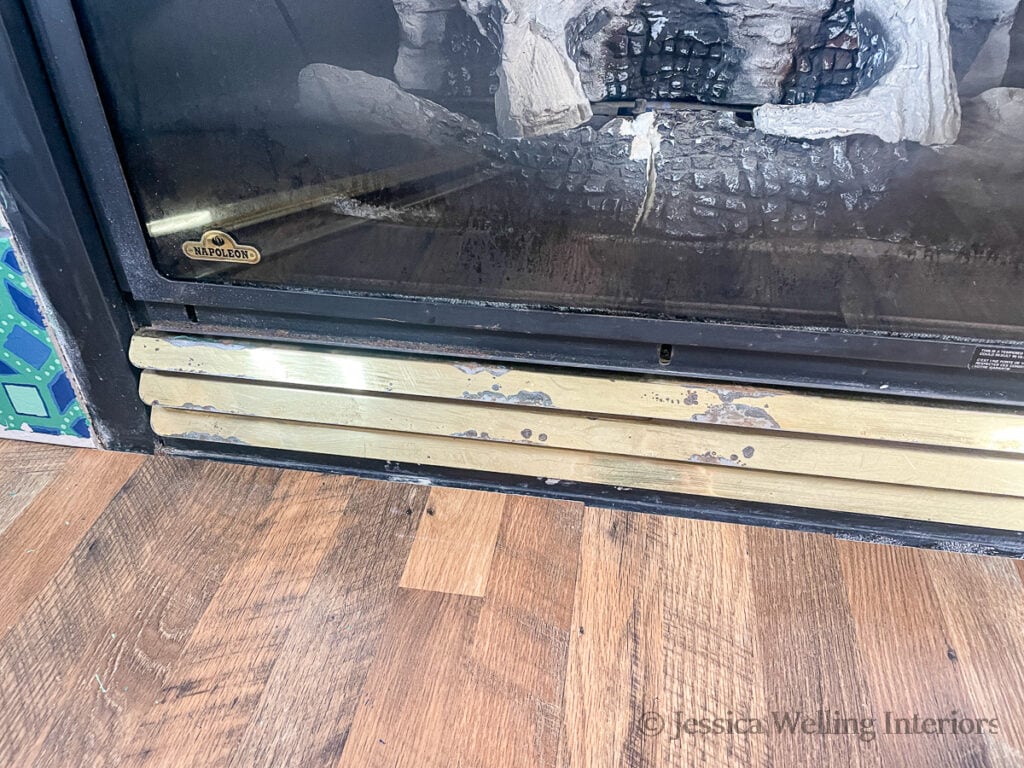
I gave it a quick and ultra-easy $12 refresh. Check out the tutorial here:
DIY Fireplace Makeover with High Heat Paint
And here it is, all finished!
More Fireplace Makeover Ideas…
$110 DIY Fireplace Makeover: How to Paint Tile
25 Modern Moroccan Tile Stencils
Painting Fireplace Tile: The Ultimate Guide