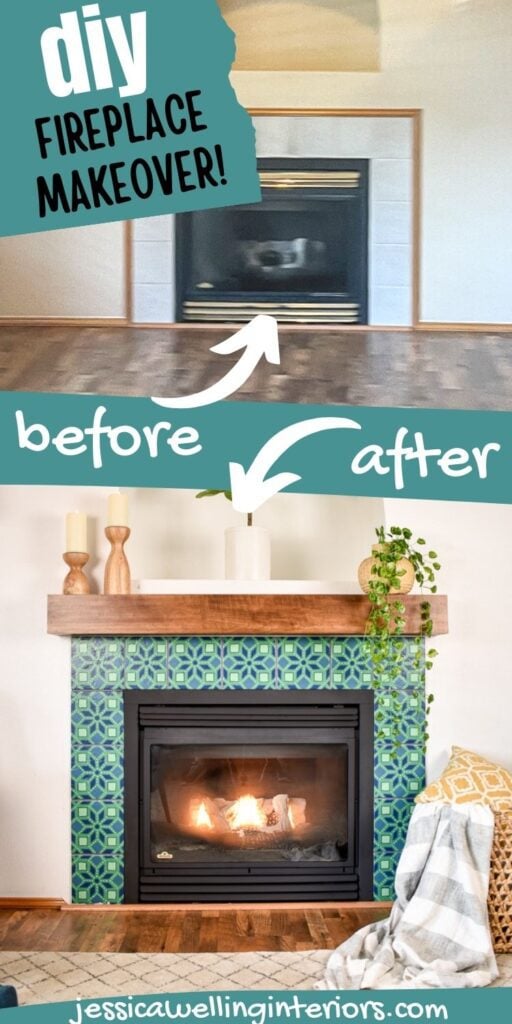
Painting Fireplace Tile: The Ultimate Guide
Transform an old fireplace tile surround with this easy and inexpensive DIY tile painting tutorial.
Did I tell you all that the girls and I moved a couple of months ago? Today I’m really excited to share my very first DIY project in the new house!
Okay, it’s far from the first DIY project. But it’s the first fun project.
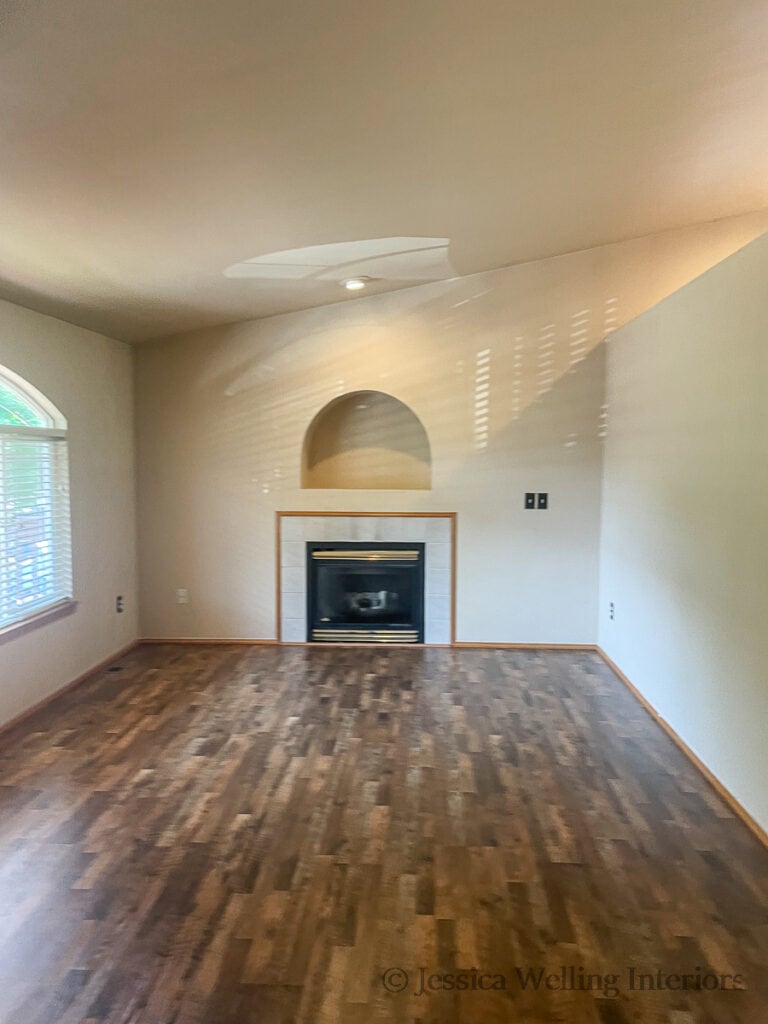
Let’s just say the old tile fireplace had seen better days.
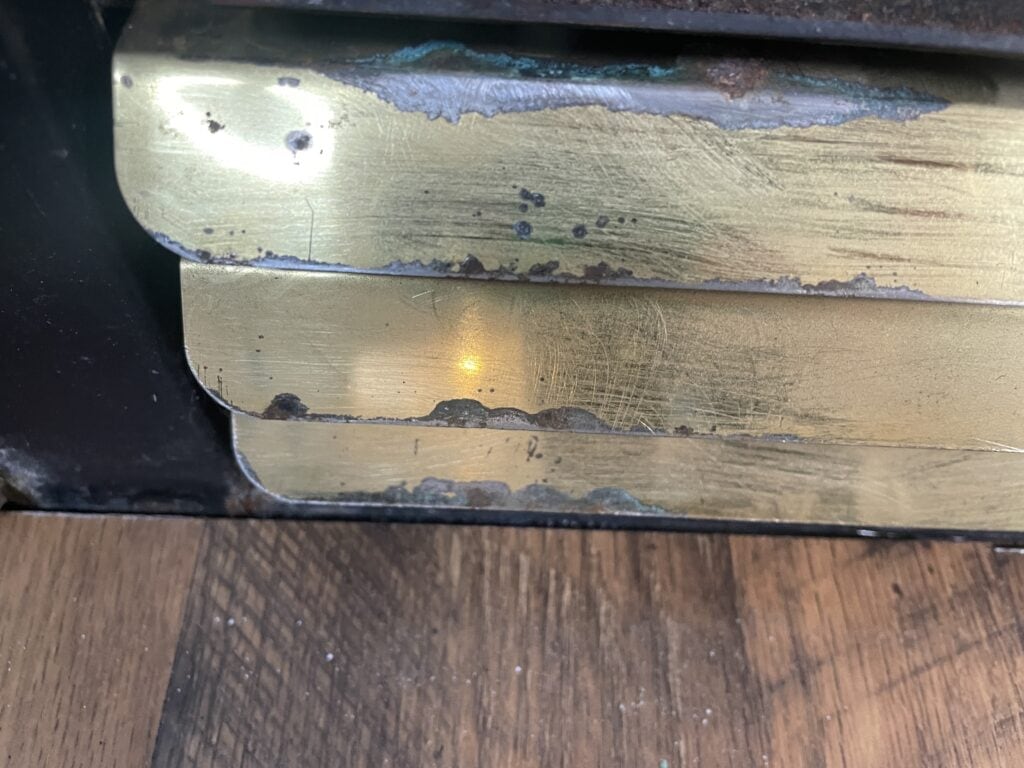
The gas insert really needed some love. In the tutorial below, I’ll show you how I made it look brand new for around $10!
DIY Fireplace Makeover With High Heat Paint
I’m all about painting fireplace tile with tile stencils because it’s easy, inexpensive, and makes a big impact. This is actually my 4th fireplace tile-painting project! You can see the tile fireplace makeover from my old house here. And we also recently painted my parent’s fireplace (photos coming soon!).
I decided to go for some bold color this time around. Because why not? I was inspired by some gorgeous old Moroccan tile fireplaces. And there’s an arched alcove above the fireplace.
Before You Begin
Measuring the Tile
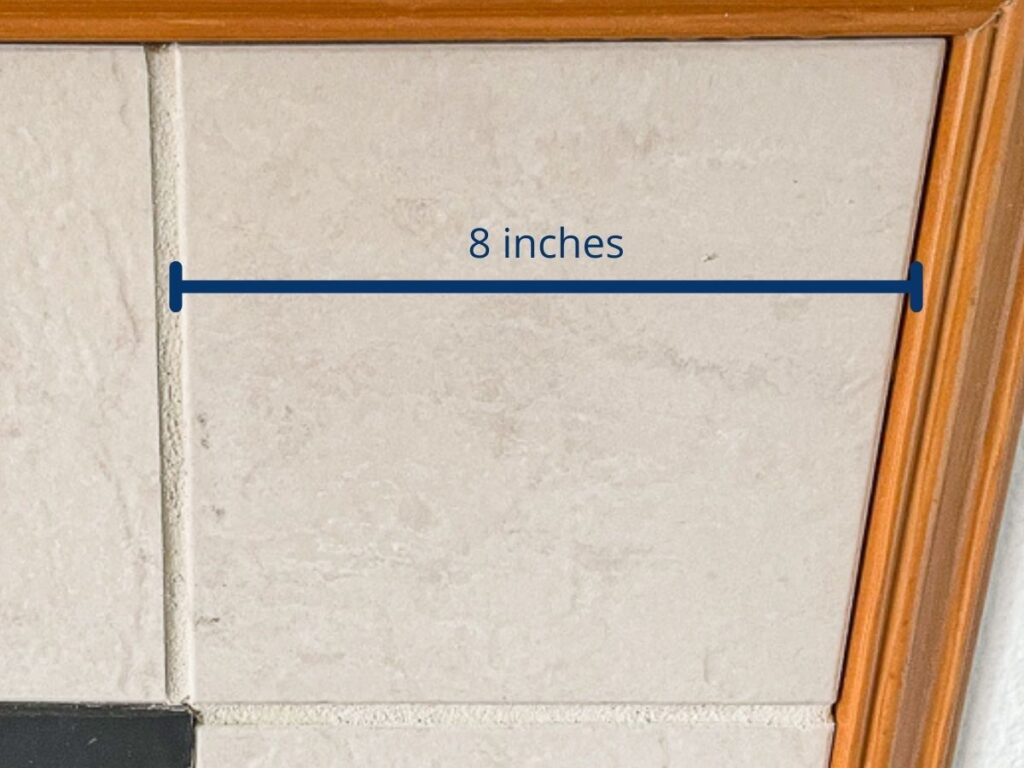
You’ll want to begin by measuring your tiles. You measure from the center of the grout line on one side, to the center of the grout line on the other side.
And if there is no grout line (like on the right below) measure to where the center of the grout line would be if there was one.
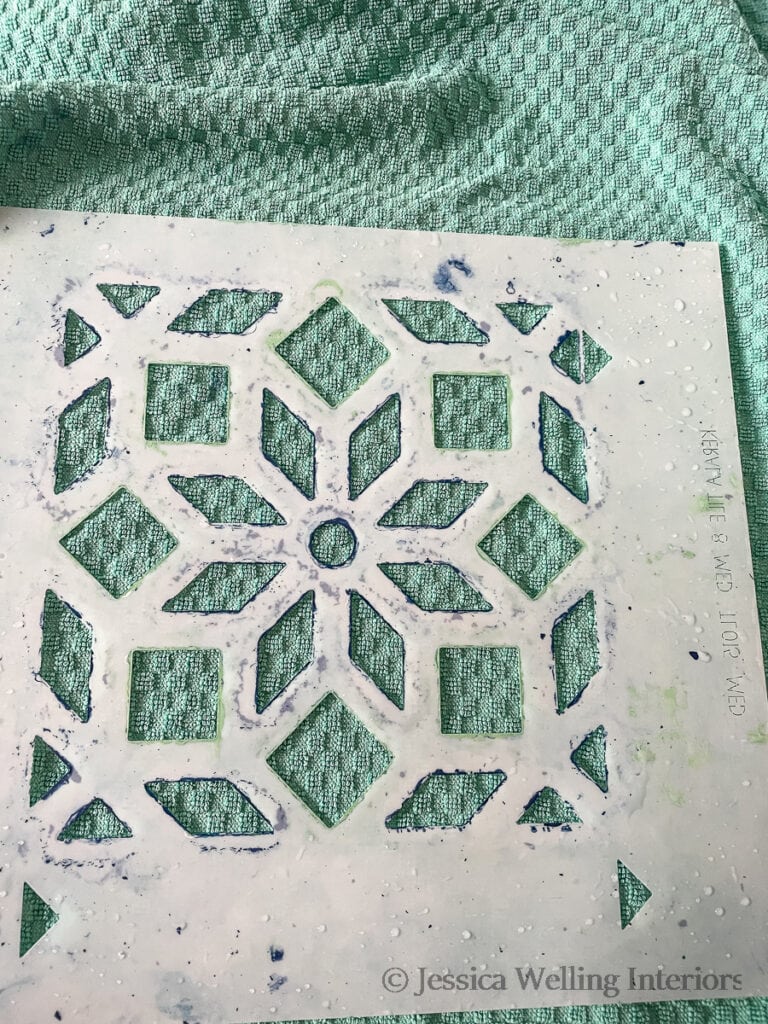
My fireplace tiles were 7 3/4″ wide, but from grout to grout they were 8″. So I ordered an 8″ tile stencil.
Don’t worry if your stencil is just slightly larger than the tiles when it arrives. It’s supposed to be that way.
As you can see below, the shapes on the outside edges of the stencil go slightly beyond the boundary of the tile, and that’s fine.
Choosing a Tile Stencil
There are a ton of tile stencil options to choose from. Here’s a list of my favorites.
The pattern you choose will depend on the look you’re going for. You’ll see patterned tile in modern farmhouse, midcentury modern, and modern Boho home decor, as well as styles with Spanish, Moroccan, and Mexican influence.
I recommend going with a simple pattern that’s only repeated one time per tile. Once I had a client choose a pattern that was repeated four times on each tile. It took FOREVER!
The more intricate shapes and lines in your pattern, the longer you will spend touching up. And it’s possible to spend A LOT of time touching up, especially if there’s a perfectionist in you.
So do yourself a favor and choose a stencil that’s not too intricate.
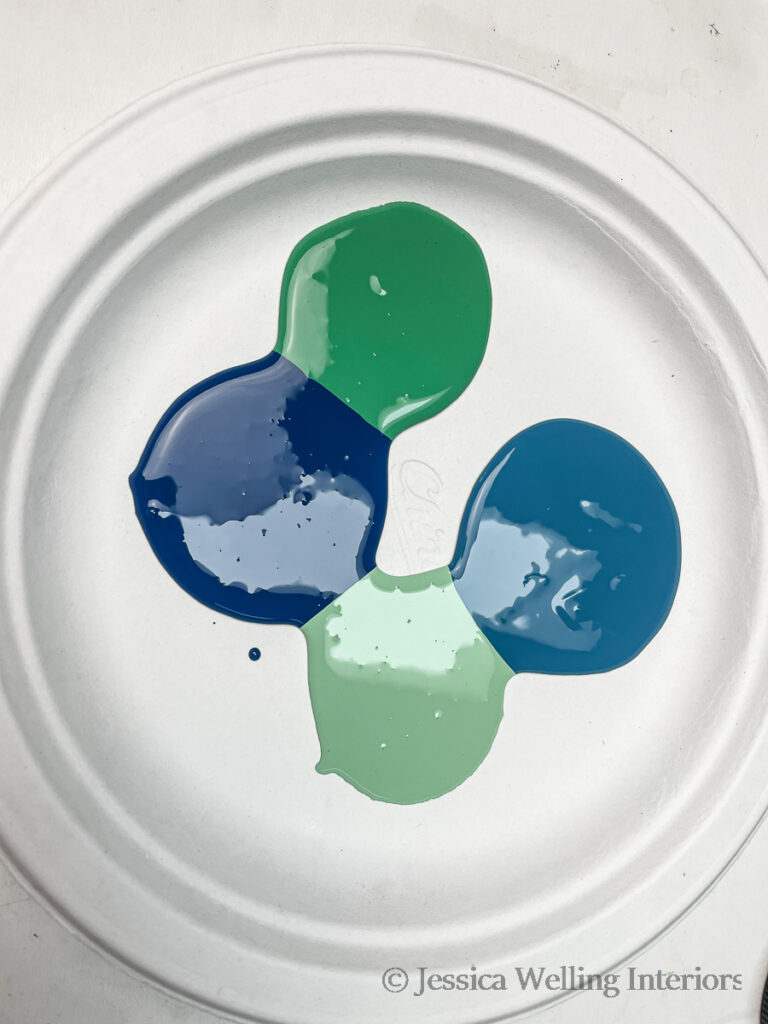
Choosing Paint Colors
I recommend going to the paint store and grabbing five or six samples. I like to use Behr samples from Home depot because they’re the least expensive samples I’ve found.
Experimenting
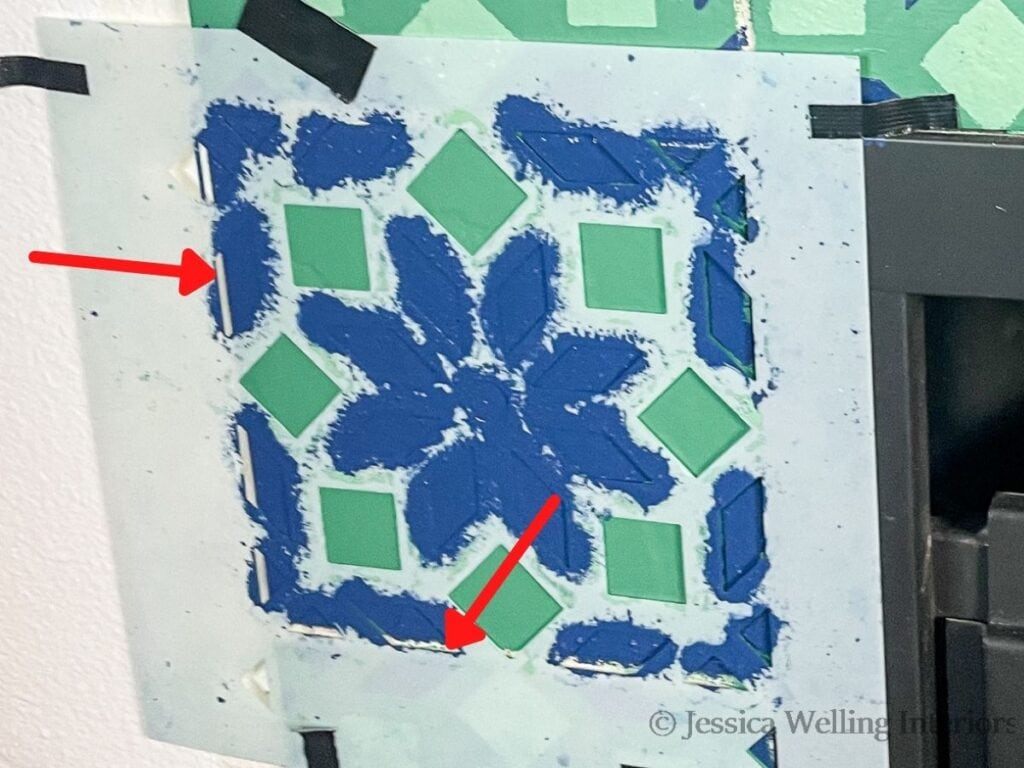
I recommend experimenting with your stencil and paint colors on a piece of cardboard before painting the actual fireplace. This will give you a chance to practice using the stencil brush and help you decide which colors to use where.
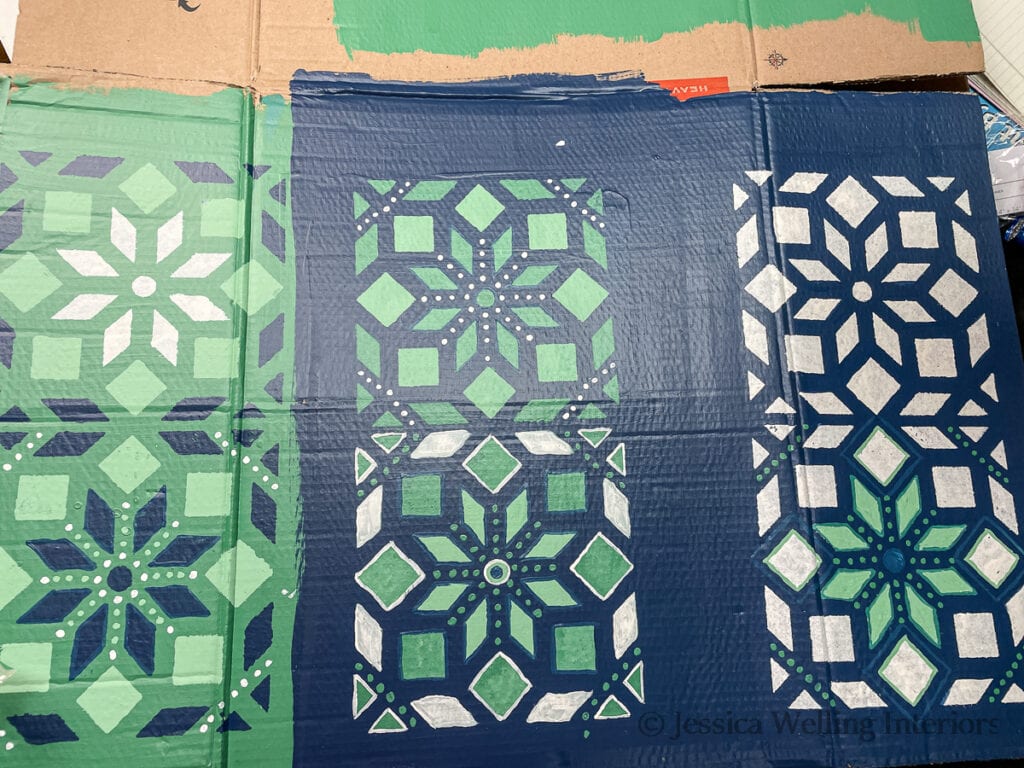
As you can see above, I tried out several different combinations before landing on my final choice.
Do You Need to Sand Your Tiles Before Painting?
This depends on how glossy the finish on your tiles is. My ceramic tiles started with a matte finish, so I opted to skip sanding. However when my mom and I painted her fireplace tiles, we did sand them first because they had a high-gloss finish.
Do I Need to Use High-Heat Paint?
No, not on the tiles. But you do need to give the paint ample time to cure if your tiles get hot. I recommend doing a test.
Turn on (or light) your fireplace and let it burn for an hour or two. Feel the tiles. Are any of them hot to the touch? Some tile fireplace surrounds get really hot, and others (like mine) barely get warm at all.
If your tiles get really hot, I recommend doing this project in the Spring, so you can give the paint a few months to cure before you want to actually use the fireplace.
I’ve never been able to find high-heat paint that comes in multiple colors and can be applied with a brush.
I’m doing this project in November, since my painted tiles won’t need to stand up to much heat. But I’ll still wait a couple of weeks after applying the final coat of polyurethane before turning on the fireplace, just to be sure.
I’m also going to paint the fireplace insert itself. I will use black high-heat spray paint for this. Tutorial coming soon!
How Long Will This Project Take?
I’ve found it’s best to plan to do this project over the course of a few days. That’s not to say it will actually take that long to do. But since there are multiple layers of paint involved, it’s important to give the paint adequate dry time between coats.
This is especially important since the tiles will likely get warm or hot when the fire is lit/on.
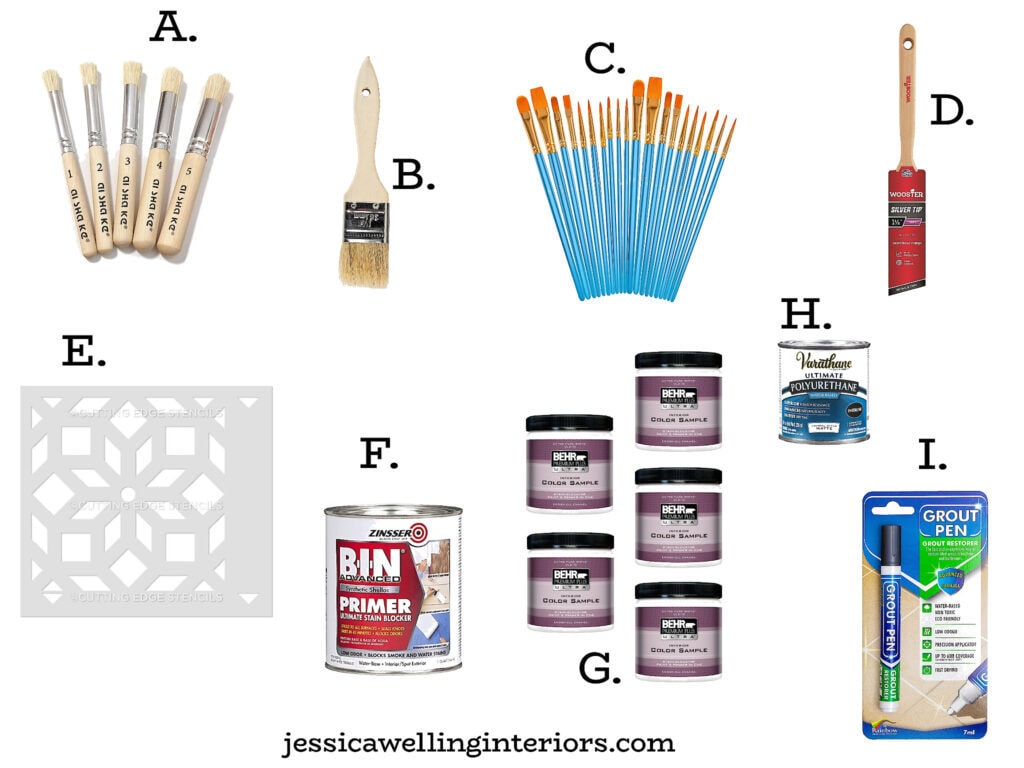
Materials
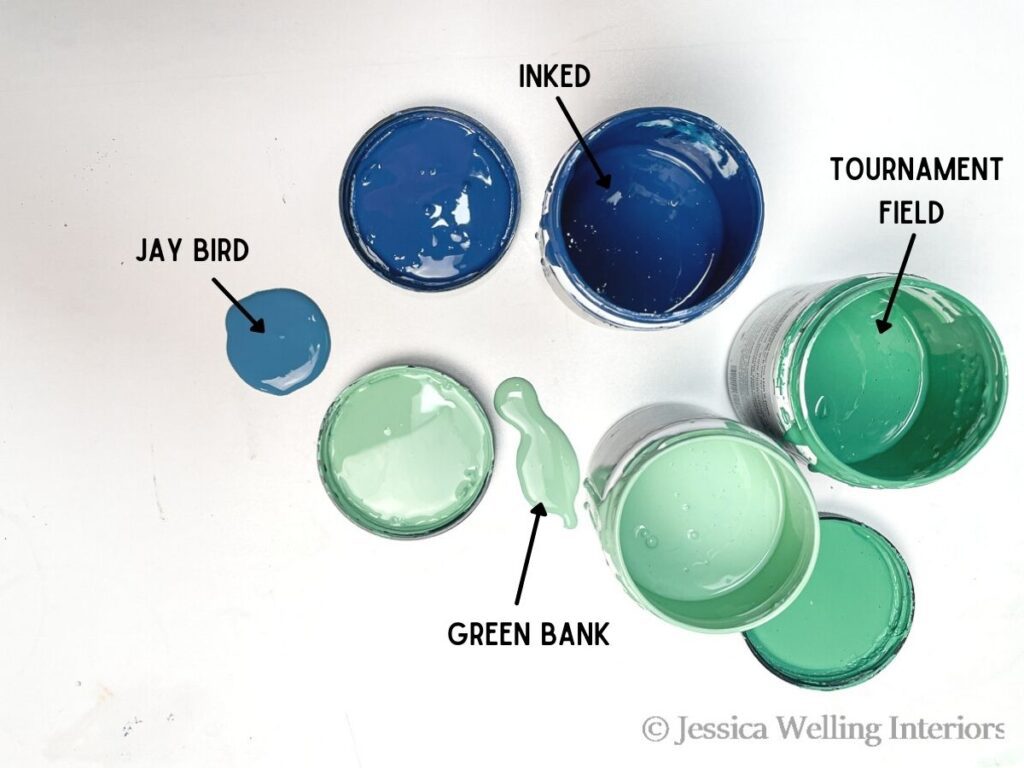
Paint Colors
Here are the paint colors I landed on, all from Behr (Home Depot):
base color: Tournament Field
pattern colors: Inked, Jay Bird, and Green Bank.
Directions
1. Clean the Tiles
Begin by wiping down your tiles with a damp rag. I was surprised at how much dust and filth came off my tiles and gas insert!
2. Apply Primer
For jobs like this one that require some serious sticking power, I like to use BIN shellac-based primer, because it will stick to just about anything! I apply it with a chip brush (cheap disposable paintbrush) because it’s a pain to clean up.
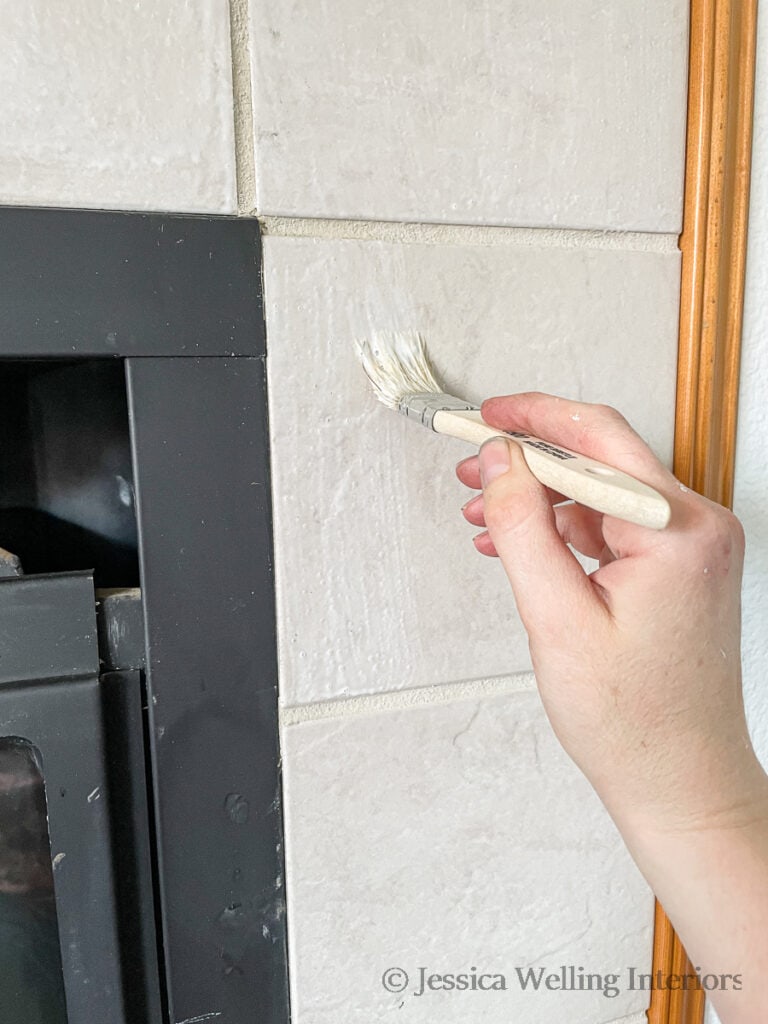
This primer needs to dry for about 45 minutes before applying the first coat of paint.
I’m planning to go over my grout lines with a grout pen at the end, so I’m not too worried about getting primer or paint on the grout.
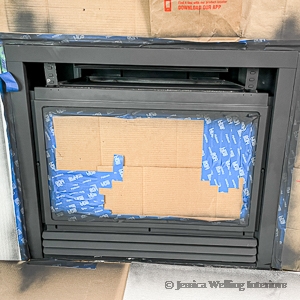
I’m also going to paint the fireplace insert. If you don’t plan to paint your fireplace insert, you’ll want to mask it off before you begin.
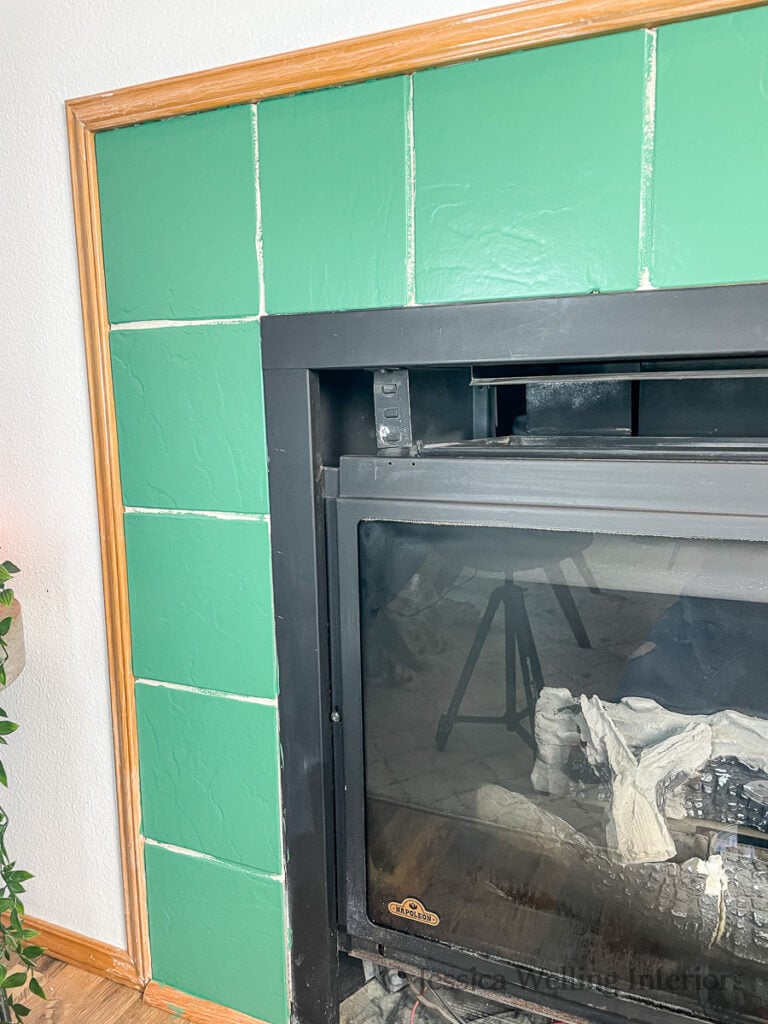
3. Apply Base Color
Paint the tiles with the base color, and let it dry. You’ll likely need to do two coats to get full coverage.
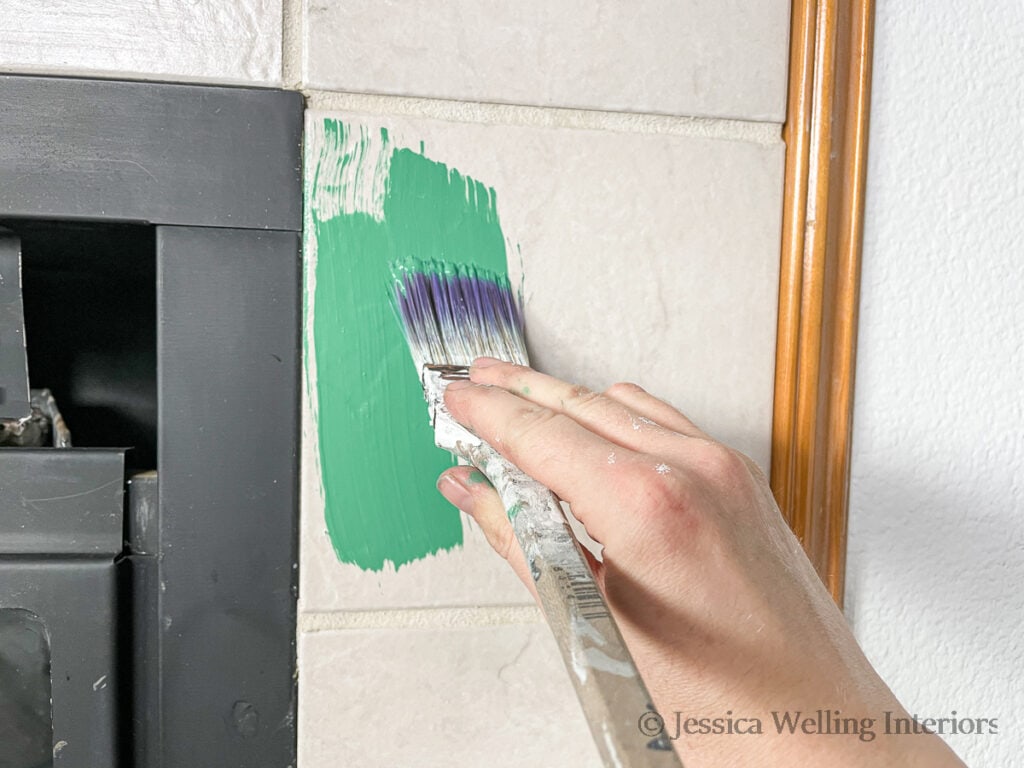
This is a good point to take a break and give the paint a chance to dry completely before moving on the the next step. You don’t want to trap moisture under your layers of paint, or you’ll have problems later.
4. Secure the Stencil
Tape
I chose to use a couple of bits of duct tape to hold my stencil in place for this project. And this worked because I don’t have a wood fireplace surround in the way. But note that I will be using my left (non-dominant) hand to hold the stencil down while I paint.
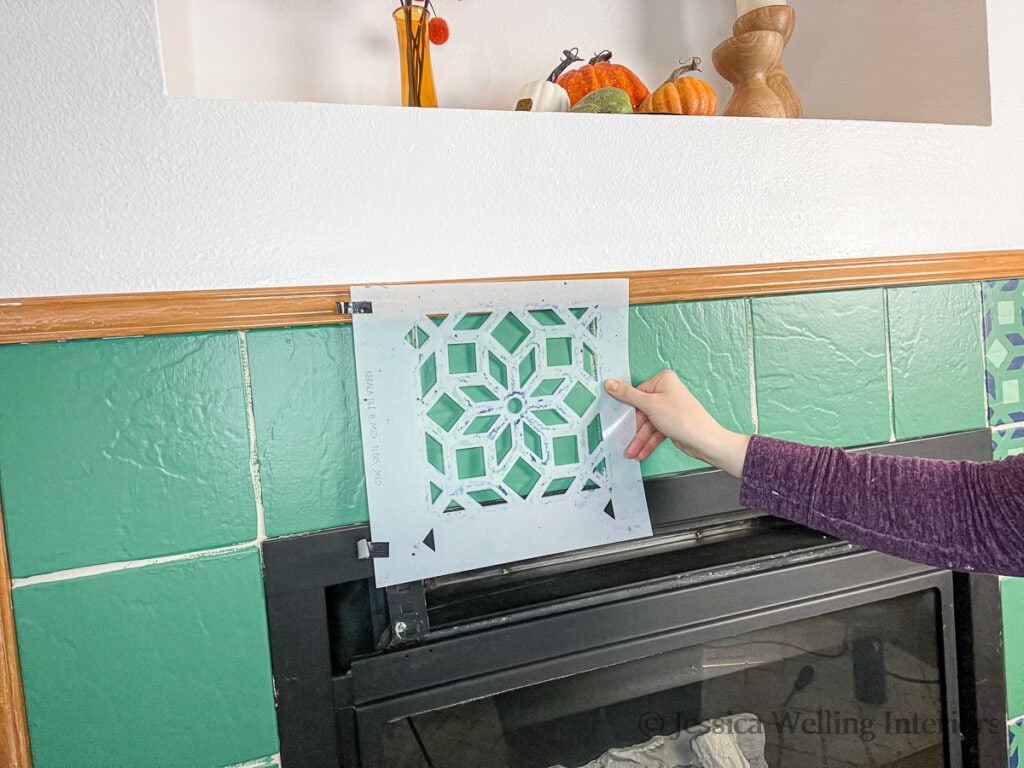
I’m also going to avoid putting tape directly on the tile surface that’s already been painted.
Stencil Adhesive
Another option is to use stencil adhesive. We used this with my mom’s fireplace makeover and it worked well. It comes in a can and you spray it on the back of the stencil to hold it in place. The adhesive level is similar to that of a post-it note.
But one word of caution: If you’re going to use stencil adhesive, be sure to spray it outside. Otherwise your floors will be really really sticky!
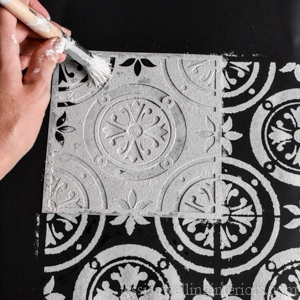
5. Apply Paint with Stencil Brush
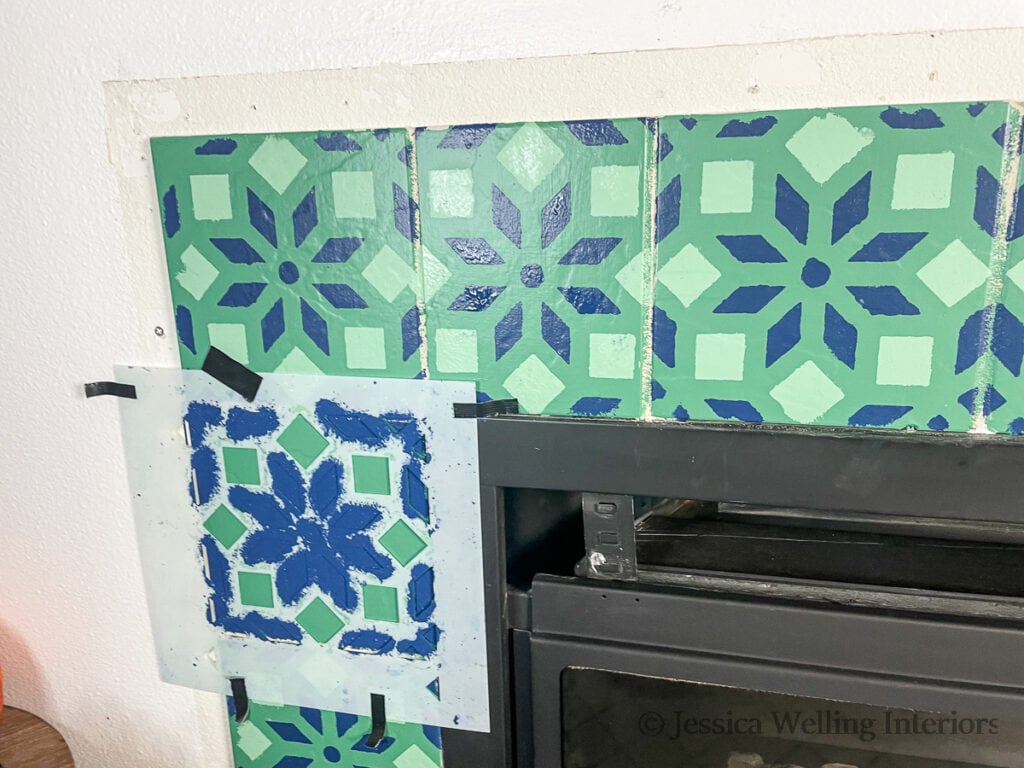
As you can see, I decided to remove the wood trim around the fireplace.
It’s difficult to get into the corners and edges, so you may have to come back with a fine artist’s paintbrush and touch the edges up later.
6. Wash & Dry Stencil & Repeat
It’s important to wash the paint off the stencil while it’s still wet. If you don’t excess paint will build up and dry around the edges of the cut outs. This will make your lines less and less crisp.
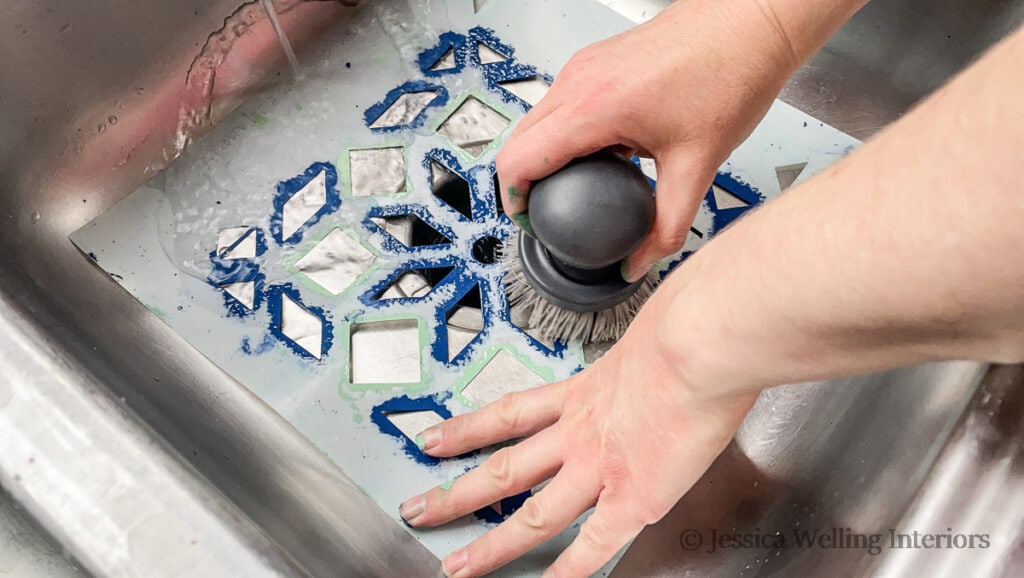
I just put my stencil in the bottom of my kitchen sink and used a dish scrubbie and warm water to gently remove the paint. Then I lay it on the counter on a dish towel to dry.
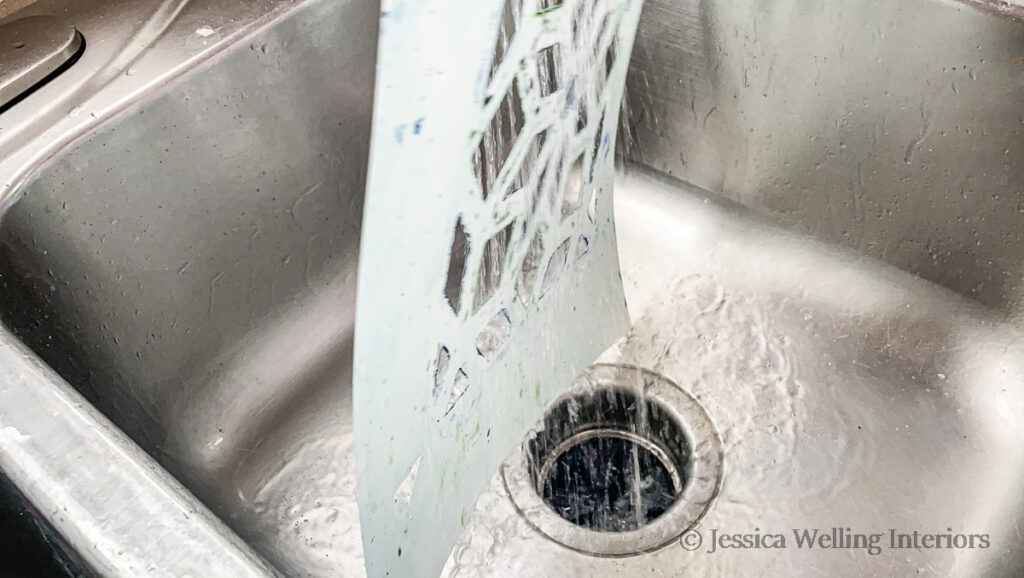
Be sure to dry the stencil completely before each use. If you don’t, the water will mix with the paint and you’ll have a drippy mess. Trust me, been there done that!
7. Touch Up
This is the step where you may have to tell your inner perfectionist to take a hike. It’s very possible to spend many, many hours touching up. But if you stand back your pattern probably looks great.
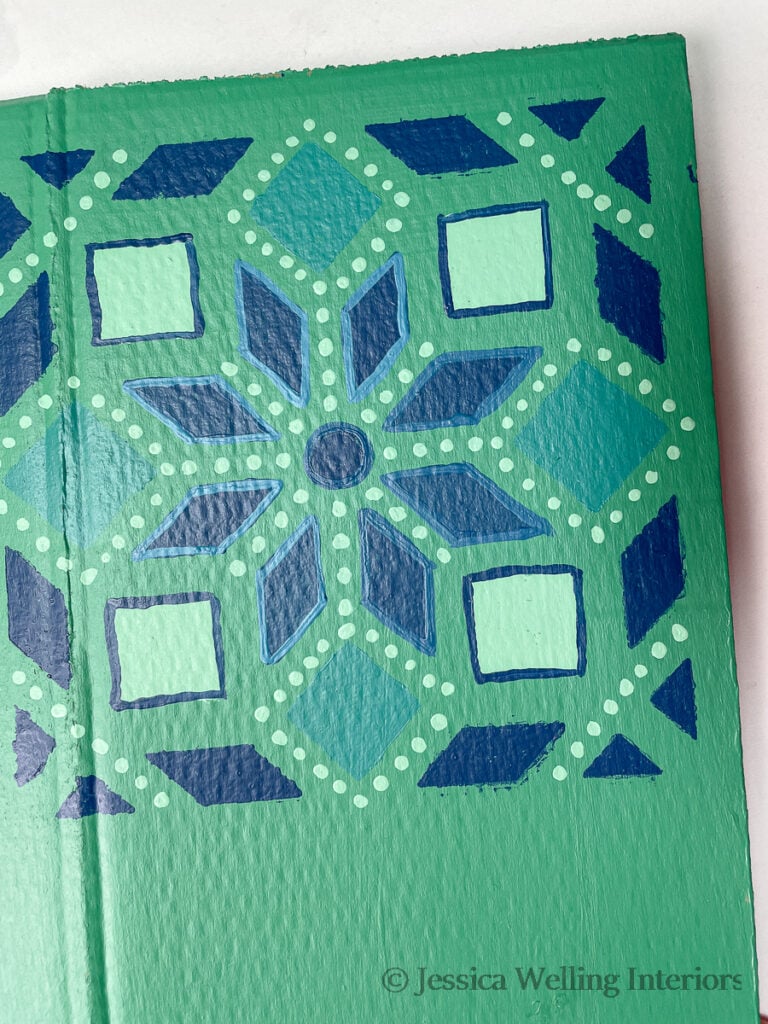
This is the first time I’ve added extra details to a stencil pattern after-the-fact. I found that outlining the shapes with a line line in a different color covered up all the imperfect edges.
8. Add Details (Optional)
I was inspired by intricate Moroccan tiles, so I wanted to add some extra details to my pattern. I used a tiny brush to outline some of the geometric shapes
I also added a dot pattern.
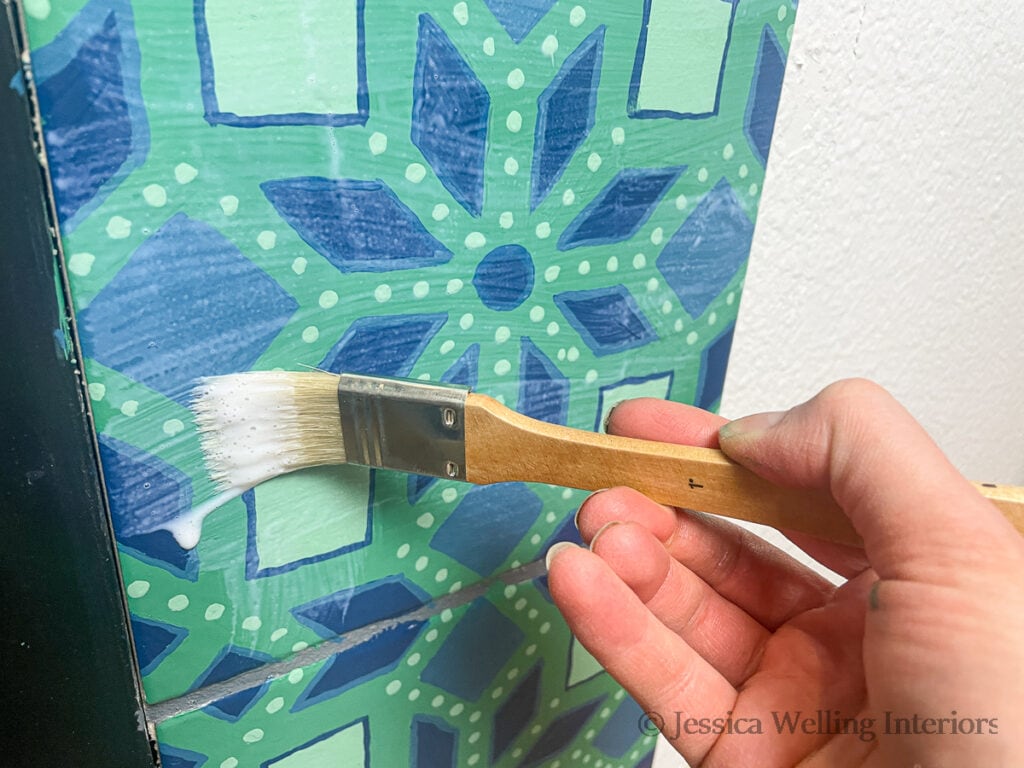
9. Apply Polyurethane
I’m using polyurethane with a matte finish because my paint is a little bumpy after all the touching up I did. The matte finish won’t draw attention to the imperfect surface of the tiles.
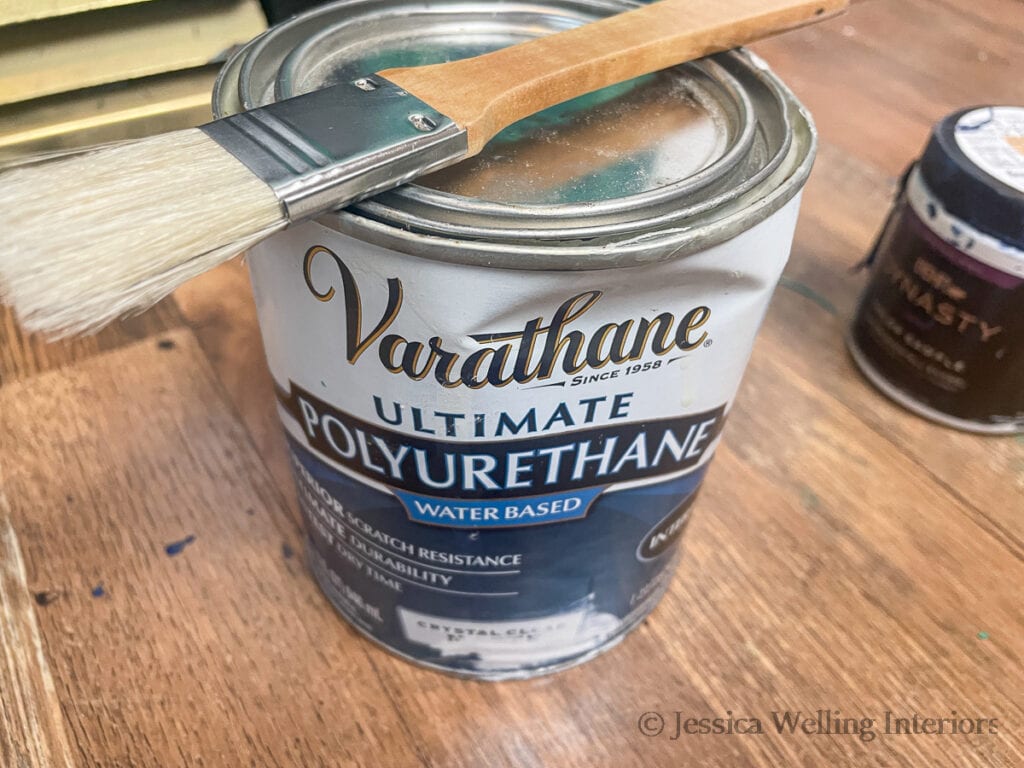
It looks a bit milky coming out of the can, but it will dry clear. I like to do 2 coats to protect the painted tiles.
10. Cover Grout Lines
I like to wait until the very end to color the grout, because I can cover over any paint that got on it.
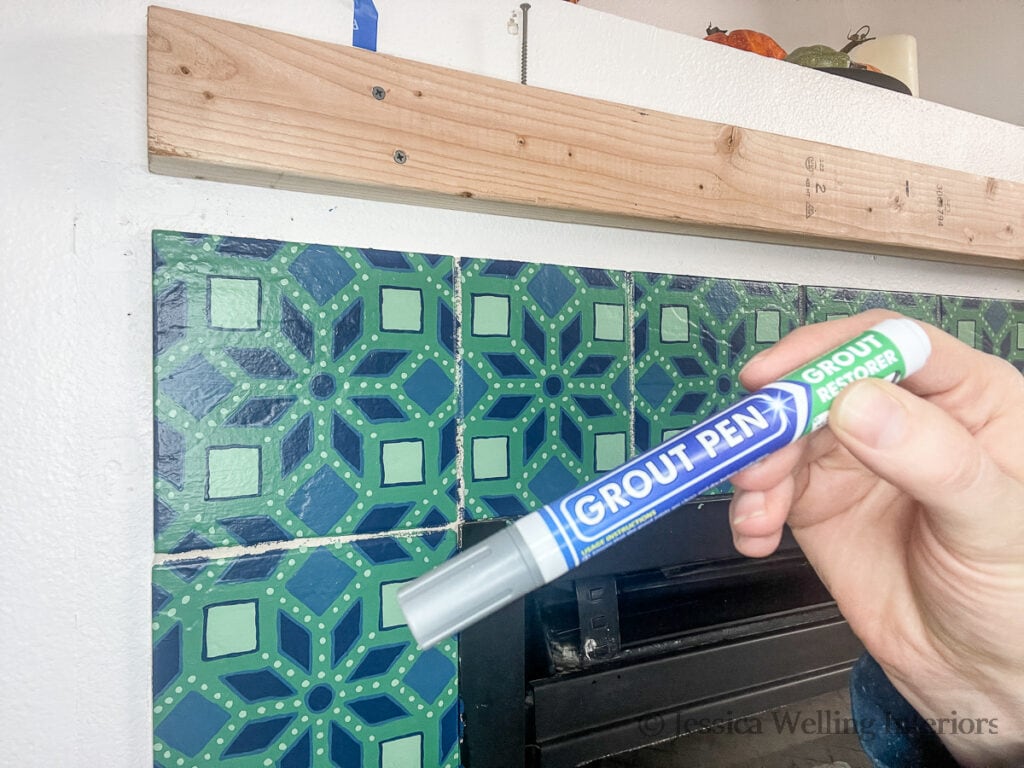
The first time I painted a tile fireplace, I used a liquid grout colorant that came in a bottle. It was drippy and made a huge mess. Then I discovered grout pens, and I’m never going back!
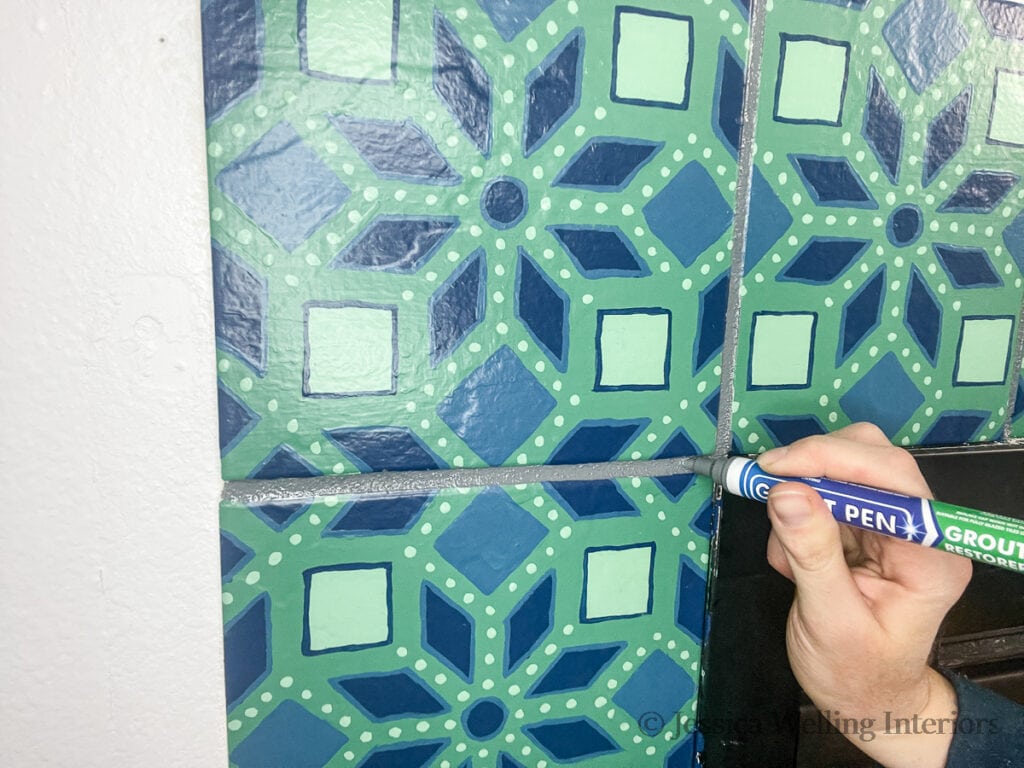
This brand is my favorite, and there are a few different colors and tip sizes to choose from. I recommend getting a narrower tip. And I think you’ll be surprised at how far a single grout pen goes.
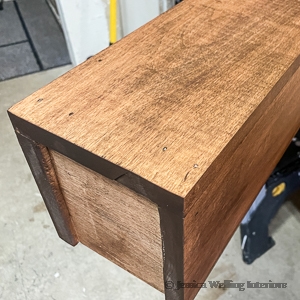
My dad and I also built a new box beam mantel and I refinished the gas fireplace insert to make it look new.
Easy DIY Fireplace Mantel Tutorial
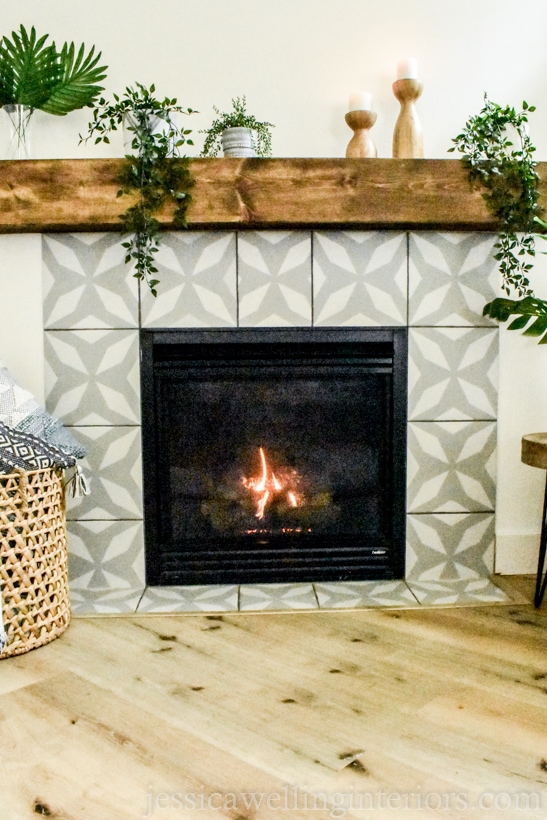
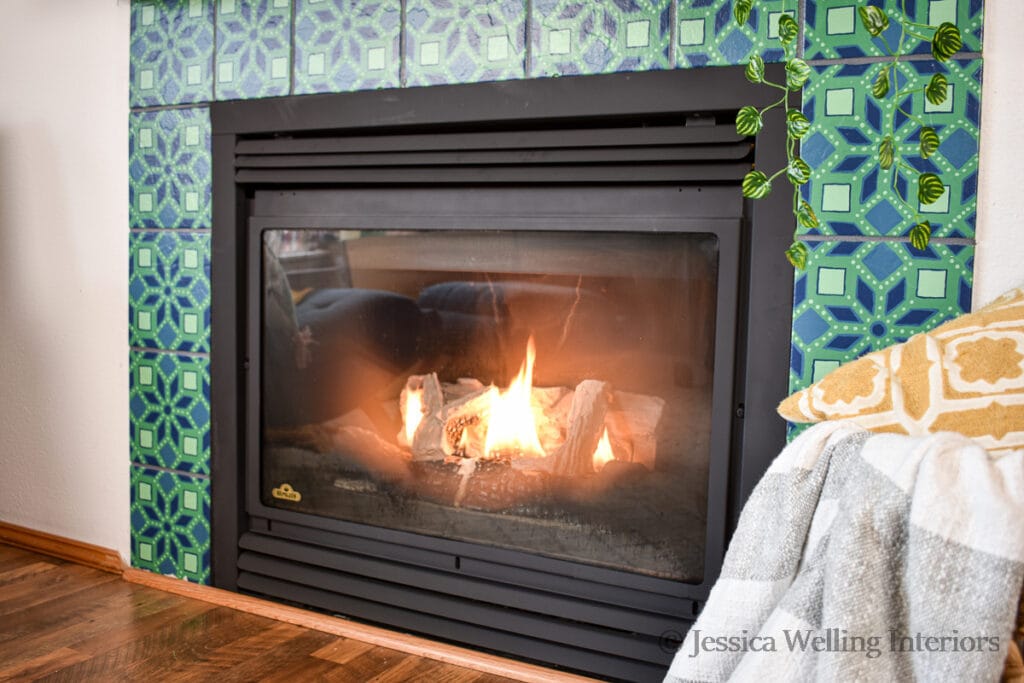
And here’s the finished fireplace…
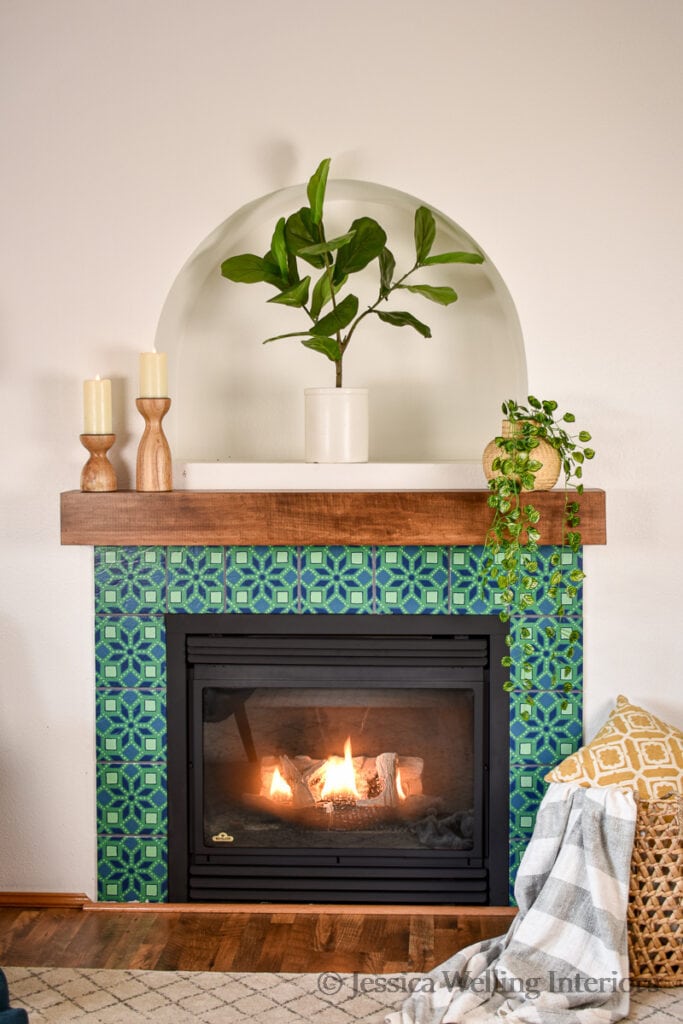
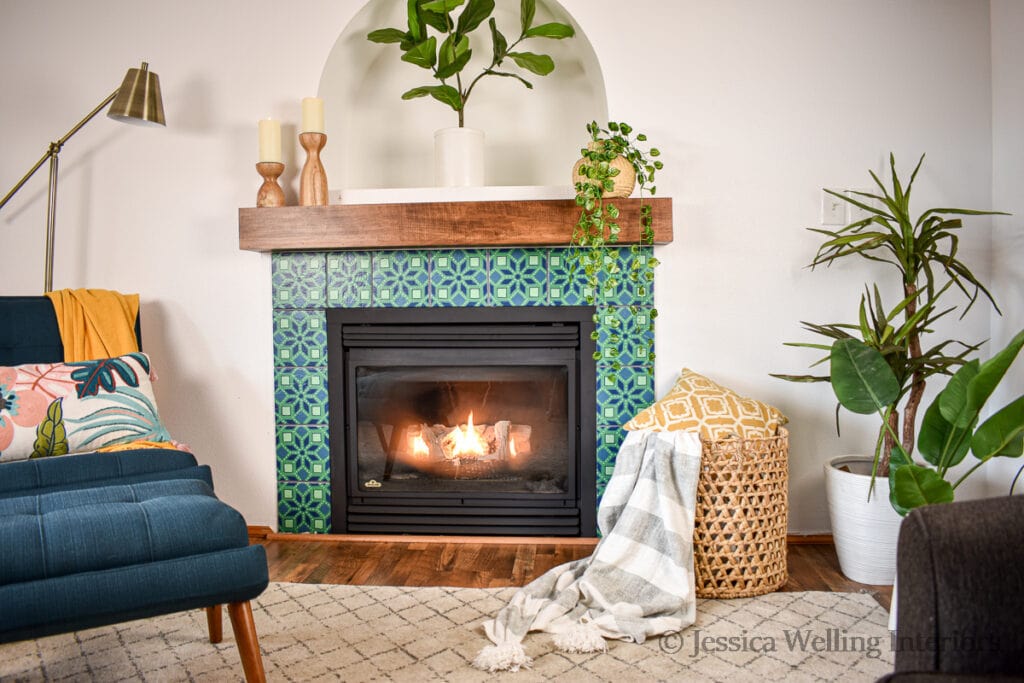
And now it’s time to decorate for Christmas! I can’t wait to make memories in our new home!
More Modern Fireplace Makeover Ideas…
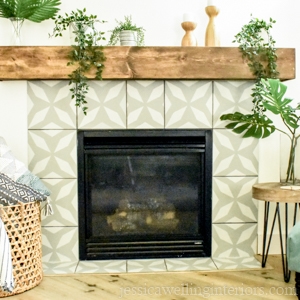
$110 DIY Fireplace Makeover: How to Paint Tile
25 Modern Moroccan Tile Stencils