
How to Make Wood Bead Christmas Ornaments
Make these fun and easy Boho wood bead Christmas ornaments! They’re perfect for modern farmhouse Christmas decor, or they can go midcentury modern too!

Boho wood bead ornaments are all the rage this year… so of course I had to try making them, and put my own unique spin on them. This was a fun Christmas craft and the kids got to help too!
I’m going colorful Boho for my Christmas tree and mantel this year. I know it’s a little “out there” but I love it and it’s going to be a thing. Just wait.
In fact, I’m revealing all the fun Boho Christmas decor I’ve been working on tomorrow in my first ever Christmas home tour! I would love for you to come see it!
So anyway, I wanted some pink ombre wood bead Christmas ornaments for my tree. But I know a lot of you prefer neutrals, so I made some unfinished wood and white ones for you too! The process is the same- but you can choose to paint the beads or not.
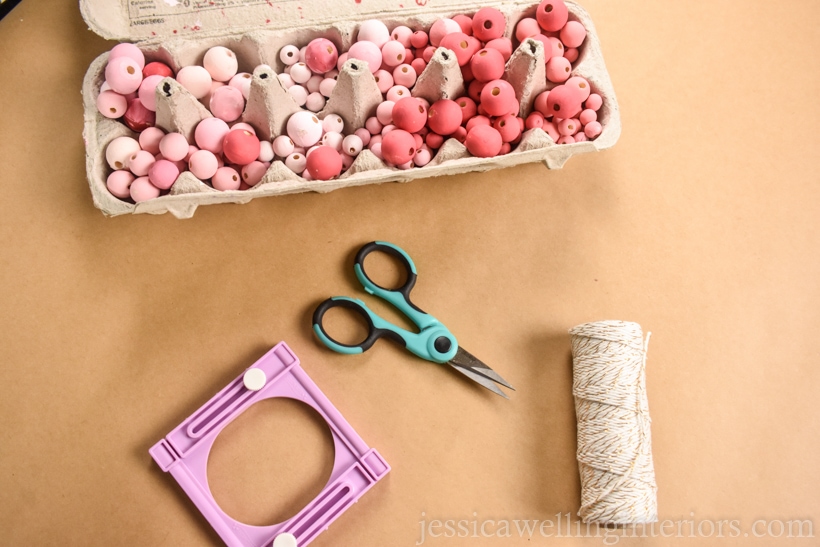
Here’s What You’ll Need:
- wood beads in 3-4 sizes (I used this multi-sized pack from Amazon)
- Tassel maker, size small
- string
- craft scissors (these are my favorites!)
- extra-large sewing needle
- Acrylic paint
- small paintbrush
1. Paint Your Wood Beads
This step is optional. But if you want your beads painted, do it while you watch Christmas movies… though maybe not on the couch.
The girls and I had fun painting the beads together. I knew I wanted some ombre-style ornaments that would fade from bright pink to very light pink, so I included 4 shades of pink in the mix. We also did some rainbow ones for the girls’ mini Christmas trees in their bedroom. And some white ones too.
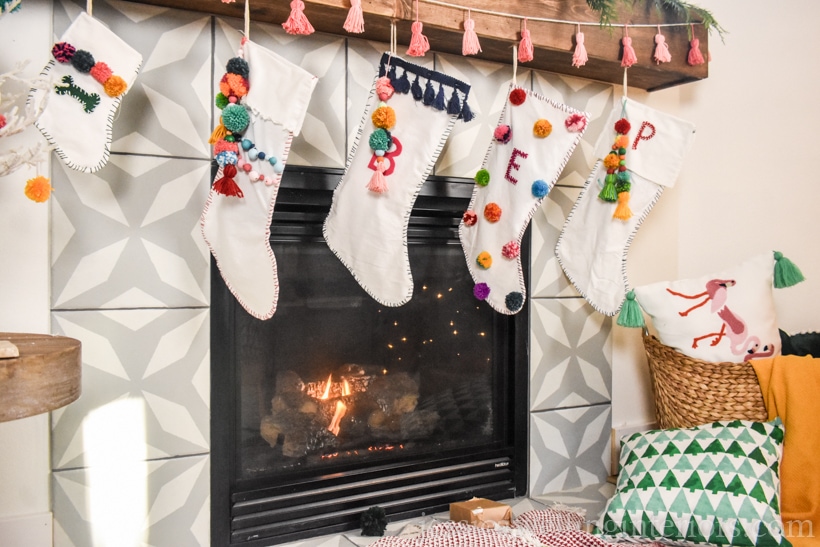
I also used these colorful painted wood beads to make fun Boho Christmas stockings, which I’ll be sharing in my Christmas home tour on Thursday!
I like this Clover tassel maker because it makes tassel-making fun and simple. It’s also adjustable and turns out uniform-length tassels if you need more than one for a project. I’m making tassel garlands, tassels for wrapping Christmas gifts, and I’m sure I’ll find more uses for them soon!
Sometimes making tassels and pom poms is easier to learn from a video. I’ll post a video at the bottom of this post.
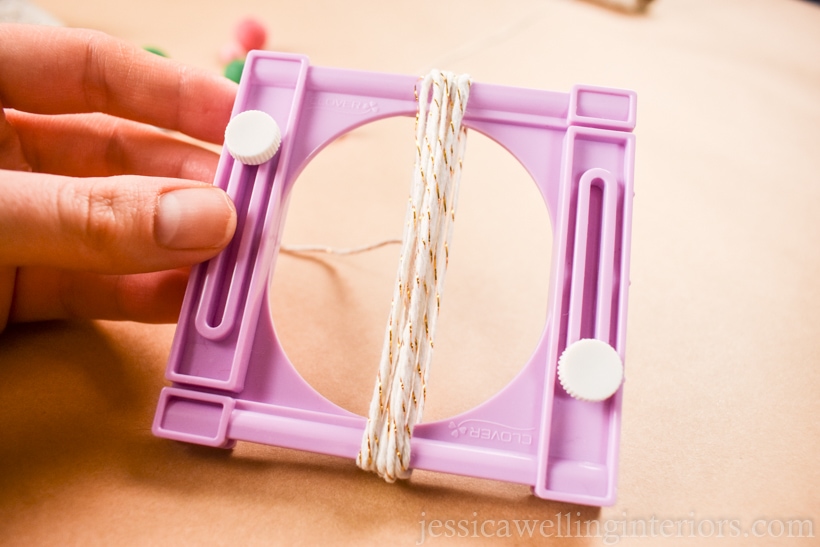
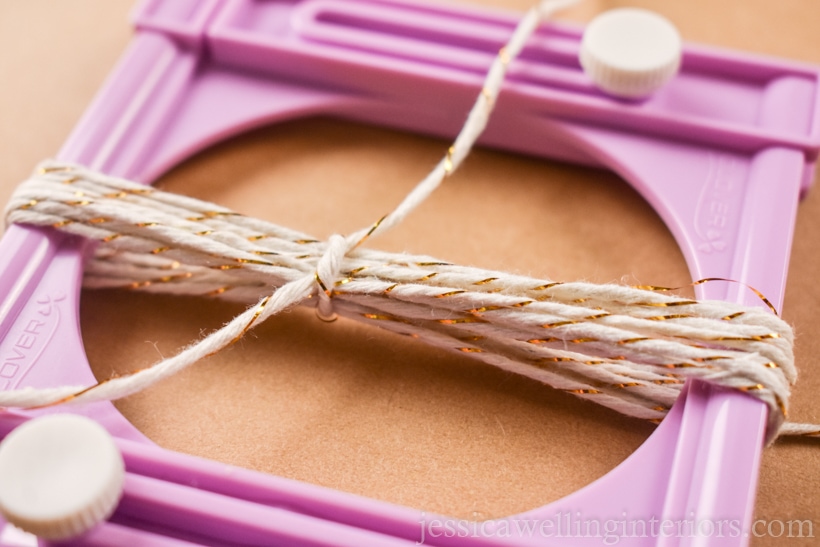
2. Wrap the String
Wrap the string around the tassel maker about 10 times. This will give you about 40 strands in your finished tassel. When you’re done, leave about a 12″ piece of string on one end before you cut it.
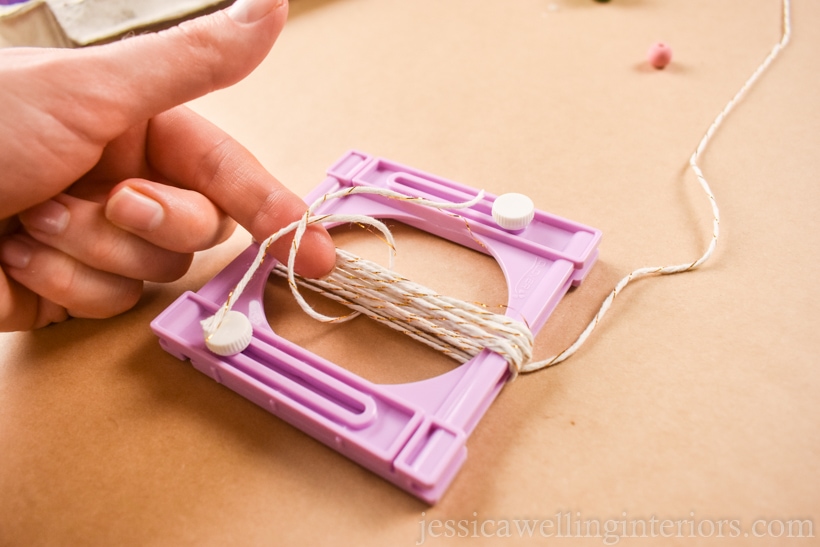
3. Tie the Tassel
Cut a short piece of string, about 10″ long, and tie it around the wrapped strings, slightly offset from the center.
4. Double-knot It
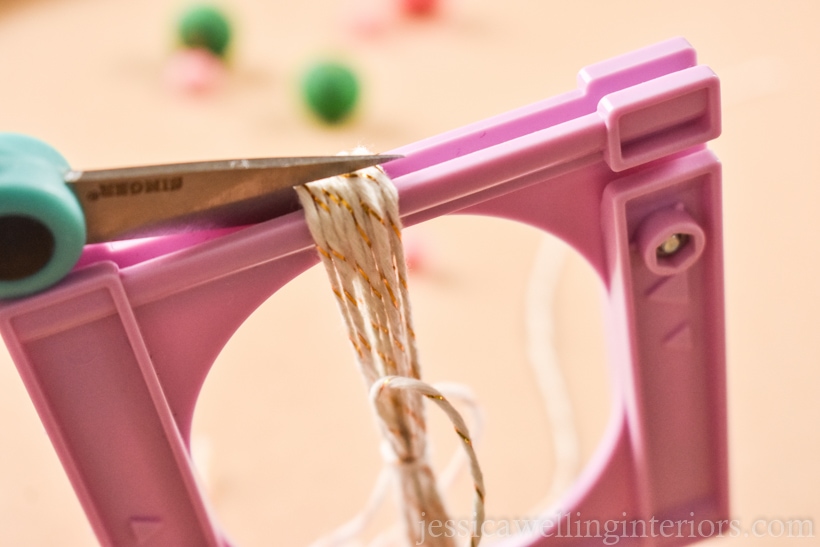
5. Cut the Tassel Ends
This is where these really sharp craft scissors come in handy! Run the scissors through the groove on each end of the tassel maker, cutting all the loops, except the extra length you left at the beginning.
It should look like this:

6. Arrange The Tassel
Now hold the tassel up by the long string you left.
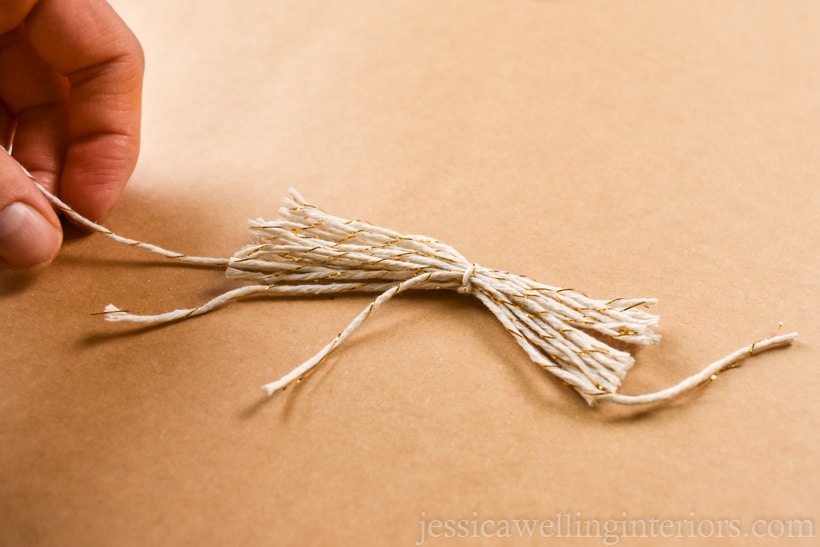
Arrange all the strings so they fall nicely. It’s okay if they don’t all hang straight down at first- gravity will help over time.

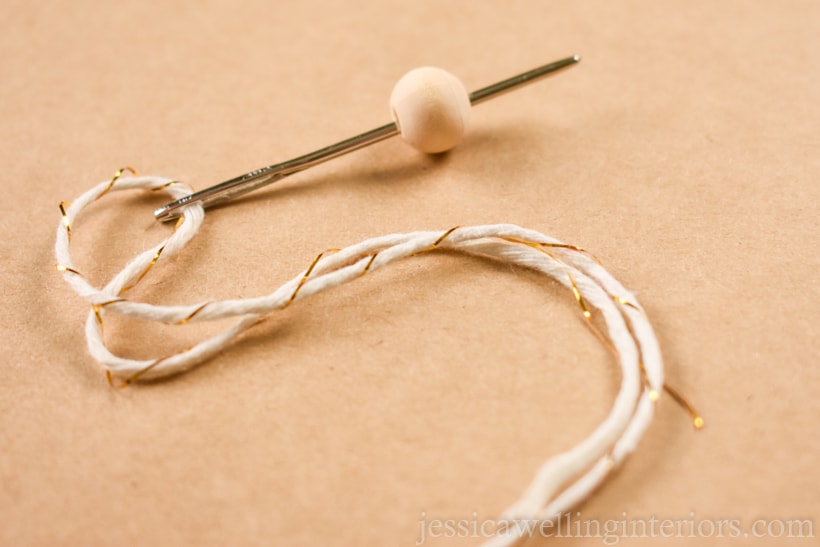
7. Thread The Needle
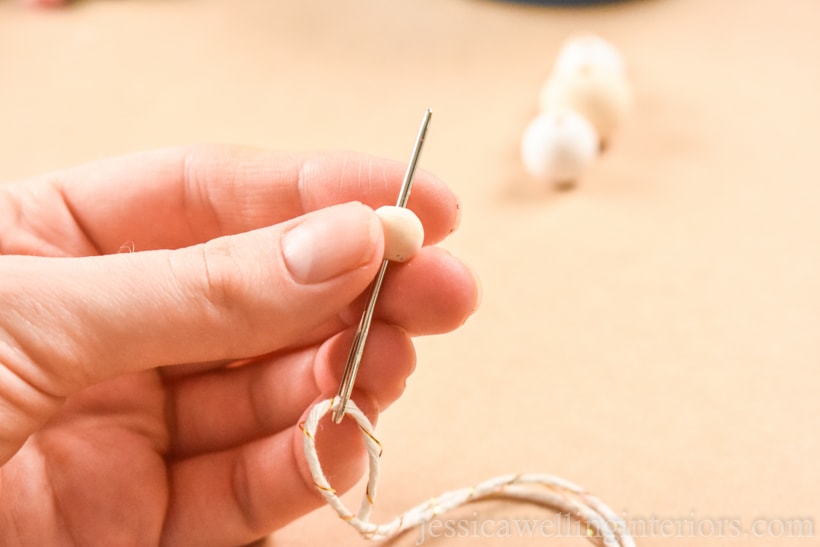
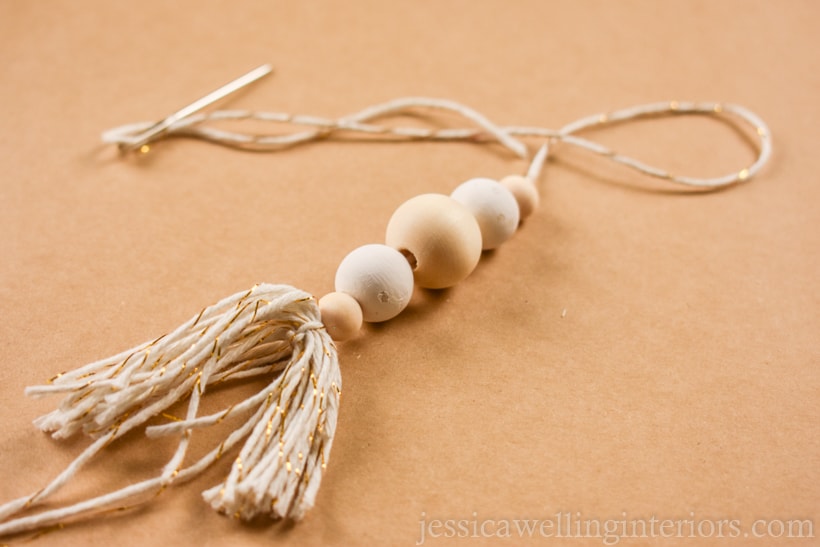
8. String The Wood Beads
Start with the smallest size of bead, and work your way up to the largest. Then back down to the smallest again.
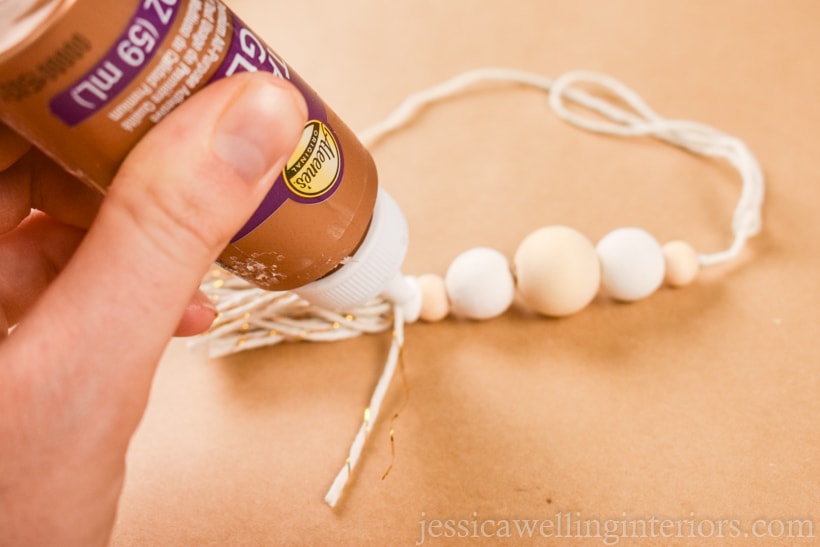
9. Add a Dab of Glue
There isn’t a ton holding this whole thing together, and I didn’t want it to fall apart- especially since Fozzy is enjoying grabbing ornaments off the tree!

So I added a dab of tacky glue to the top of the tassel to be sure the main vertical string doesn’t pull out.. Hot glue works even better!
10. Tie the Ornament Top
Tie and knot a loop at the top of the ornament to hang it on the Christmas tree.
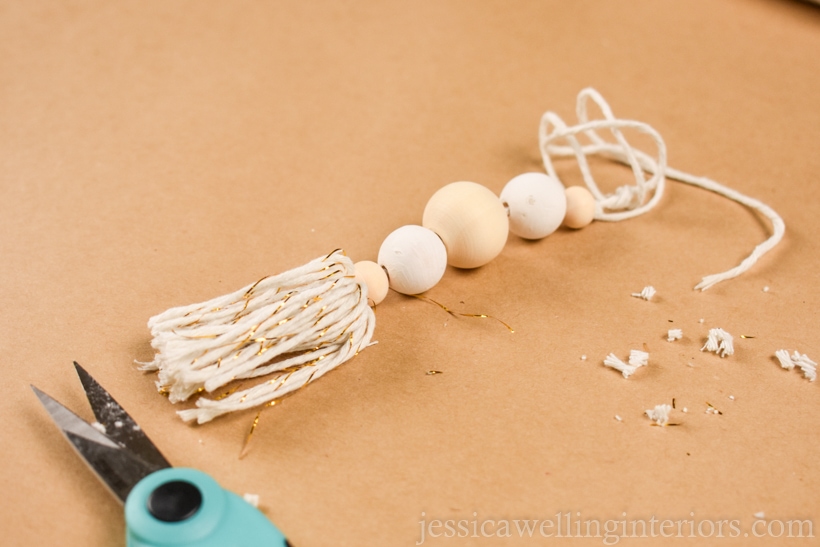
11. Trim the Tassel
Finally, trim the ends of the tassel so they’re even when they hang.
And that’s it! There are so many fun variations on this ornament too! We made pink wood bead ornaments to go on our MidCentury Modern Christmas tree.


More DIY Christmas Ornament Ideas…
DIY Christmas Ornaments: Metallic Stars

Fluffy Snowballs: DIY Christmas Ornaments

DIY Christmas Ornaments: Gold-Dipped Baubles


What a fun and colorful project!
Mary Ann
Thank you so much!