
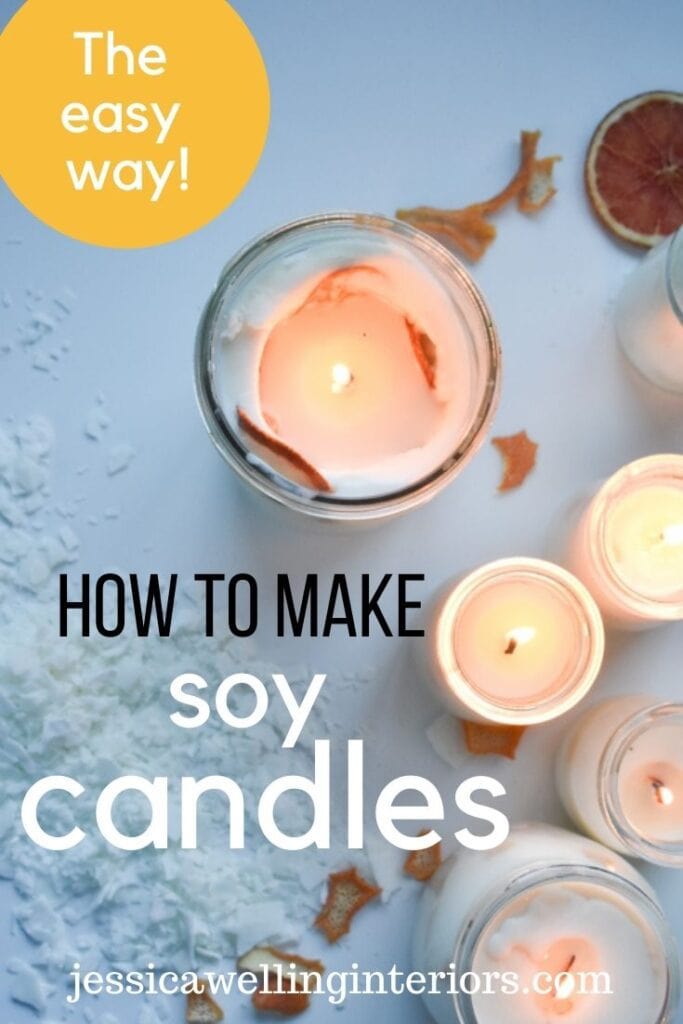
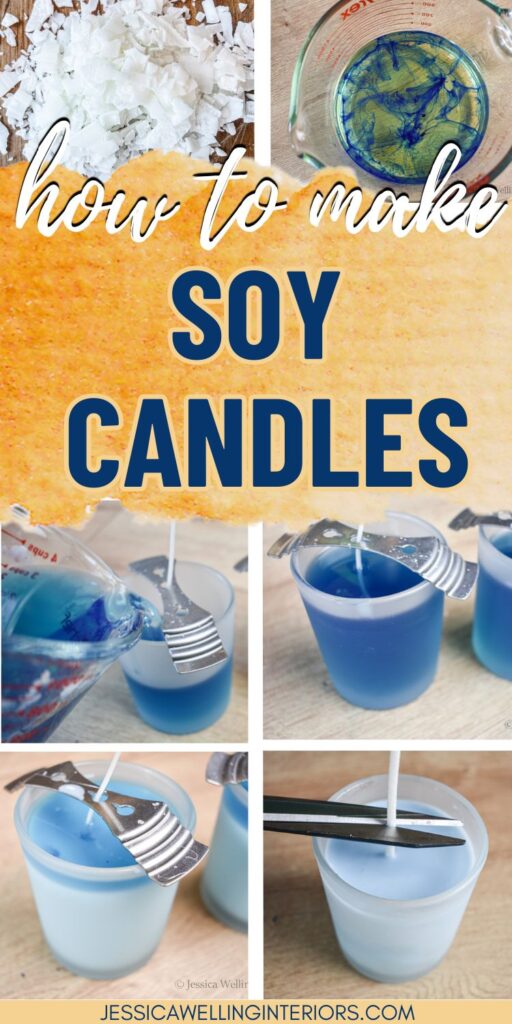
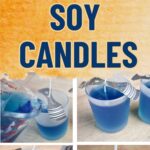
How to Make Soy Candles: A Beginner’s Guide
Learn how to make soy candles with this simple step-by-step tutorial. These natural handmade candles make perfect gifts!
Natural soy candles are the perfect handmade gifts! But when I first started researching natural candles, I quickly learned that candle-making is a little trickier than I had imagined.
What’s more, every guide and tutorial I found recommended weighing out the wax and fragrance oils, using a double-boiler, etc. I never found the ultra-simple guide I was looking for, so I’m writing it myself.
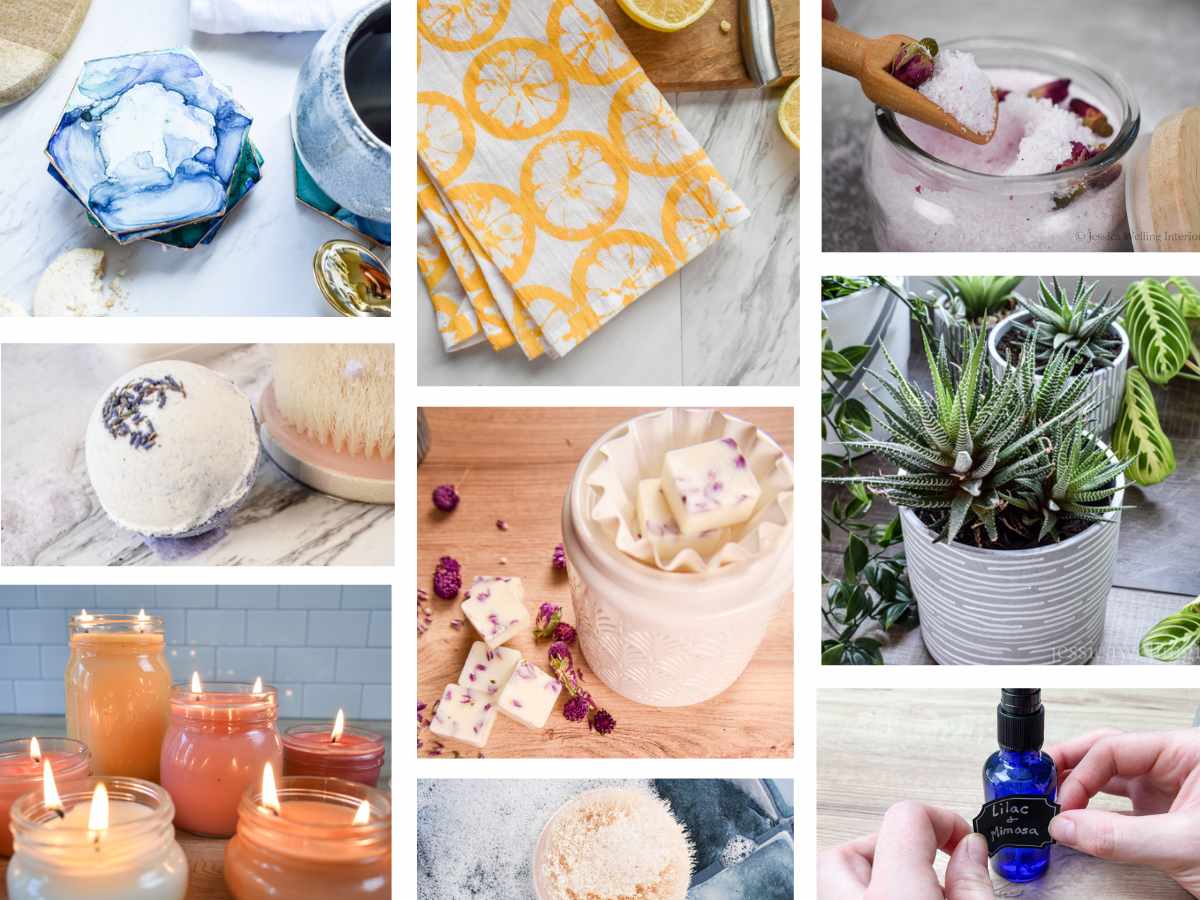
If you want to make soy wax melts, check out this tutorial. Wax melts or tealight candles are also great ways to use up any extra scented wax left over after you pour your candles!
How To Make Soy Candles
This guide is a quick-start soy candle tutorial. If you’re looking for more information about the different varieties of candle wax, fragrance oils, candle jars & tins, wax dye, wick types, etc., you’ll find answers to all your questions in this post: How to Make Candles: A Beginner’s Guide.
If you’re brand new to candle making, I recommend starting simple, with smaller candle vessels, basic cotton wicks, and no inclusions. There will be plenty of time to experiment later, but I want to be sure you’re successful on your first try.
Materials
Note: This post contains Amazon affiliate links, which means I earn a very small commission (at no additional cost to you) if you make a purchase through one of them. This helps me support my family and continue creating content for you. I appreciate your support!
Here’s what you’ll need:

A. Soy wax (this is my favorite brand from Amazon and it comes with wicks & metal wick-centering devices, which you’ll also need!
B. Metal Wick-Centering Devices (You can buy them separately from the wax here)
C. Cotton Wicks (Mine came with the wax above but you can buy them separately here.)
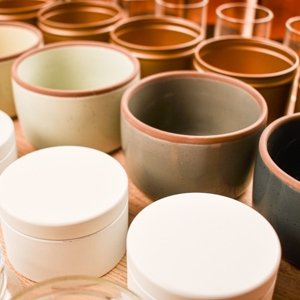
D. Candle jars or tins (I’m using two of these 6 oz. frosted glass jars with wood lids from Amazon, but you can use any containers you like. See more of my favorite candle jars & tins here.)
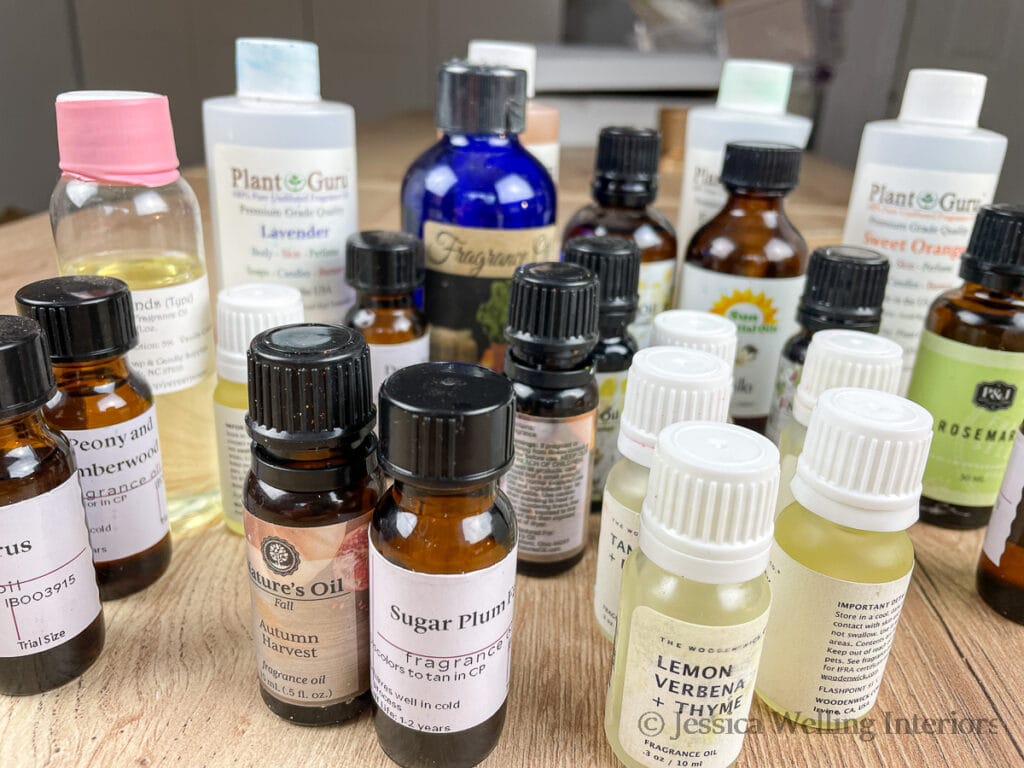
E. Candle Fragrance Oil (Makesy makes my favorite all-natural fragrance oils!) And here’s a list of all my favorite candle fragrance oils I’ve tested that actually smell good, and many are all-natural as well!
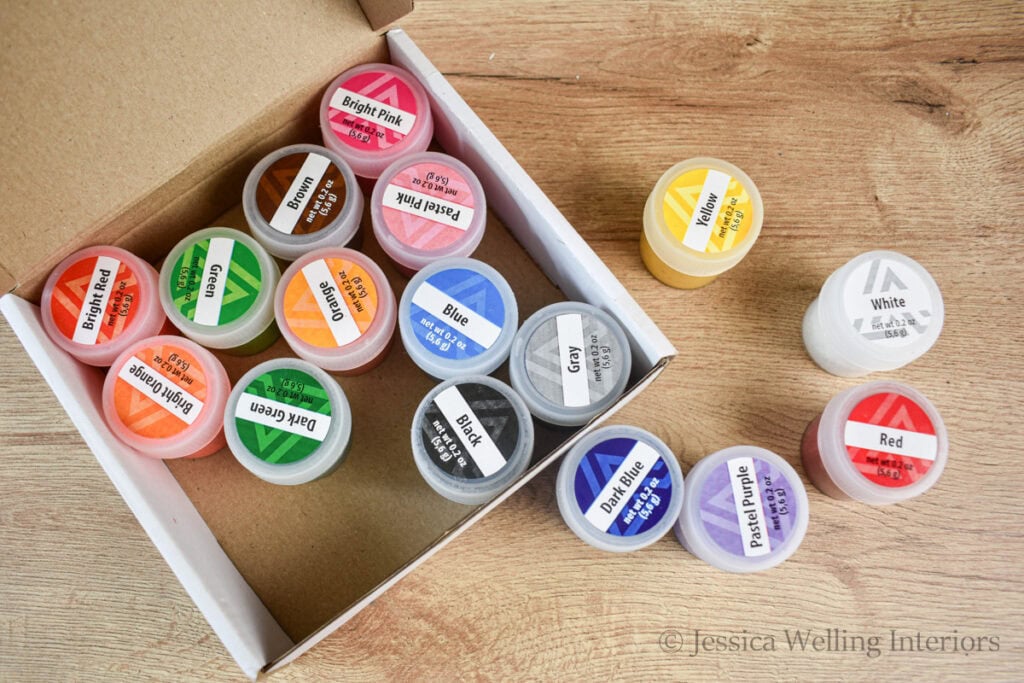
F. Wax Dye (I like this multi-color set.) optional
Tools
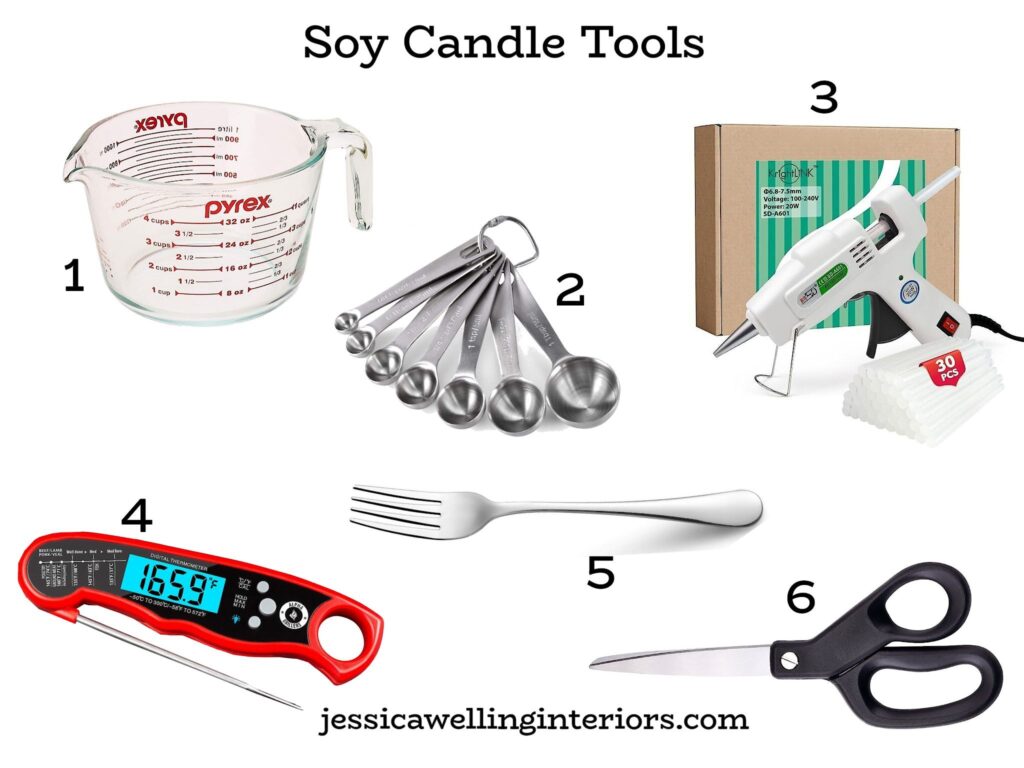
- Large Glass Measuring Cup (or other microwave-safe container)
- Measuring Spoons
- Mini Hot Glue Gun & Glue Sticks
- Digital Meat Thermometer
- Fork
- Scissors
Directions
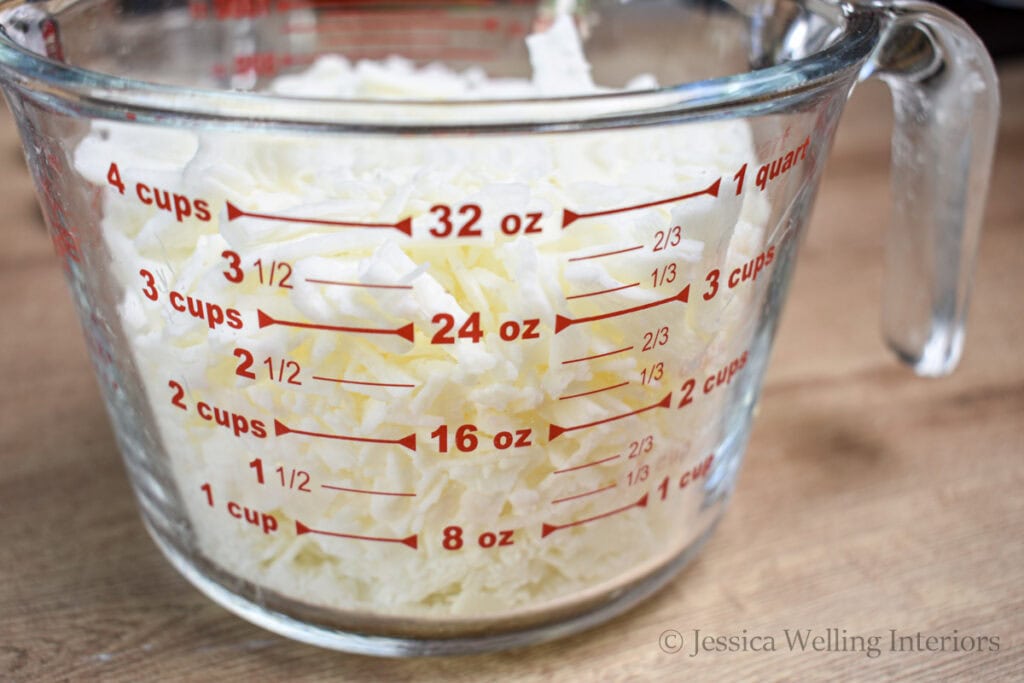
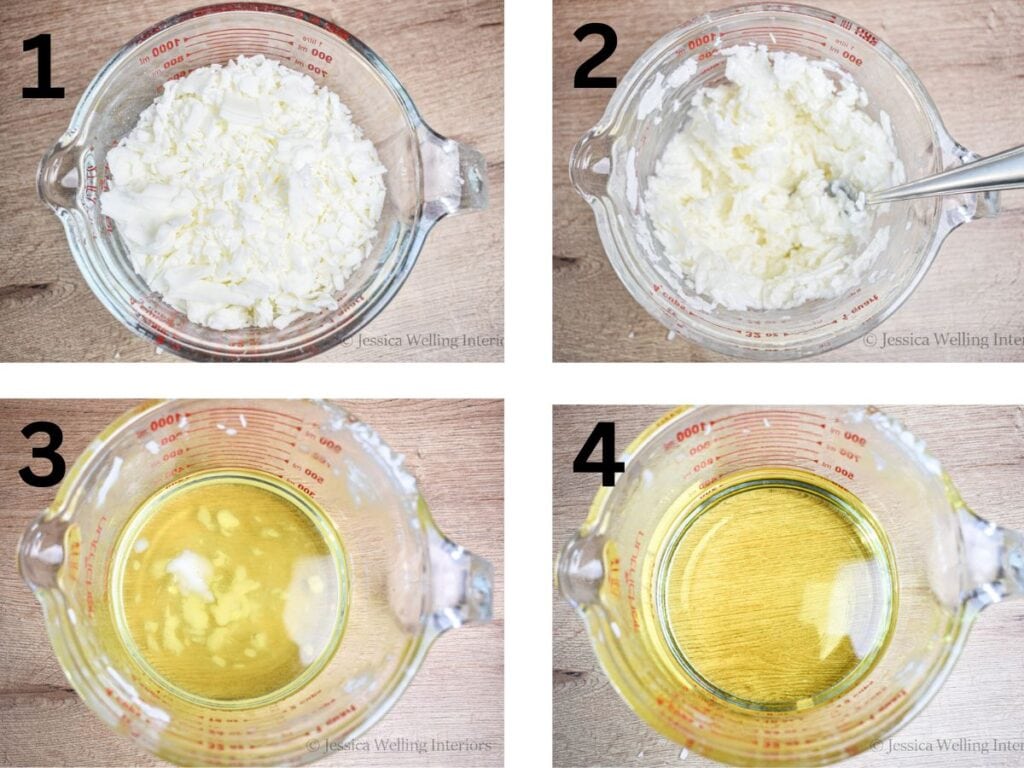
1. Measure the wax.
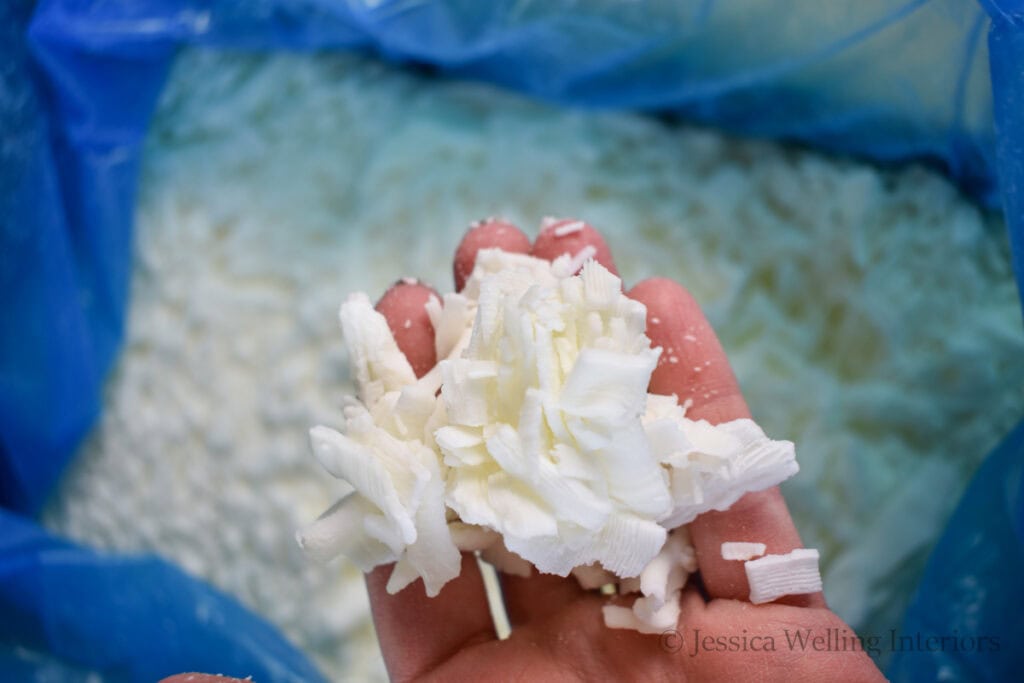
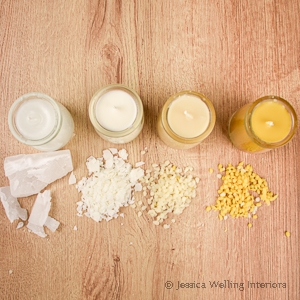
Soy wax usually comes in flake form, which makes it really easy to measure and work with. I’ve found that soy wax flakes will melt down to approximately half their original volume.
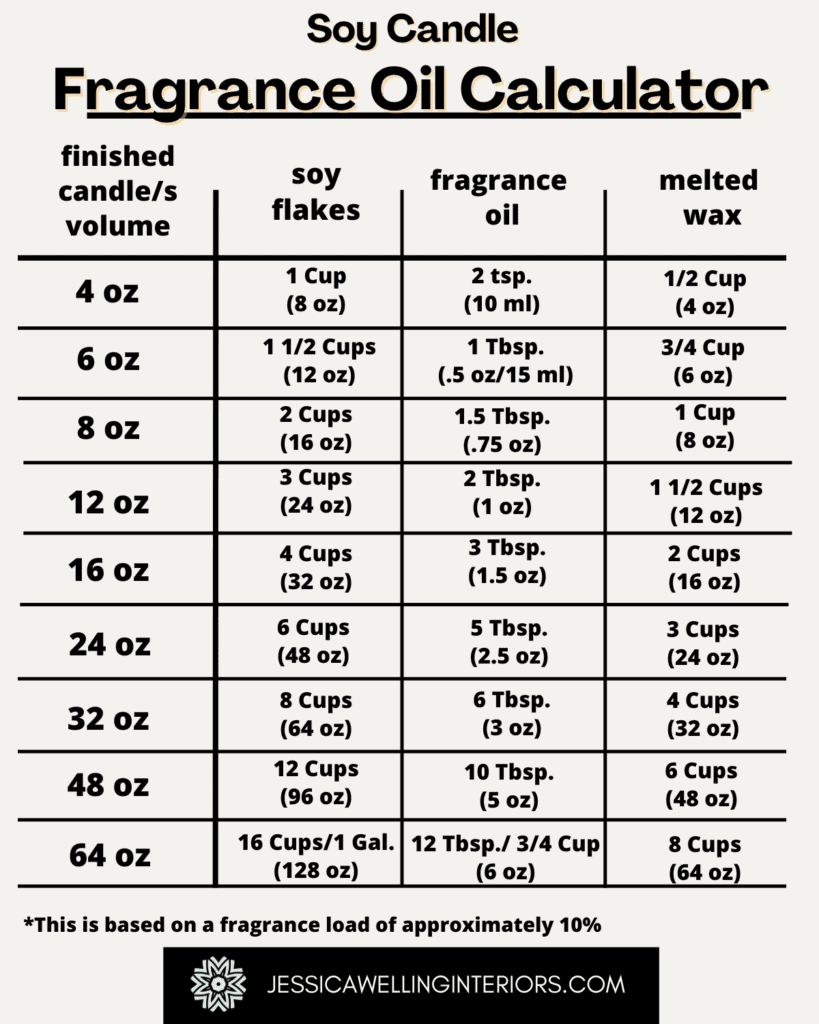
I’m making two 6-oz. candles, which means I’ll need about 12 oz. of hot wax. So I will double that and measure out about 24 oz. of soy wax flakes. I’ll include a cheat sheet titled Soy Candle Fragrance Oil Calculator at the bottom of this post to help you with all your candle calculations.
2. Melt wax.
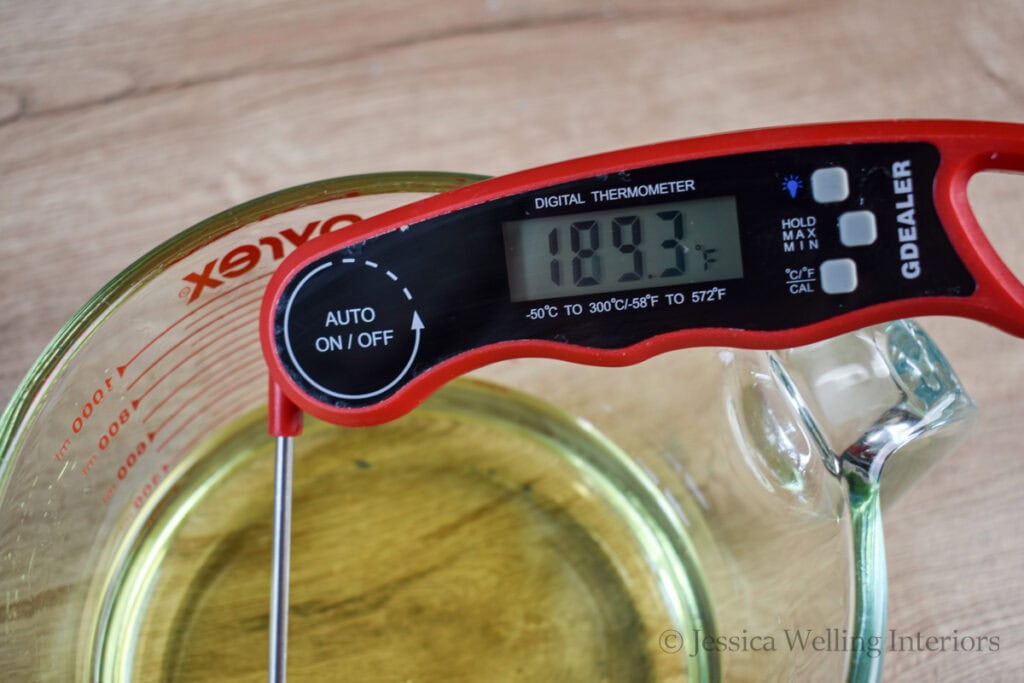
Heat the wax in the microwave, starting with one-minute increments. Stir it thoroughly each time. After two one-minute sessions in the microwave, cut the time down to 30 seconds. Continue until all the wax is melted.
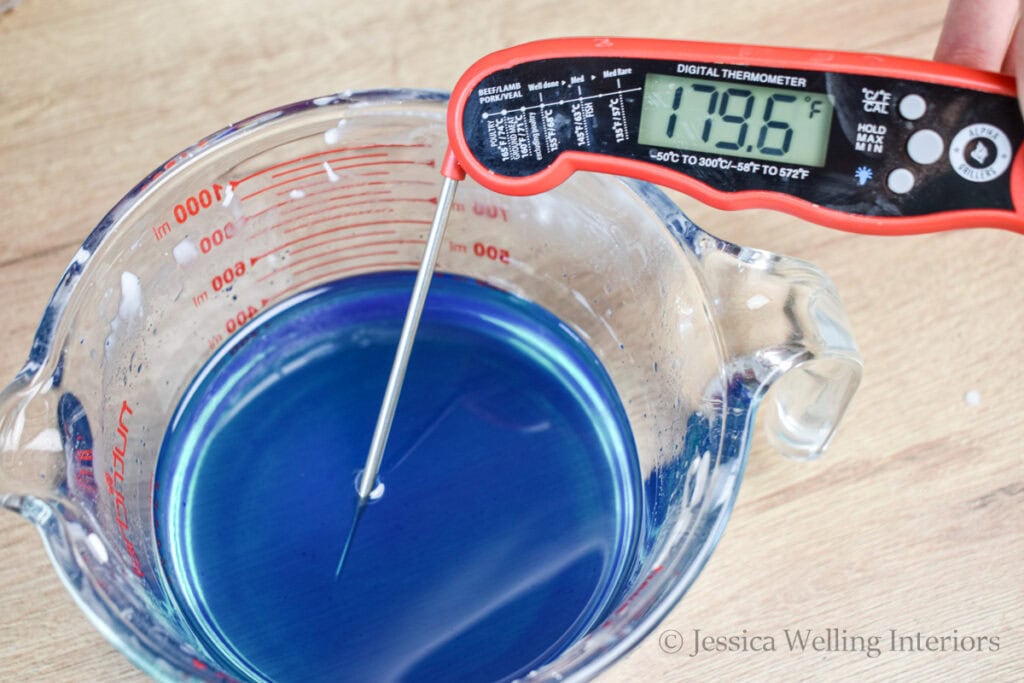
If you plan to add color to your candles, you’ll want to heat your soy wax to between 180-190 degrees F. This folding digital meat thermometer makes it easy to check the temperature.
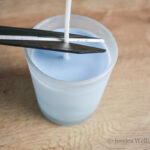
3. Add wax dye (optional).
If you want to add color to your soy candles, this is the time to sprinkle in some wax colorant.
My favorite wax dye from Amazon comes in little chips that make it very easy to control the amount of dye you’re adding- and each color comes in a little resealable container.

Sprinkle in a few wax chips. They should begin to melt/dissolve immediately. Then stir them in until there are no specks of color left.
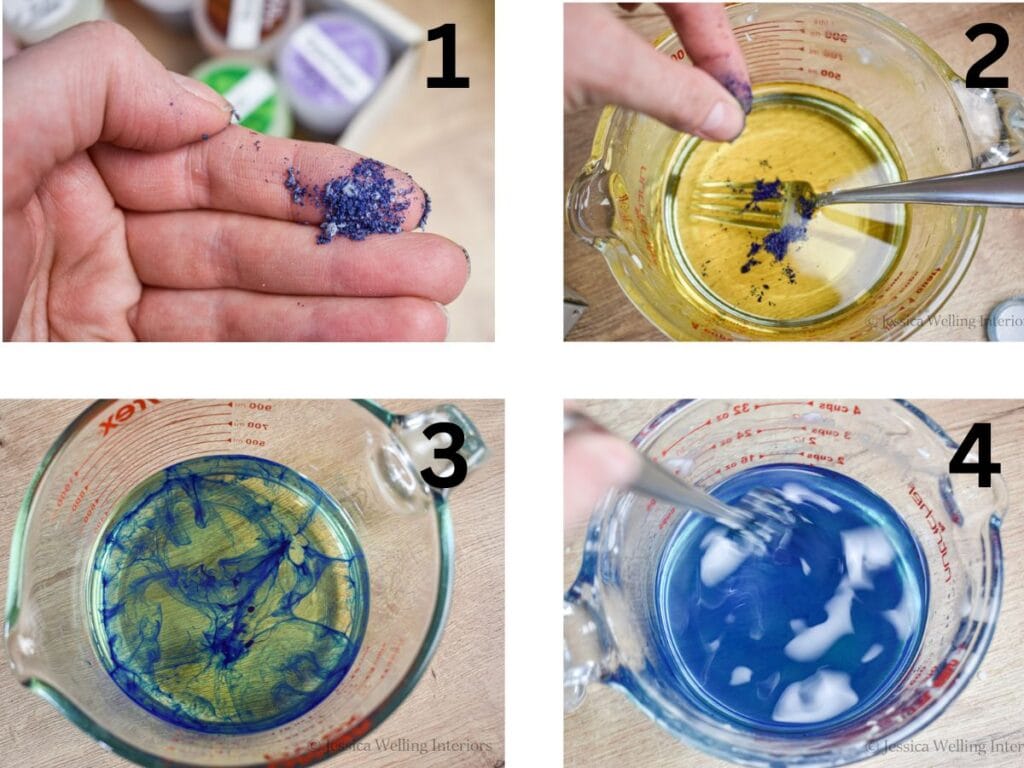
If you can still see specks of wax dye after some stirring, pop the wax back into the microwave for 30 seconds and stir again.
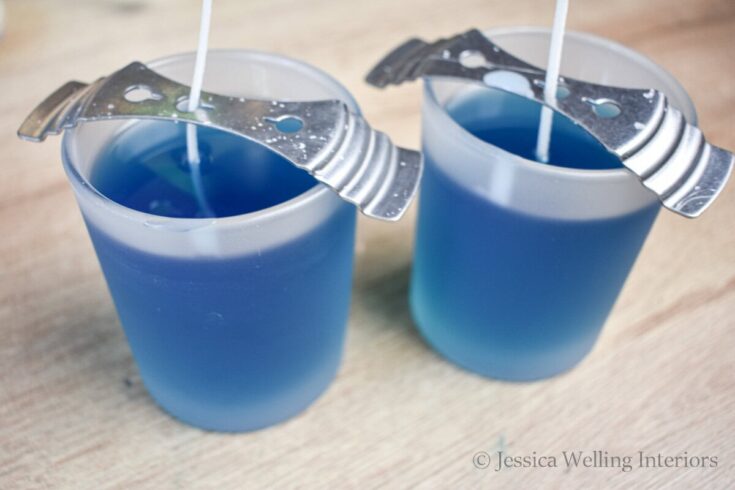
One more note about wax dye: Soy wax is opaque in its solid state, so the color will look MUCH lighter once the wax has cooled. For reference, I’m using about 2 small pinches of dark blue dye in this batch, and the finished candles will be a very light blue.
And finally, wax dye is optional. Undyed soy wax will be opaque and creamy white, which is also pretty!
4. Add fragrance oil.
Wait until your wax has cooled to between 175-185 degrees F before adding your fragrance oil. This is the inexpensive digital thermometer I use for all my candles and wax melts.
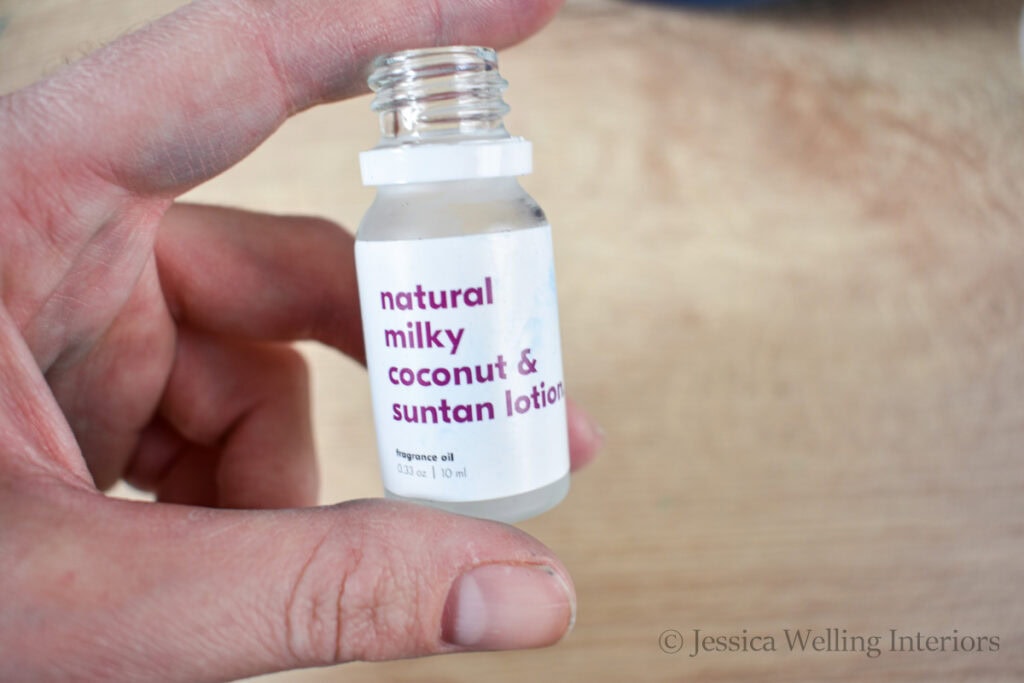
I’m using Natural Milky Coconut & Suntan Lotion, from Makesy (Note: this recipe requires more than this bottle). You can find a list of my favorite candle fragrance oil’s I’ve personally tested here.
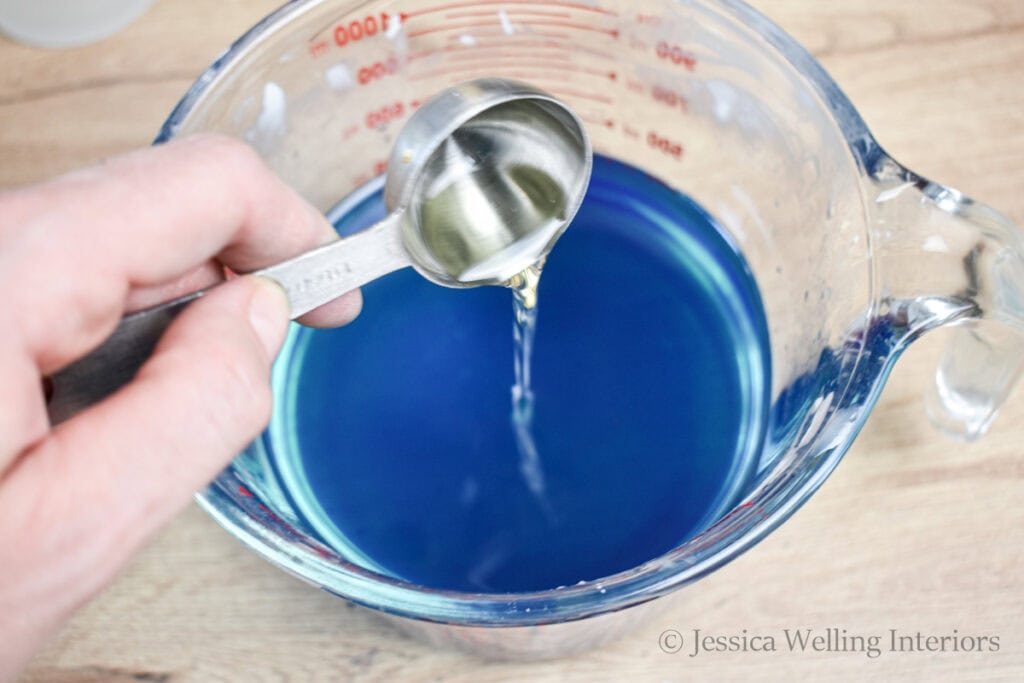
Add about 2 Tablespoons (1 oz) of fragrance oil to 12 oz of melted wax. Stir it thoroughly with a fork, and continue to stir for about 30 seconds to ensure everything is incorporated.
Now let the soy wax cool until it starts to look cloudy. While you wait, you can prep your containers and wicks.
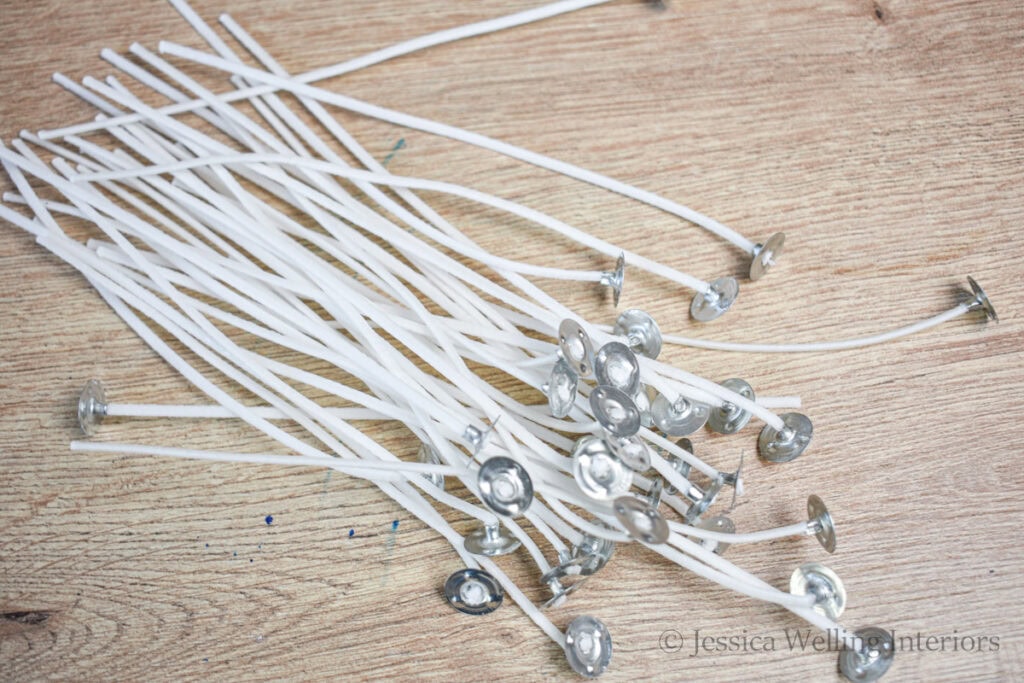
5. Prep containers & wicks.
For the cotton wicks, use a hot glue gun to add a dot of glue to the bottom of the wick and attach it to the bottom center of the container.
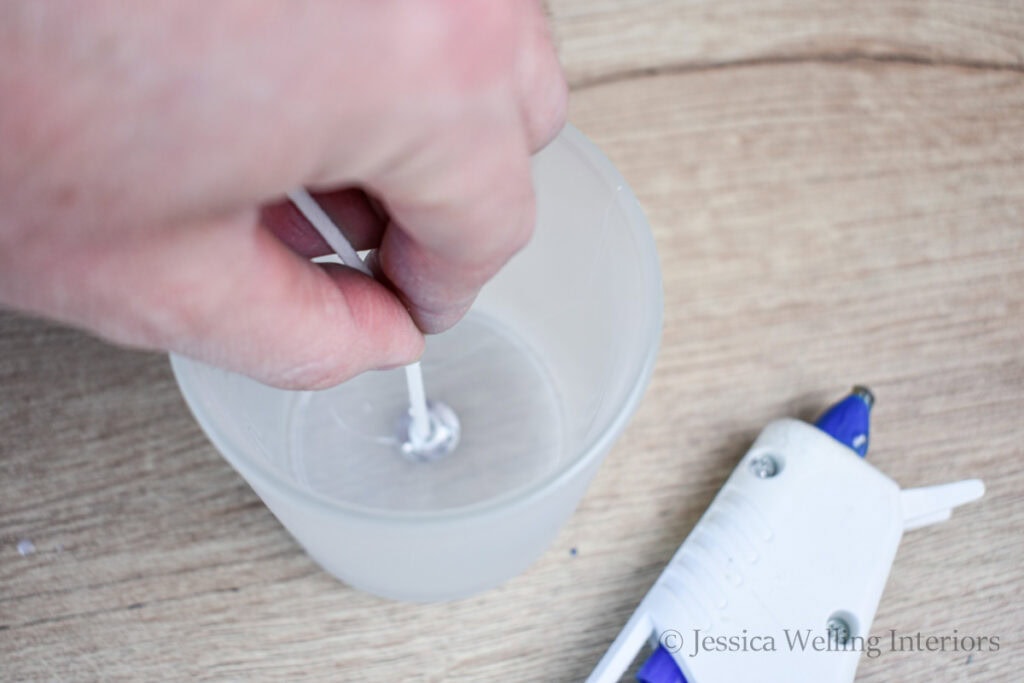
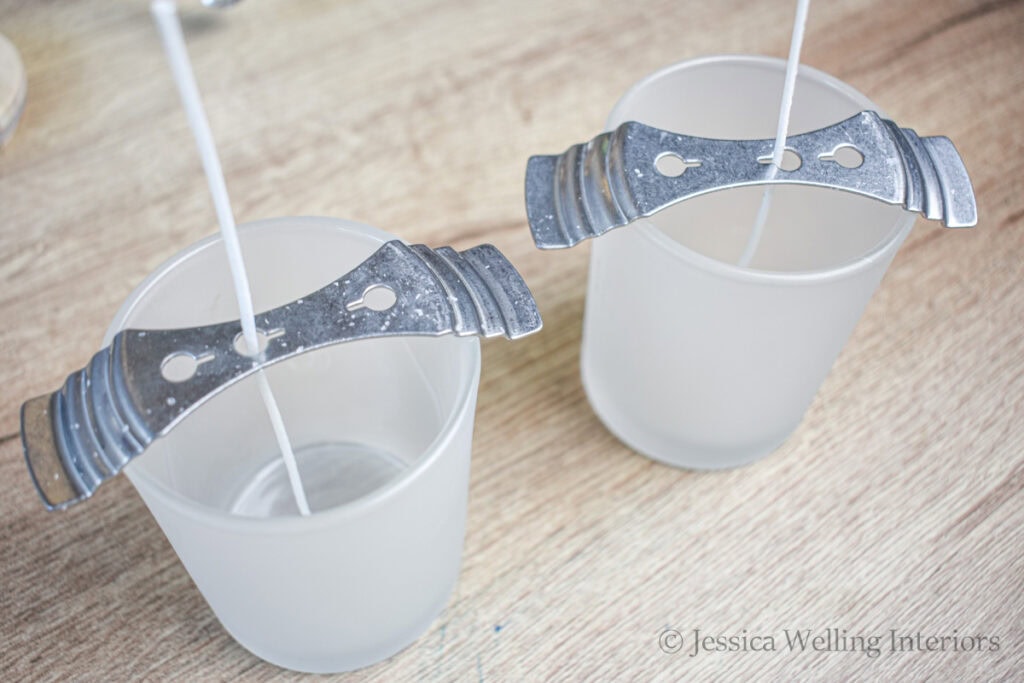
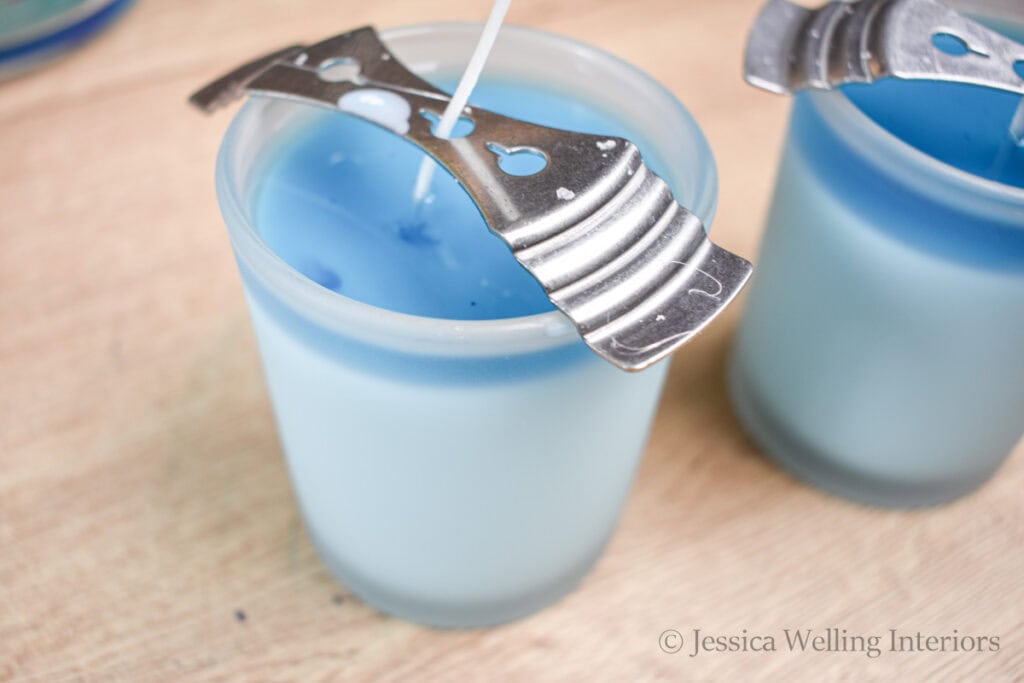
6. Secure wicks.
Use a wick centering device to hold each wick in place. The wick will soften and bend once you add hot wax to the container, so it’s important to secure it. These handy metal wick holders came with the soy wax I ordered from Amazon. Or you can get them separately here.
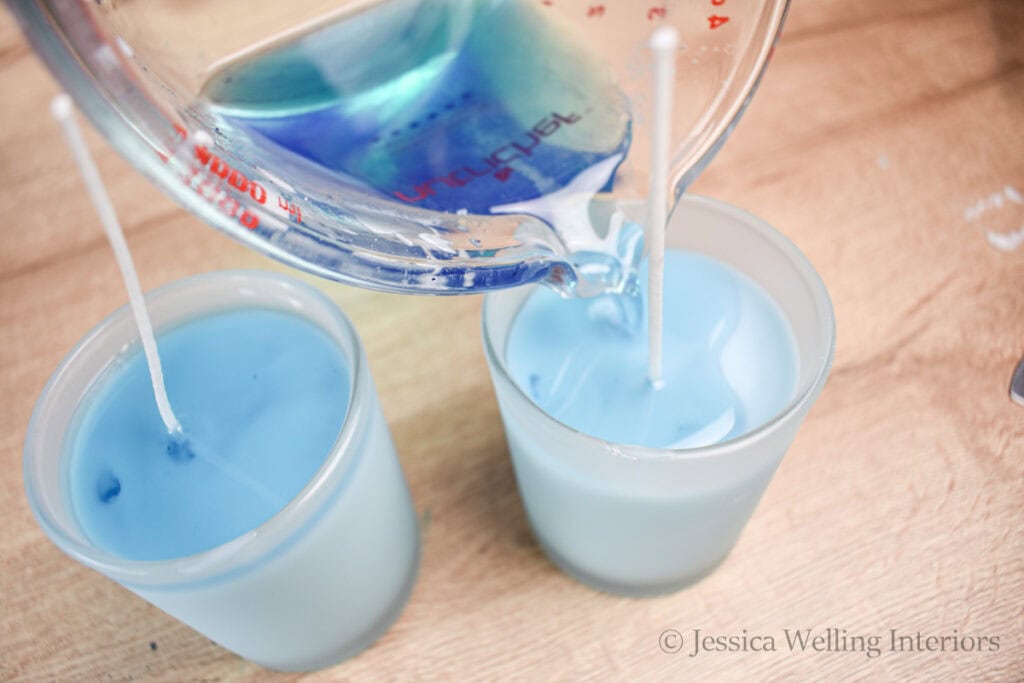
7. Pour the wax.
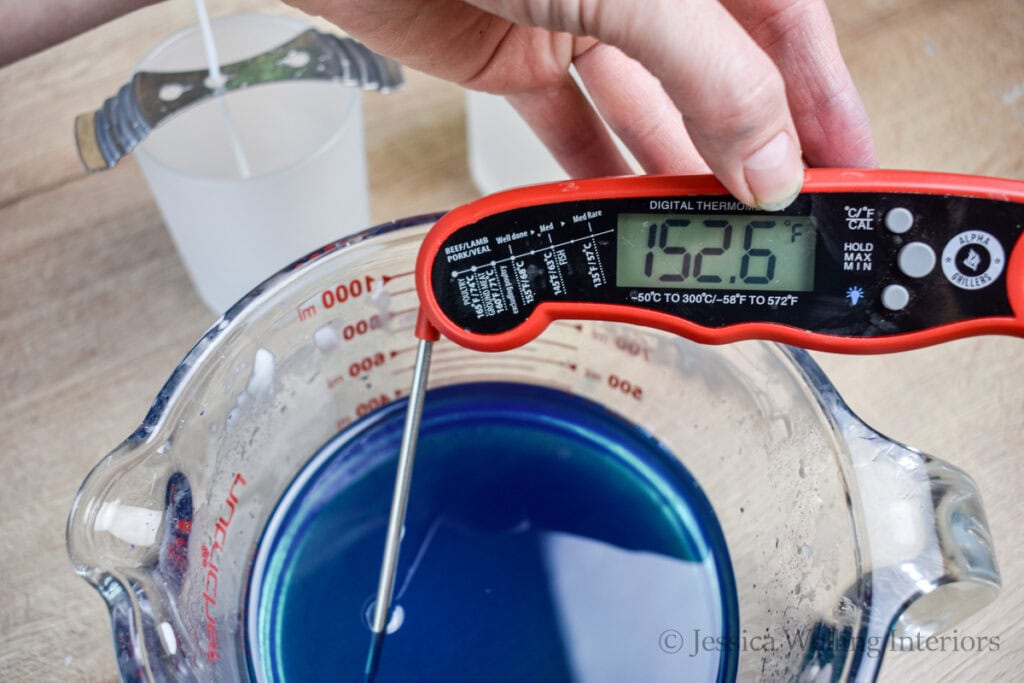
Once the wax has begun to cool and it’s starting to look a little cloudy, it’s time to pour your candles. If you pour the wax when it’s too hot, it can separate from the sides of your container. This isn’t the end of the world, but your final product will look better if you wait until it’s cooler. Shoot for a pouring temperature of 130-155 degrees F (54-68 degrees C).
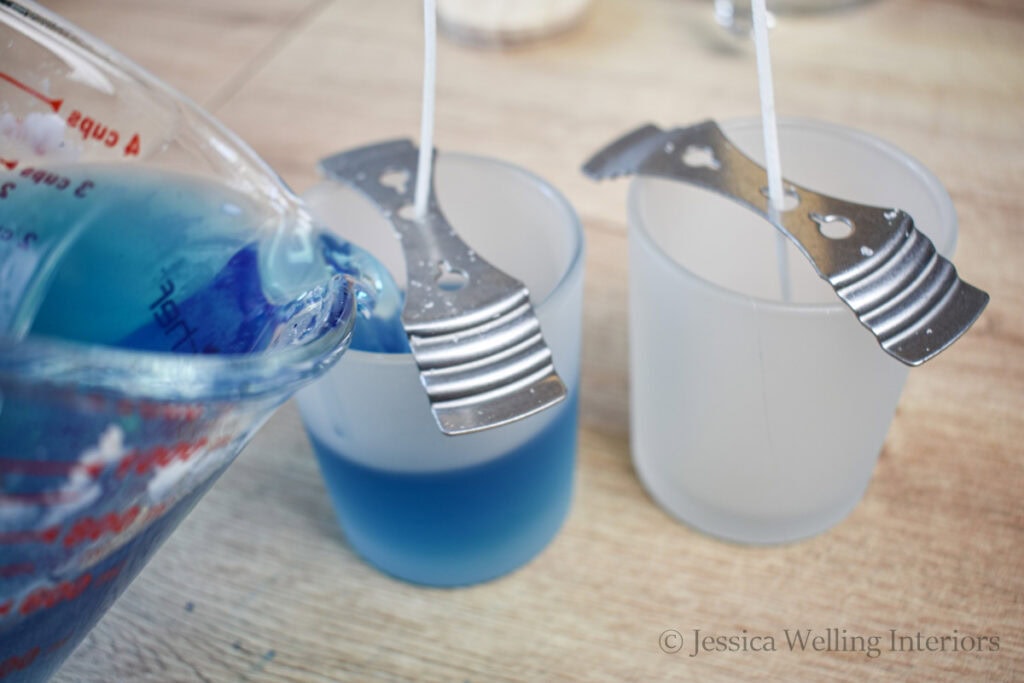
Carefully pour the wax into the jars, about 1/4 inch from where you want the top to be. You’ll do a second pour after it cools to fill it the rest of the way and cover any blemishes, so be sure to reserve some wax in your glass measuring cup.

8. Let them cool.
Let the candles cool completely. This will take a few hours, depending on the size of your jars.
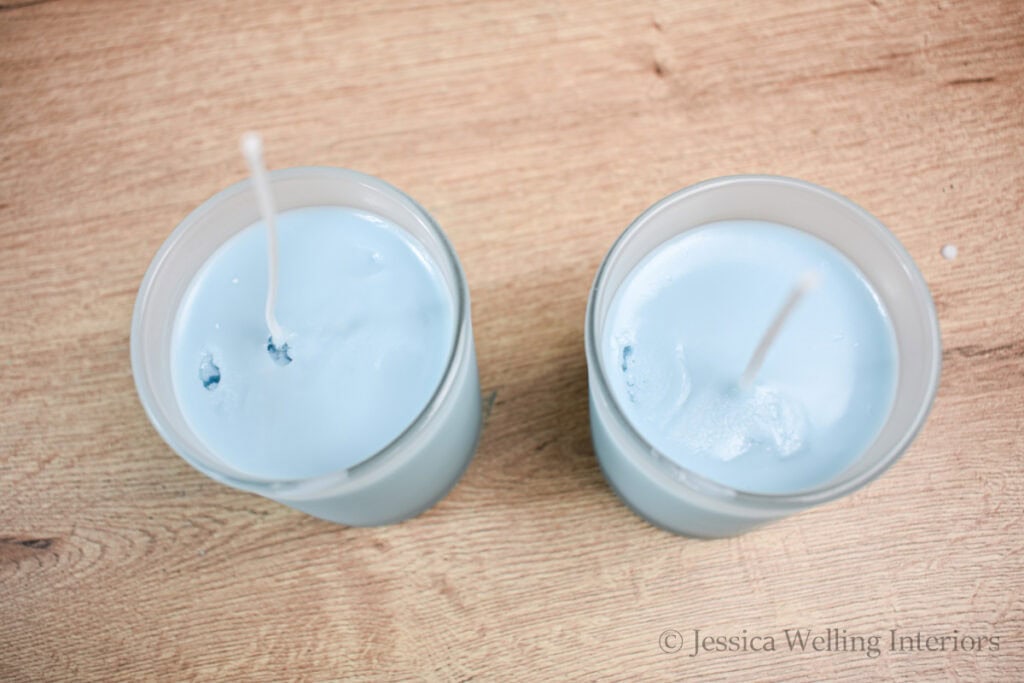
You may notice that the tops of the candles have some holes and uneven spots, but don’t worry. We’re going to do a second pour after this one cools and hardens.
9. Second pour.
Pop your wax back into the microwave for 30 seconds, or until it’s just melted. Then carefully pour just enough wax to cover the top of the existing candle and fill in any holes.
Let this cool completely again. If you still have bubbles, cracks or uneven tops, you may need to use a heat gun to smooth the tops. I like this one from Amazon and you can find instructions and more candle top troubleshooting tips in this post: No More Ugly Candle Tops!
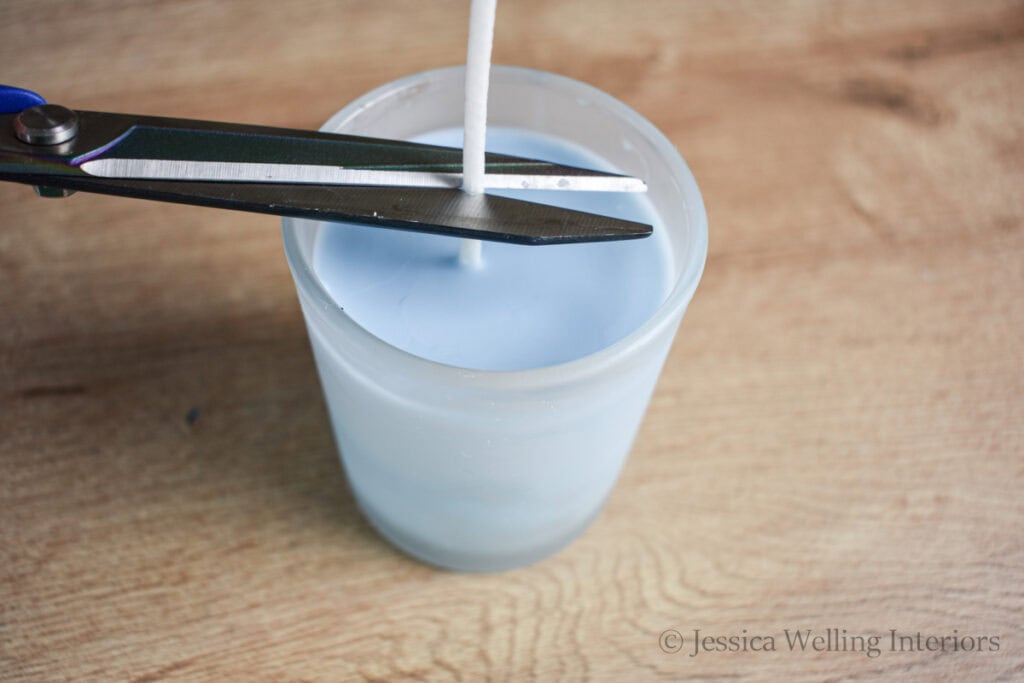
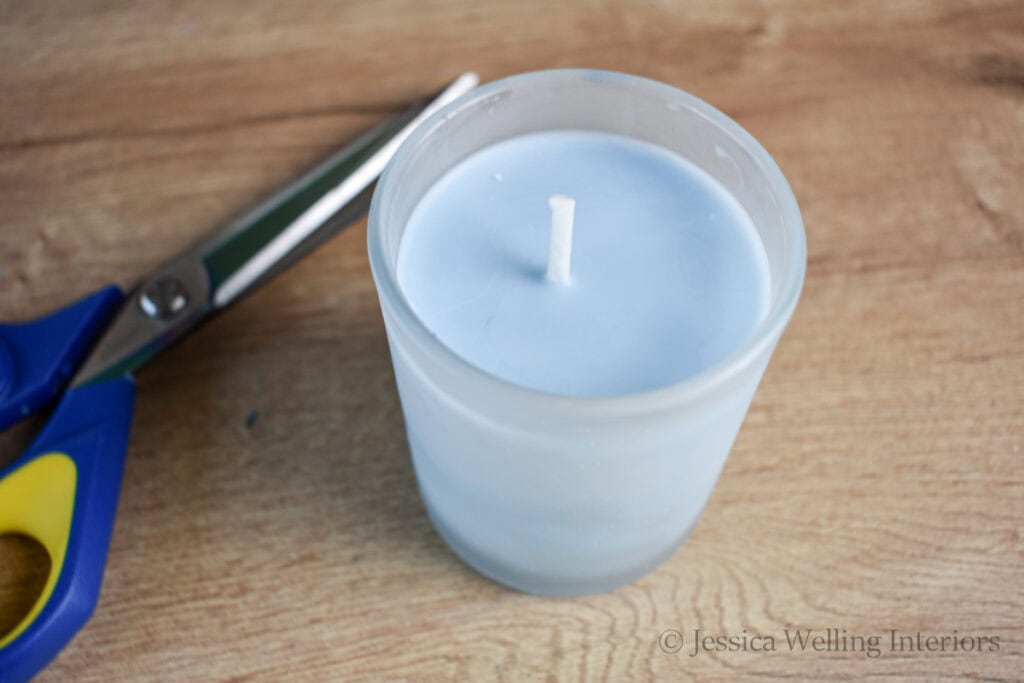
10. Trim the wicks.
Use a sharp pair of scissors to trim the wicks.
11. Let them cure.
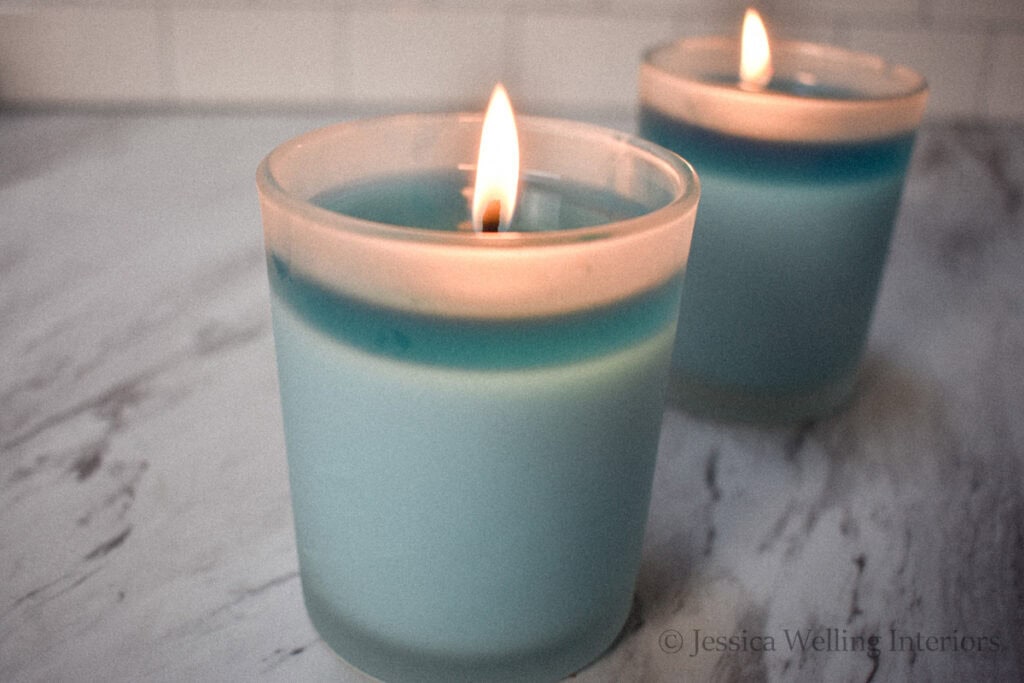
Scented soy candles need time to cure before you burn them in order for them to give off the best fragrance (we call this “hot throw”).
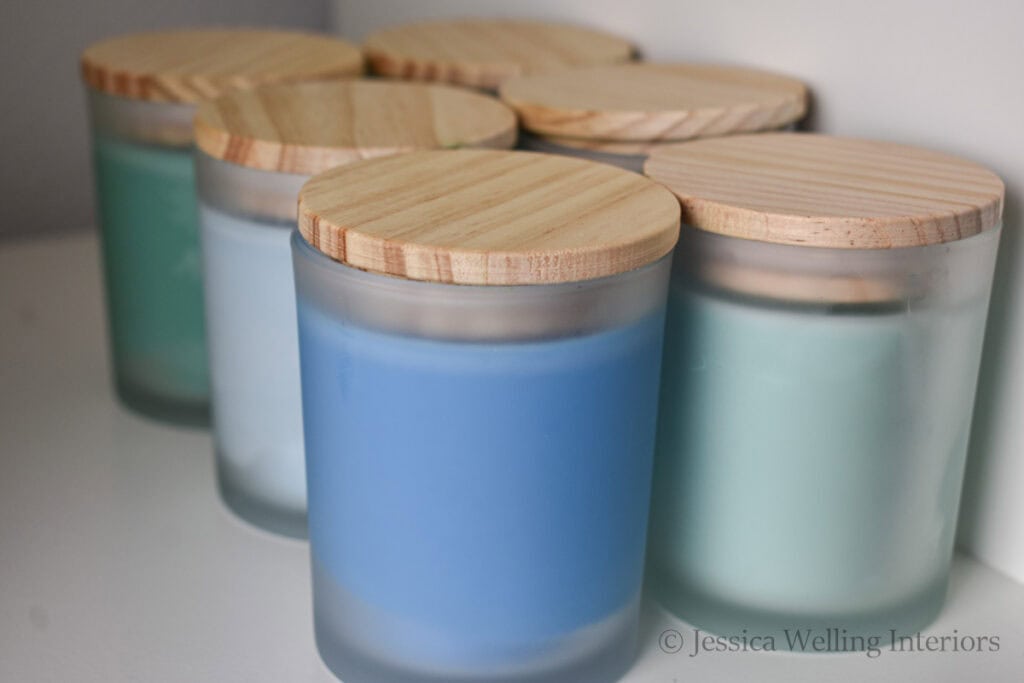
So replace their lids (or cover them with plastic wrap if your containers don’t have lids) and store them in a cool dry spot out of direct sunlight for 2-3 weeks.
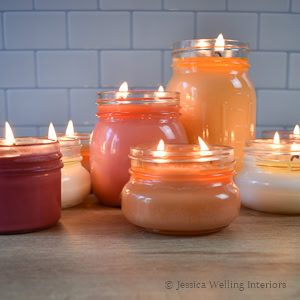
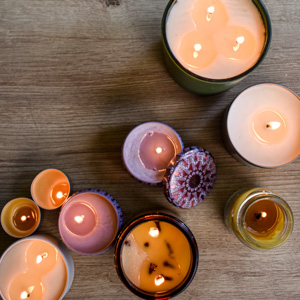
And enjoy!
Leftover Wax
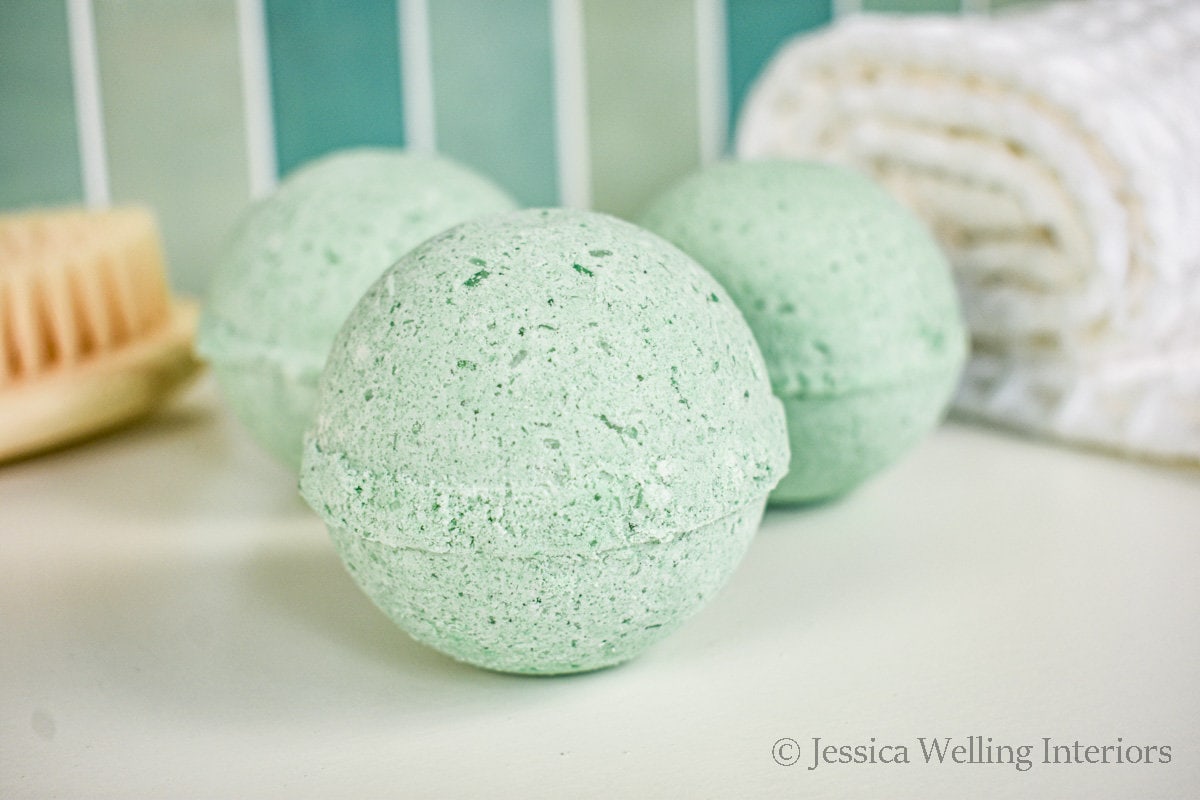
If you end up with leftover scented wax, you can make soy wax melts or tealight candles.
Clean Up
One of my favorite things about soy wax is the easy clean up (compared to other waxes like paraffin and beeswax). It actually cleans up with soap and hot water, so I usually just remove any big pieces of wax and throw everything in the dishwasher.
If you’re going to get into candle making, I recommend getting one of these handy counter scrapers to make quick work of any drips of hardened wax on the counter or floor.

Fragrance Oil Calculator
How much fragrance oil should I add to soy candles?
You will come across a lot of complicated explanations of how to calculate the exact amount of fragrance oil to add based on a particular variety of wax’ “fragrance load”. But it gets complicated, requires weighing different ingredients, etc. So I put together this chart to help you determine the correct amount of oil for your soy candles:
These are my favorite inexpensive candle jars and tins, and I’ve organized them by volume.
Can I Make Candles With Essential Oils?
I was originally planning to use essential oils in my all-natural candles. But after some experimenting (read wasting A LOT of expensive essential oils in my first few batches of candles!), I realized that this just doesn’t work. I was bummed to realize this, but still determined to make gorgeous DIY scented candles.
If you want to make the most of your essential oils, I recommend diffusing them instead. I also love to use them to make homemade bath salts & bubble bath, room spray, DIY Poo-Pourri, chapstick, bath bombs, hand lotion, foot soak, etc.
But there is a great alternative. You can get natural plant-derived candle fragrance oils from Makesy. Here’s a list of the best candle fragrance oils I’ve personally tested– and I’ve tried hundreds of different oils from multiple companies- and no one is paying me to say this!
How to Make Soy Candles
Materials
Tools
Instructions
- Measure the soy wax flakes into a large glass measuring cup.
- Melt the wax in the microwave, starting with 1-minute intervals and then 30-second intervals, stirring often.
- Heat the wax to between 180-190 degrees F and use a digital thermometer to check the temperature.
- Add 1-2 pinches of wax dye flakes and stir well until you can't see any of the dye chips. This step is optional.
- Wait until the wax cools to between 175-185 degrees F (79-85 degrees C) and add the fragrance oil. Stir well.
- Use a mini hot glue gun to attach one wick to the bottom center of each candle vessel.
- Secure each wick with a wick centering device.
- Pour the wax into each jar, about 1/4 inch from where you want the top of the candle to be, and reserve some wax in the glass measuring cup.
- Let the candles cool completely.
- Return the the leftover wax to the microwave for 30 seconds, or until it's just melted. Do a second pour, just covering the top of each candle to hide any imperfections.
- Use sharp scissors to trim the wicks.
- Replace the lids and let the candles cure for about 2 weeks before use.

How to Make Soy Candles
Instructions
- Measure Wax
- Melt Wax
- Check Temperature (175-185 degrees)
- Add Wax Dye (Optional)
- Add Fragrance Oil
- Let Wax Cool Slightly
- Prep Containers & Wicks
- Secure the Wicks
- Pour Wax
- Let it Cool
- Final Pour & Add Decoration
- Trim the Wick
- Let it Cure
More DIY Candles & Wax Melts…
The Best Candle Jars & Tins & Where to Get Them
What is the Best Wax for Candles? Soy vs. Beeswax vs. Paraffin
How to Make Wax Melts: Everything You Need to Know
How to Make Candles Smell Stronger


Thank you for this. I received a soy candle making kit for Christmas and also wasted a lot of essential oils. Good instruction for candle making is really hard to come by. I also tried stepping dried herbs for 45 mins and that didn’t work either. I’m excited to try with the fragrance oils you advertised here 🤞🏽
Yes I’ve wasted so much time & expensive materials & oils too! I think you’ll really love the Makesy/Wooden Wick Co. Oils. Did you see my post about my favorite fragrance oils too? https://jessicawellinginteriors.com/best-fragrance-oils-for-candles/ I’m supposed to be getting an order of new oils to try today so will keep updating. Enjoy!
Hi, my soy candles just aren’t throwing scent like I’ve had other soy candles throw. Your article was so helpful and I’ve definitely improved, but what do you think I’m doing wrong? Maybe I should use more oil? I am using the oil brand you recommended too 🙂
Hi Kristy,
Thanks for reaching out! Yes I would try a little more fragrance oil. You’re using the Makesy/Wooden Wick Co. oils? I’ve definitely found that some of their scents will give a stronger scent throw than others. Let me know how it goes!
Actually, I bought the Plant Guru brand as you had pictured- the ones I bought smell really nice, but the hot throw isn’t what I thought. I’m using twice the amount of oil that you have in your recommendation chart, and it still doesn’t throw as nice as the candles I’ve bought. Is that why you have gone away from that brand? Just curious 🙂 Thanks for keeping in touch!
Hi,
Yes I wasn’t thrilled with the scents, but they really had zero scent throw once they were in the candles. Makesy is much better!
a good blog post about How to make a soy candle
I would love for you to tell how many ounces per cup of melted wax or something like that. I am doing the 4 cups of wax (2 cups melted) and I have no idea how many 8 oz candles it will make. Thanks.
Hi Kira,
The soy wax should melt down to about 1/2 of it’s original volume (in flake form). So 4 cups of flakes should give you approximately 2 cups of melted wax, which equals 16 fluid ounces. 1 cup is 8 fluid ounces, so you should be able to make 2 8oz (1 cup) candles. Again, this is all approximate, but hopefully that gives you a better idea.
I am confused- you said Makesy is the best natural fragrance for the candles, but your picture uses the Plant Guru. Is it still 3 tablespoons of oil for 2 cups melted wax with the Makesy oil? I don’t want to order too much because the 16 ounces of oils is expensive on their site.
Yikes I need to update this post ASAP. I’ve discovered Makesy since writing this post. Don’t get the Plant Guru stuff- it’s junk. Sorry in the meantime refer to this post that I just wrote last week using Makesy fragrance oil. If you’re going to use 2 cups of melted wax, a 2 oz bottle of fragrance oil will be plenty. You’ll still use 3 Tablespoons of fragrance oil, which is 1.5 oz. I hope that helps! Let me know if you have any other questions. https://jessicawellinginteriors.com/easy-scented-soy-candles/
It’s interesting to know how important the temperatures are when it comes to making infused soy candles. I want to have some soon because I like lighting candles whenever I want to relax. Having different kinds in my home will surely be a good idea.
Hi Alice, Yes the temperatures are very important! I hope you enjoy your candles!
Thank you for this great tutorial on candle making.
SW
You’re very welcome!
Hi Jessica! I haven’t started my candle making quite yet, just researching right now. Have you had any problems with frosting on the soy candles? If so, how and we’re you able to fix that?
Hi Shana, I’ve had frosting on soy wax melts (it usually happens after they’ve been sitting for several months). But I haven’t really had this problem with soy candles. Hope that helps!
Shana… if you have a small heat gun, just slowly melt the top of the candle with the heat gun. This normally corrects the frosting. You can also use a hairdryer on low heat setting. I’ve found that when I apply heat to the right side of the container, the left side is the first to melt. Just a tip🙂